Installing Cypress and writing your first test
Installing Cypress
Before we can begin writing Cypress tests, we first need to install it. Within your terminal type the following:
npm install cypress --save-dev
Now that we have Cypress installed, we can launch it with:
npx cypress open
tip
You can click on the images to enlarge them.
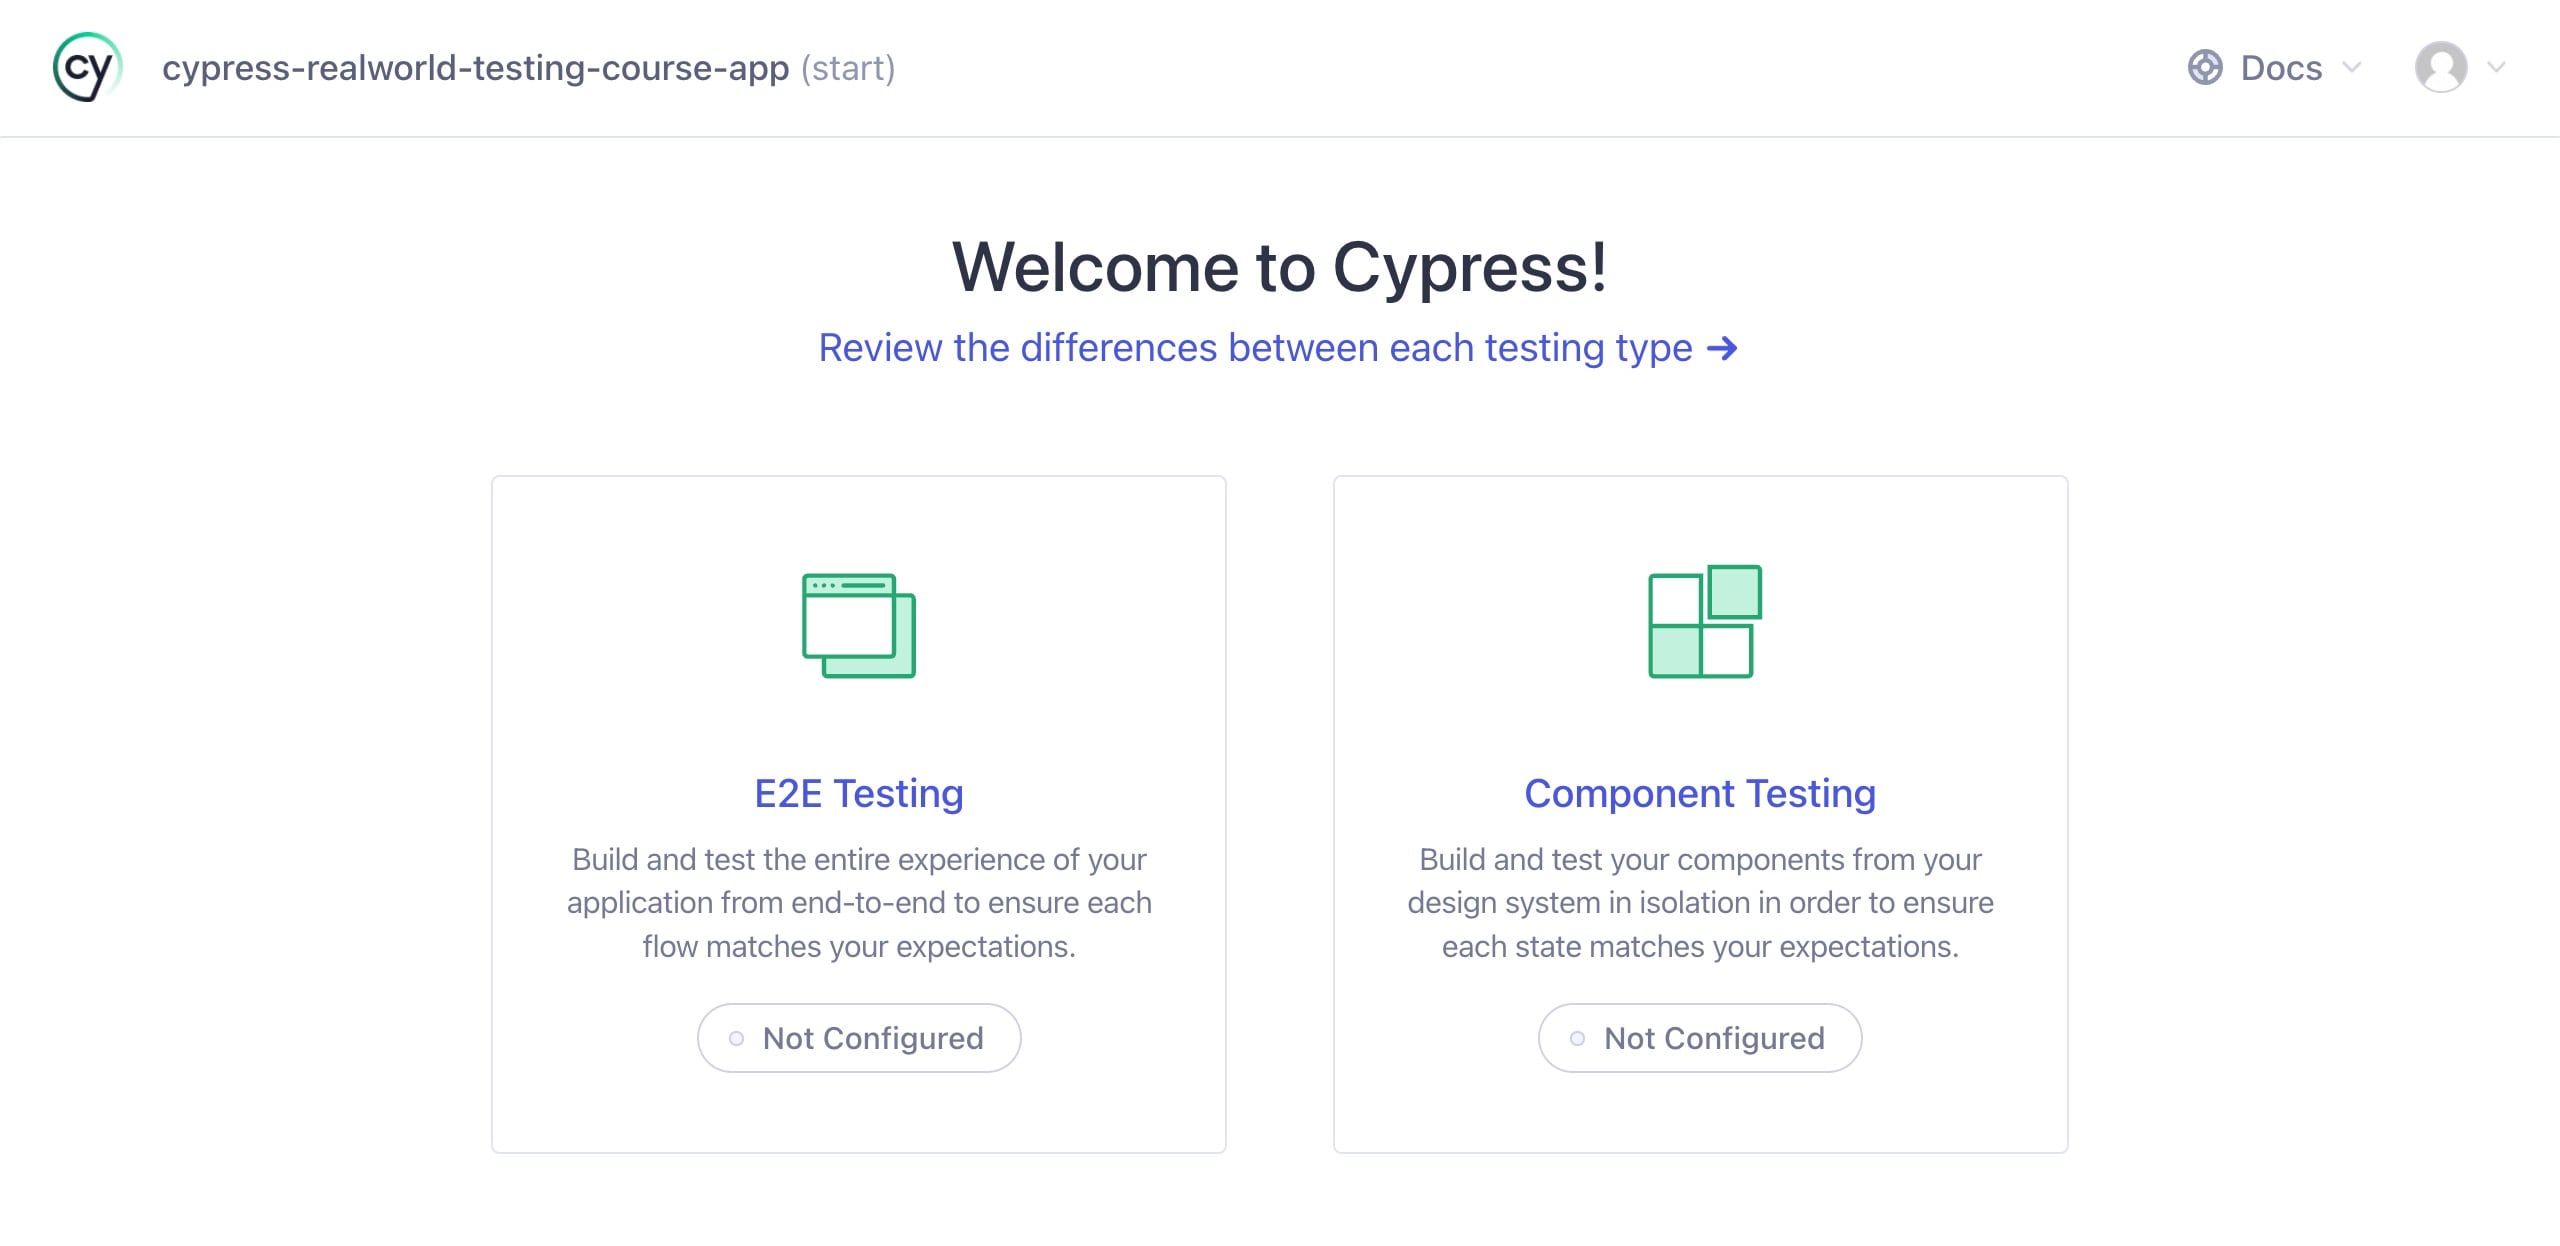
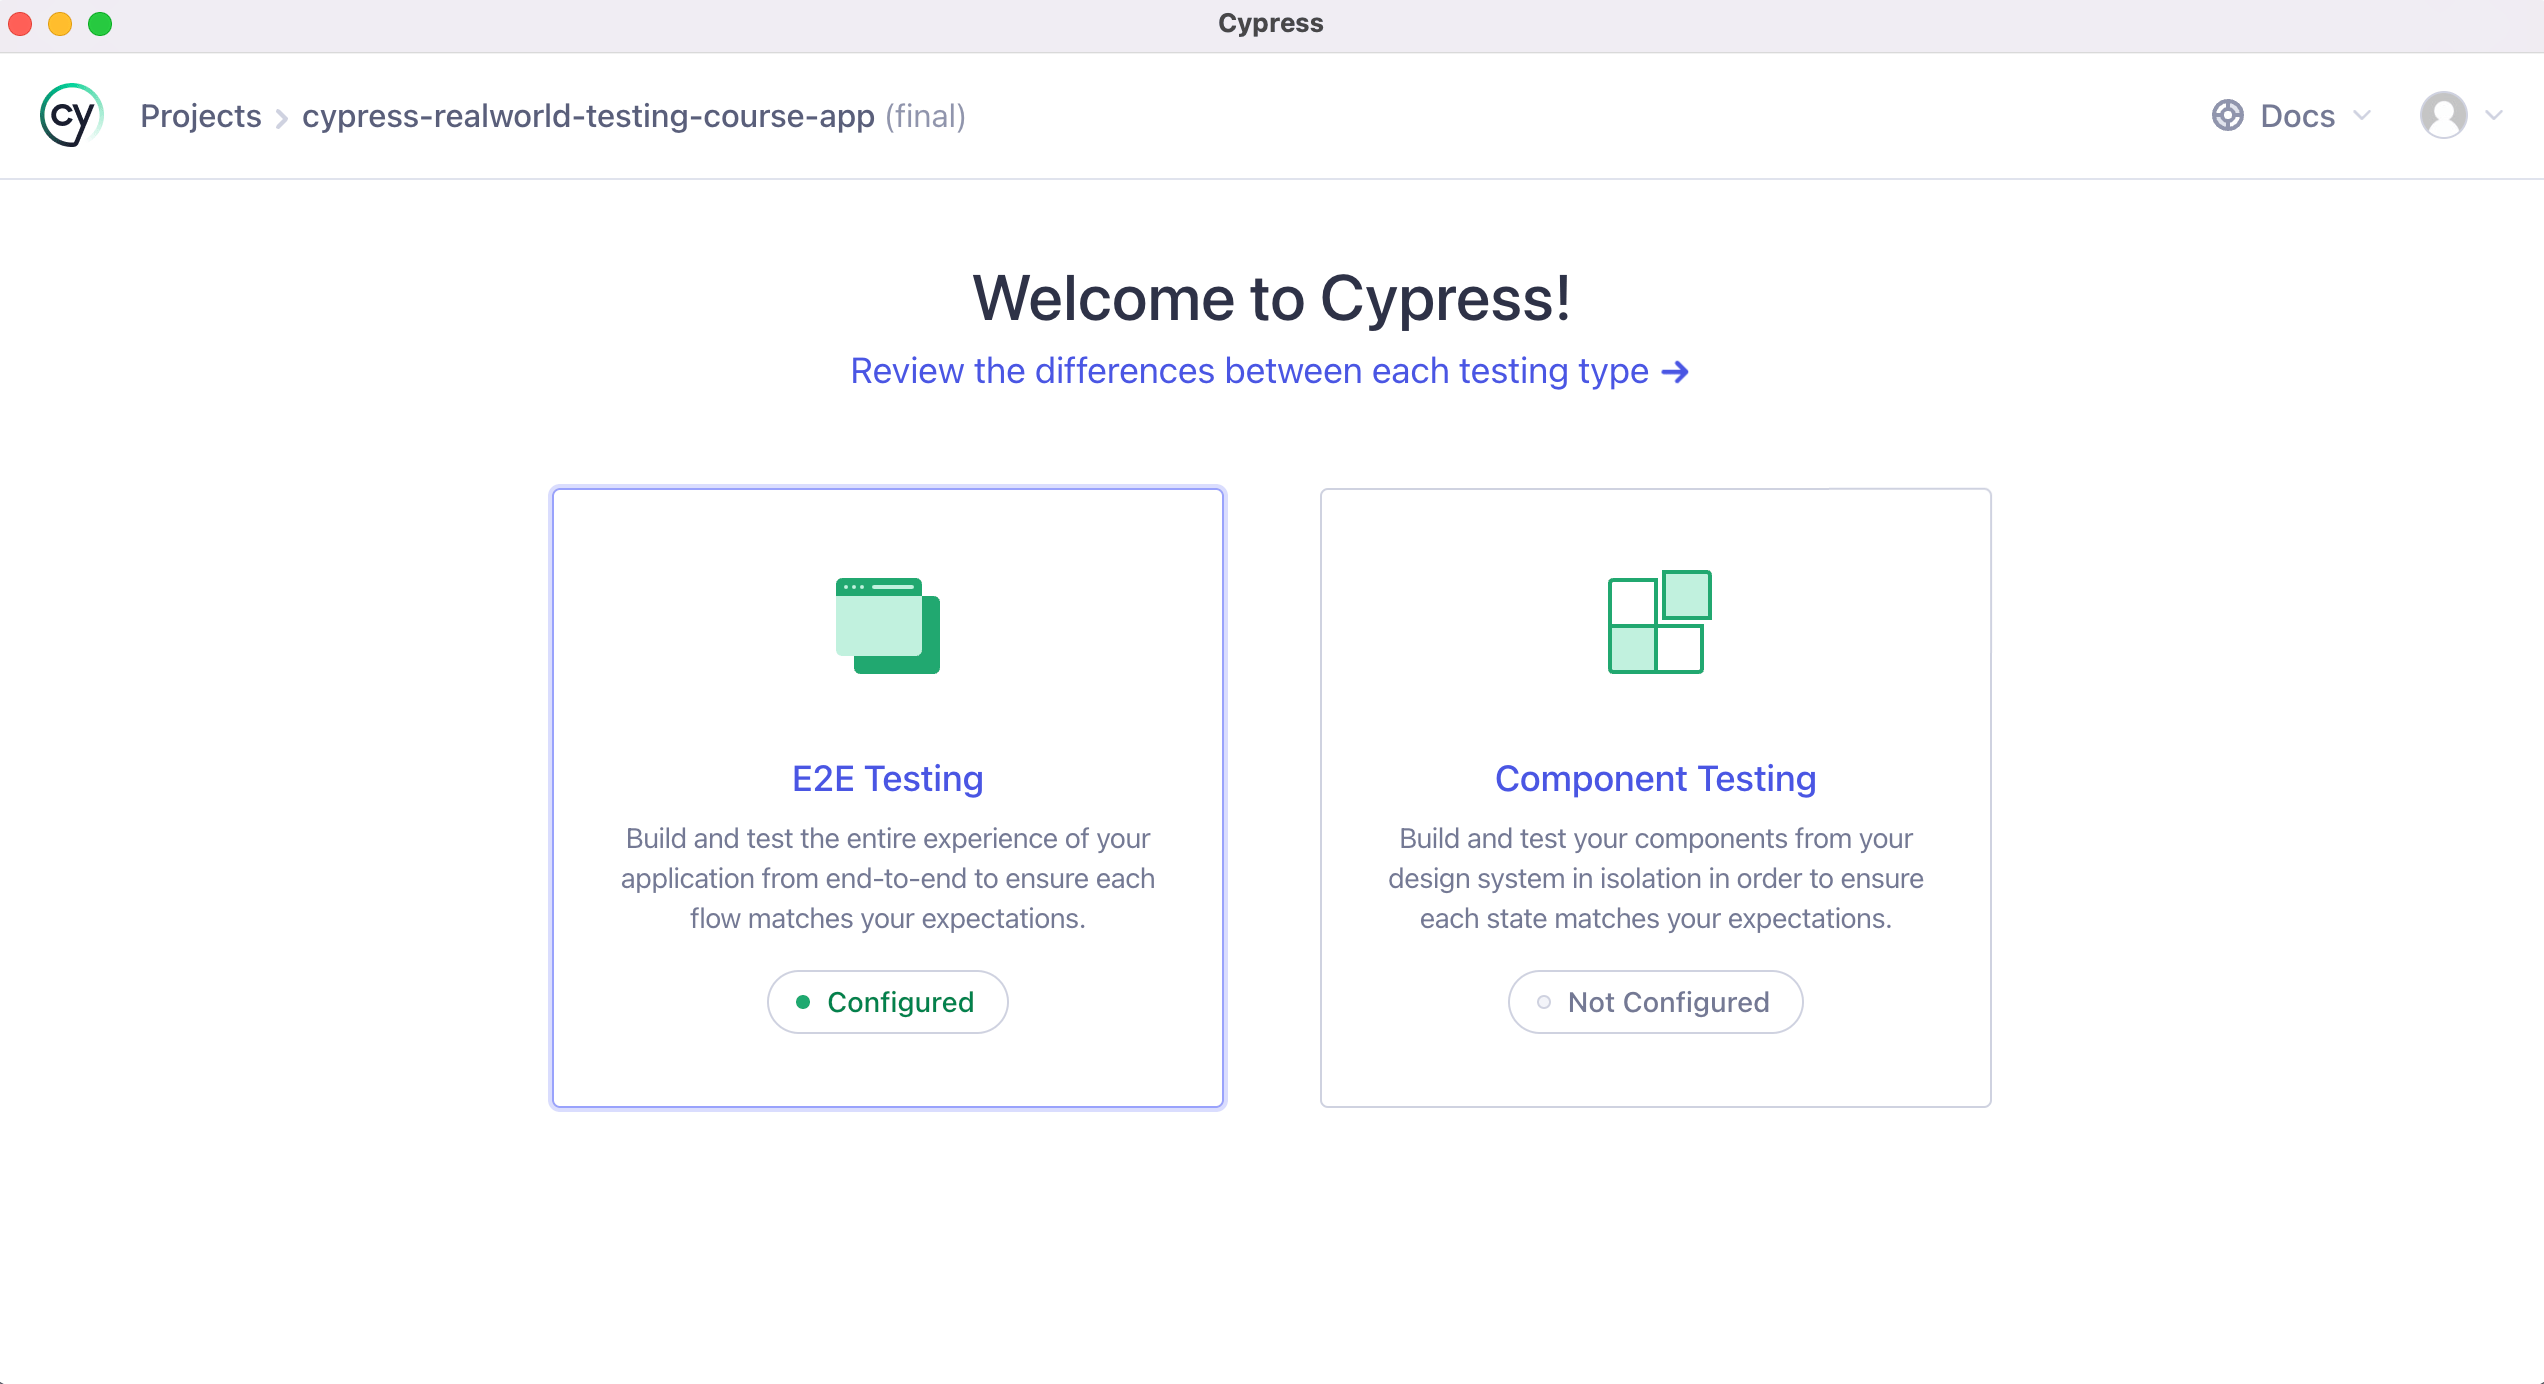
With the Cypress 10 and later, we are now presented with the ability to write E2E or component tests. In this course, we are going to focus solely on E2E tests. Components tests will be covered in another course.
Click on the “E2E Testing” button on the left to get started.
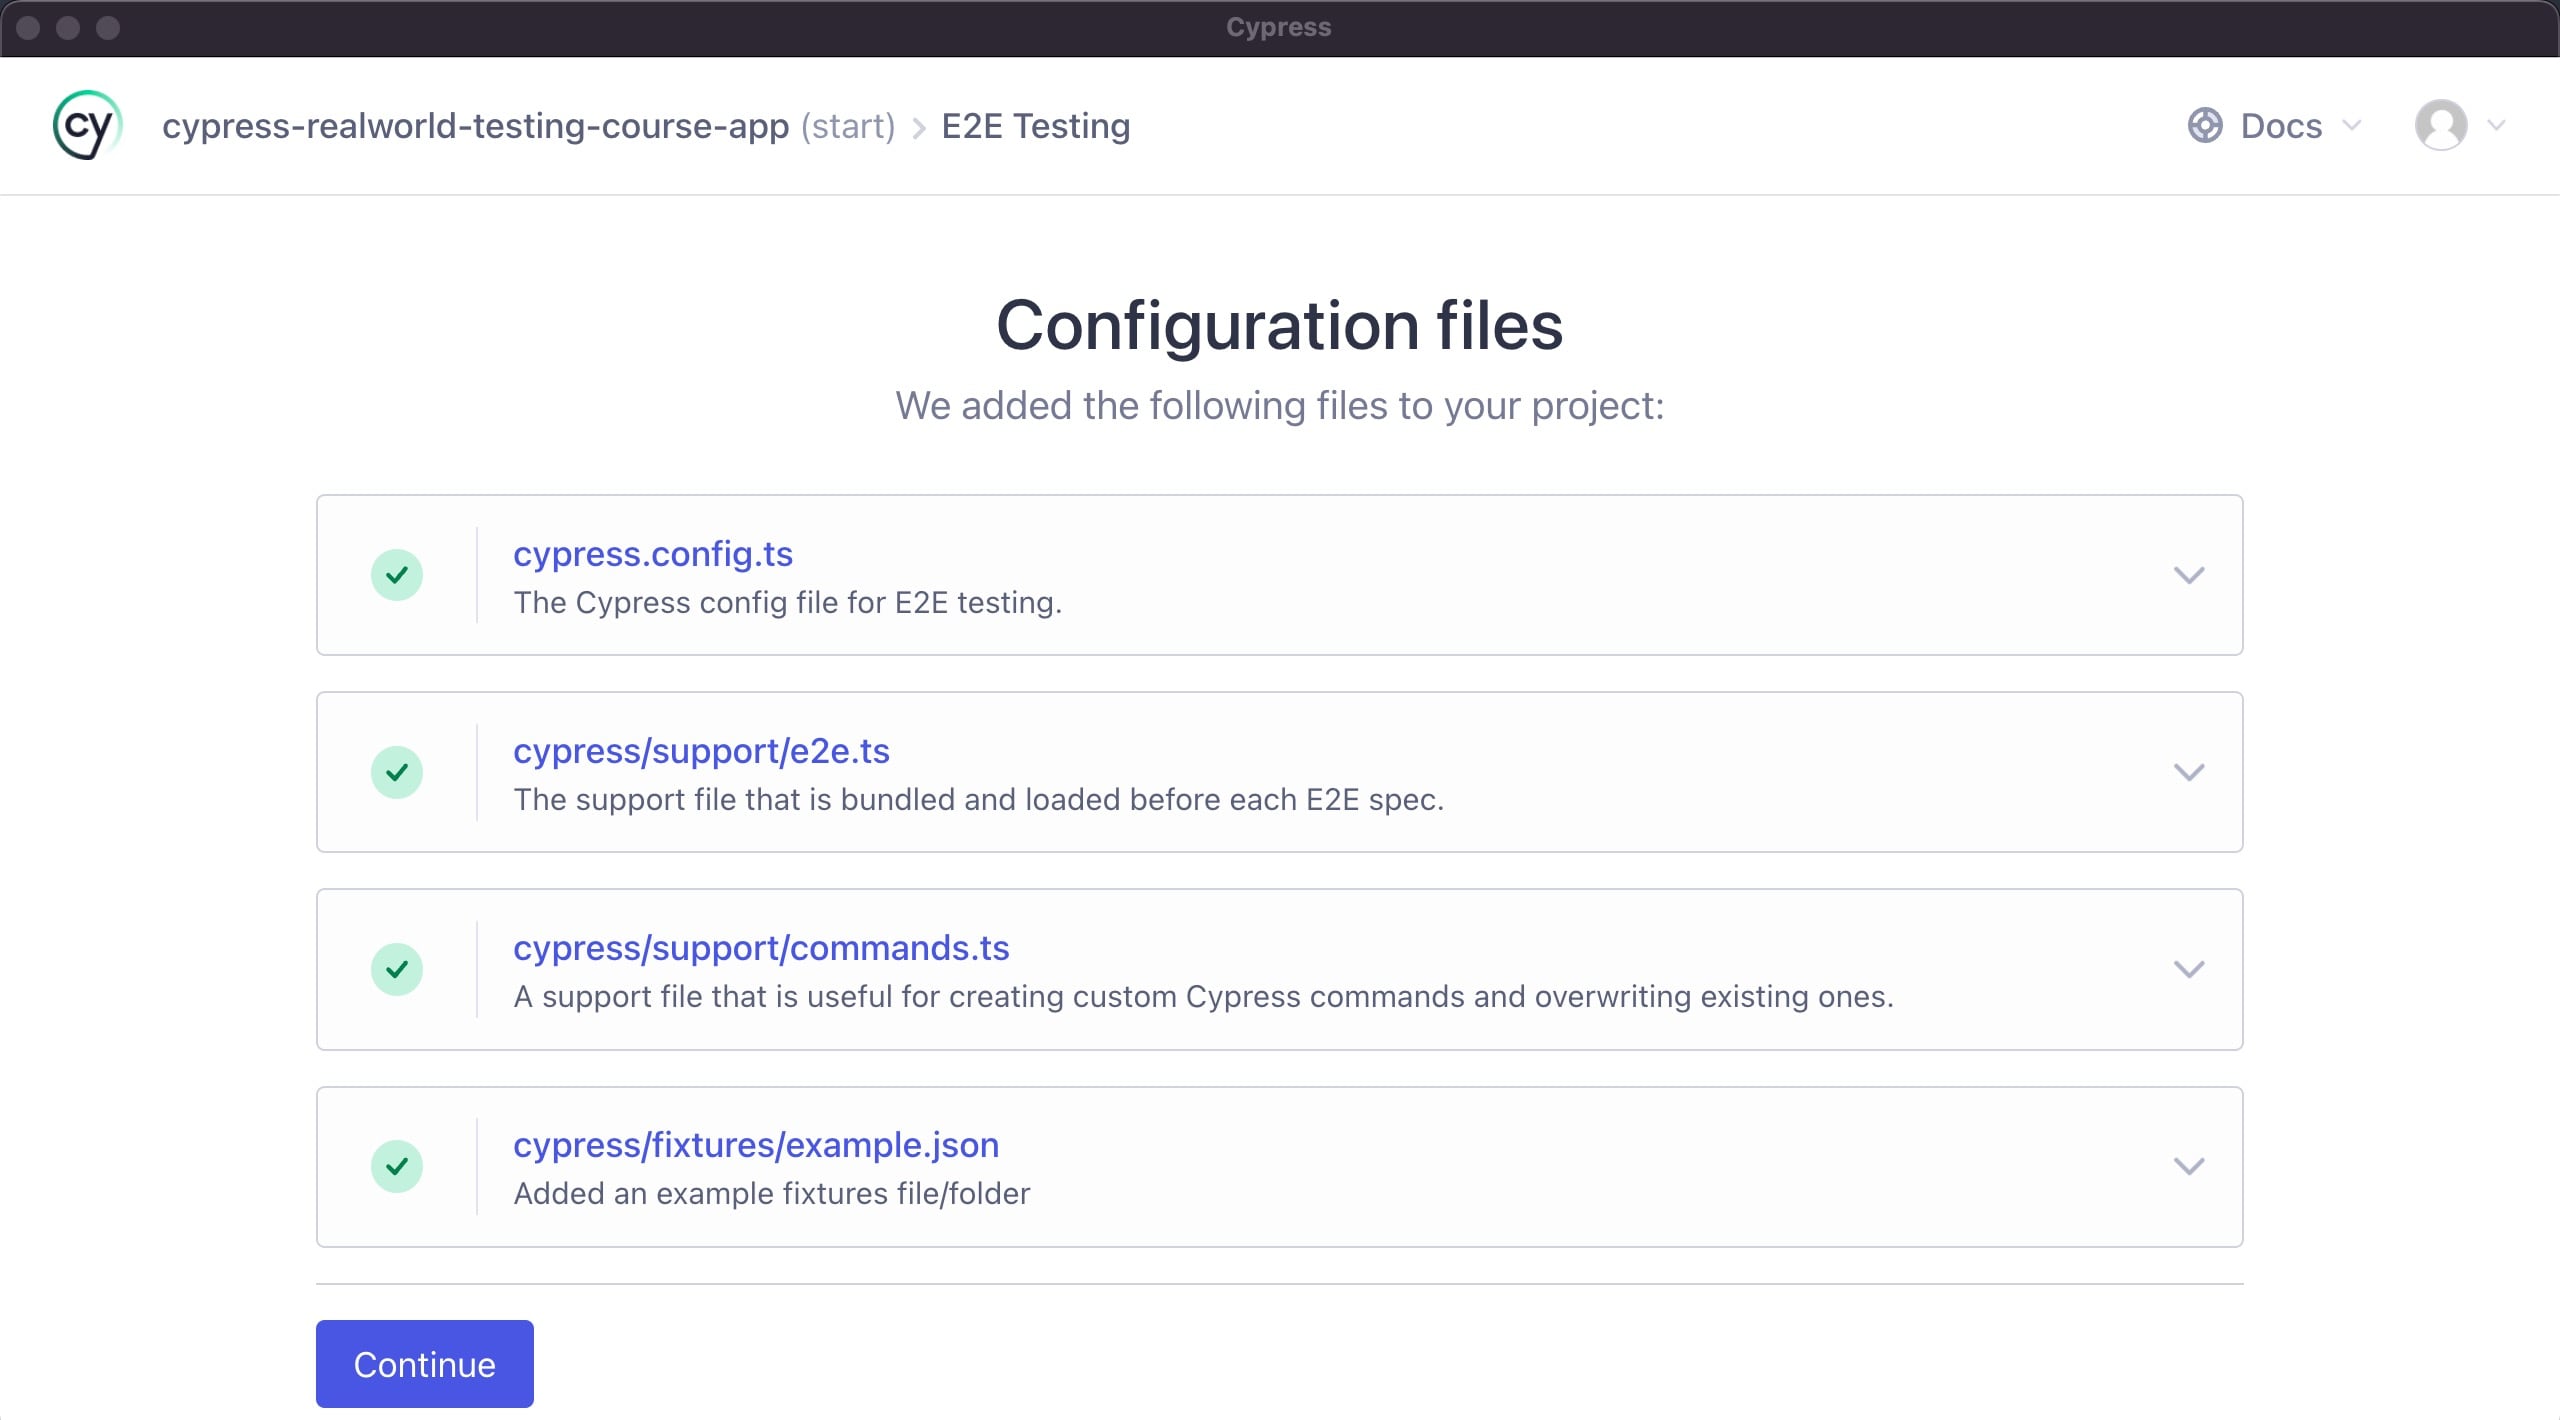
Next, Cypress is going to let you know the various files it is going to create for you to get everything properly configured for e2e testing. Click on the “Continue” button at the bottom.
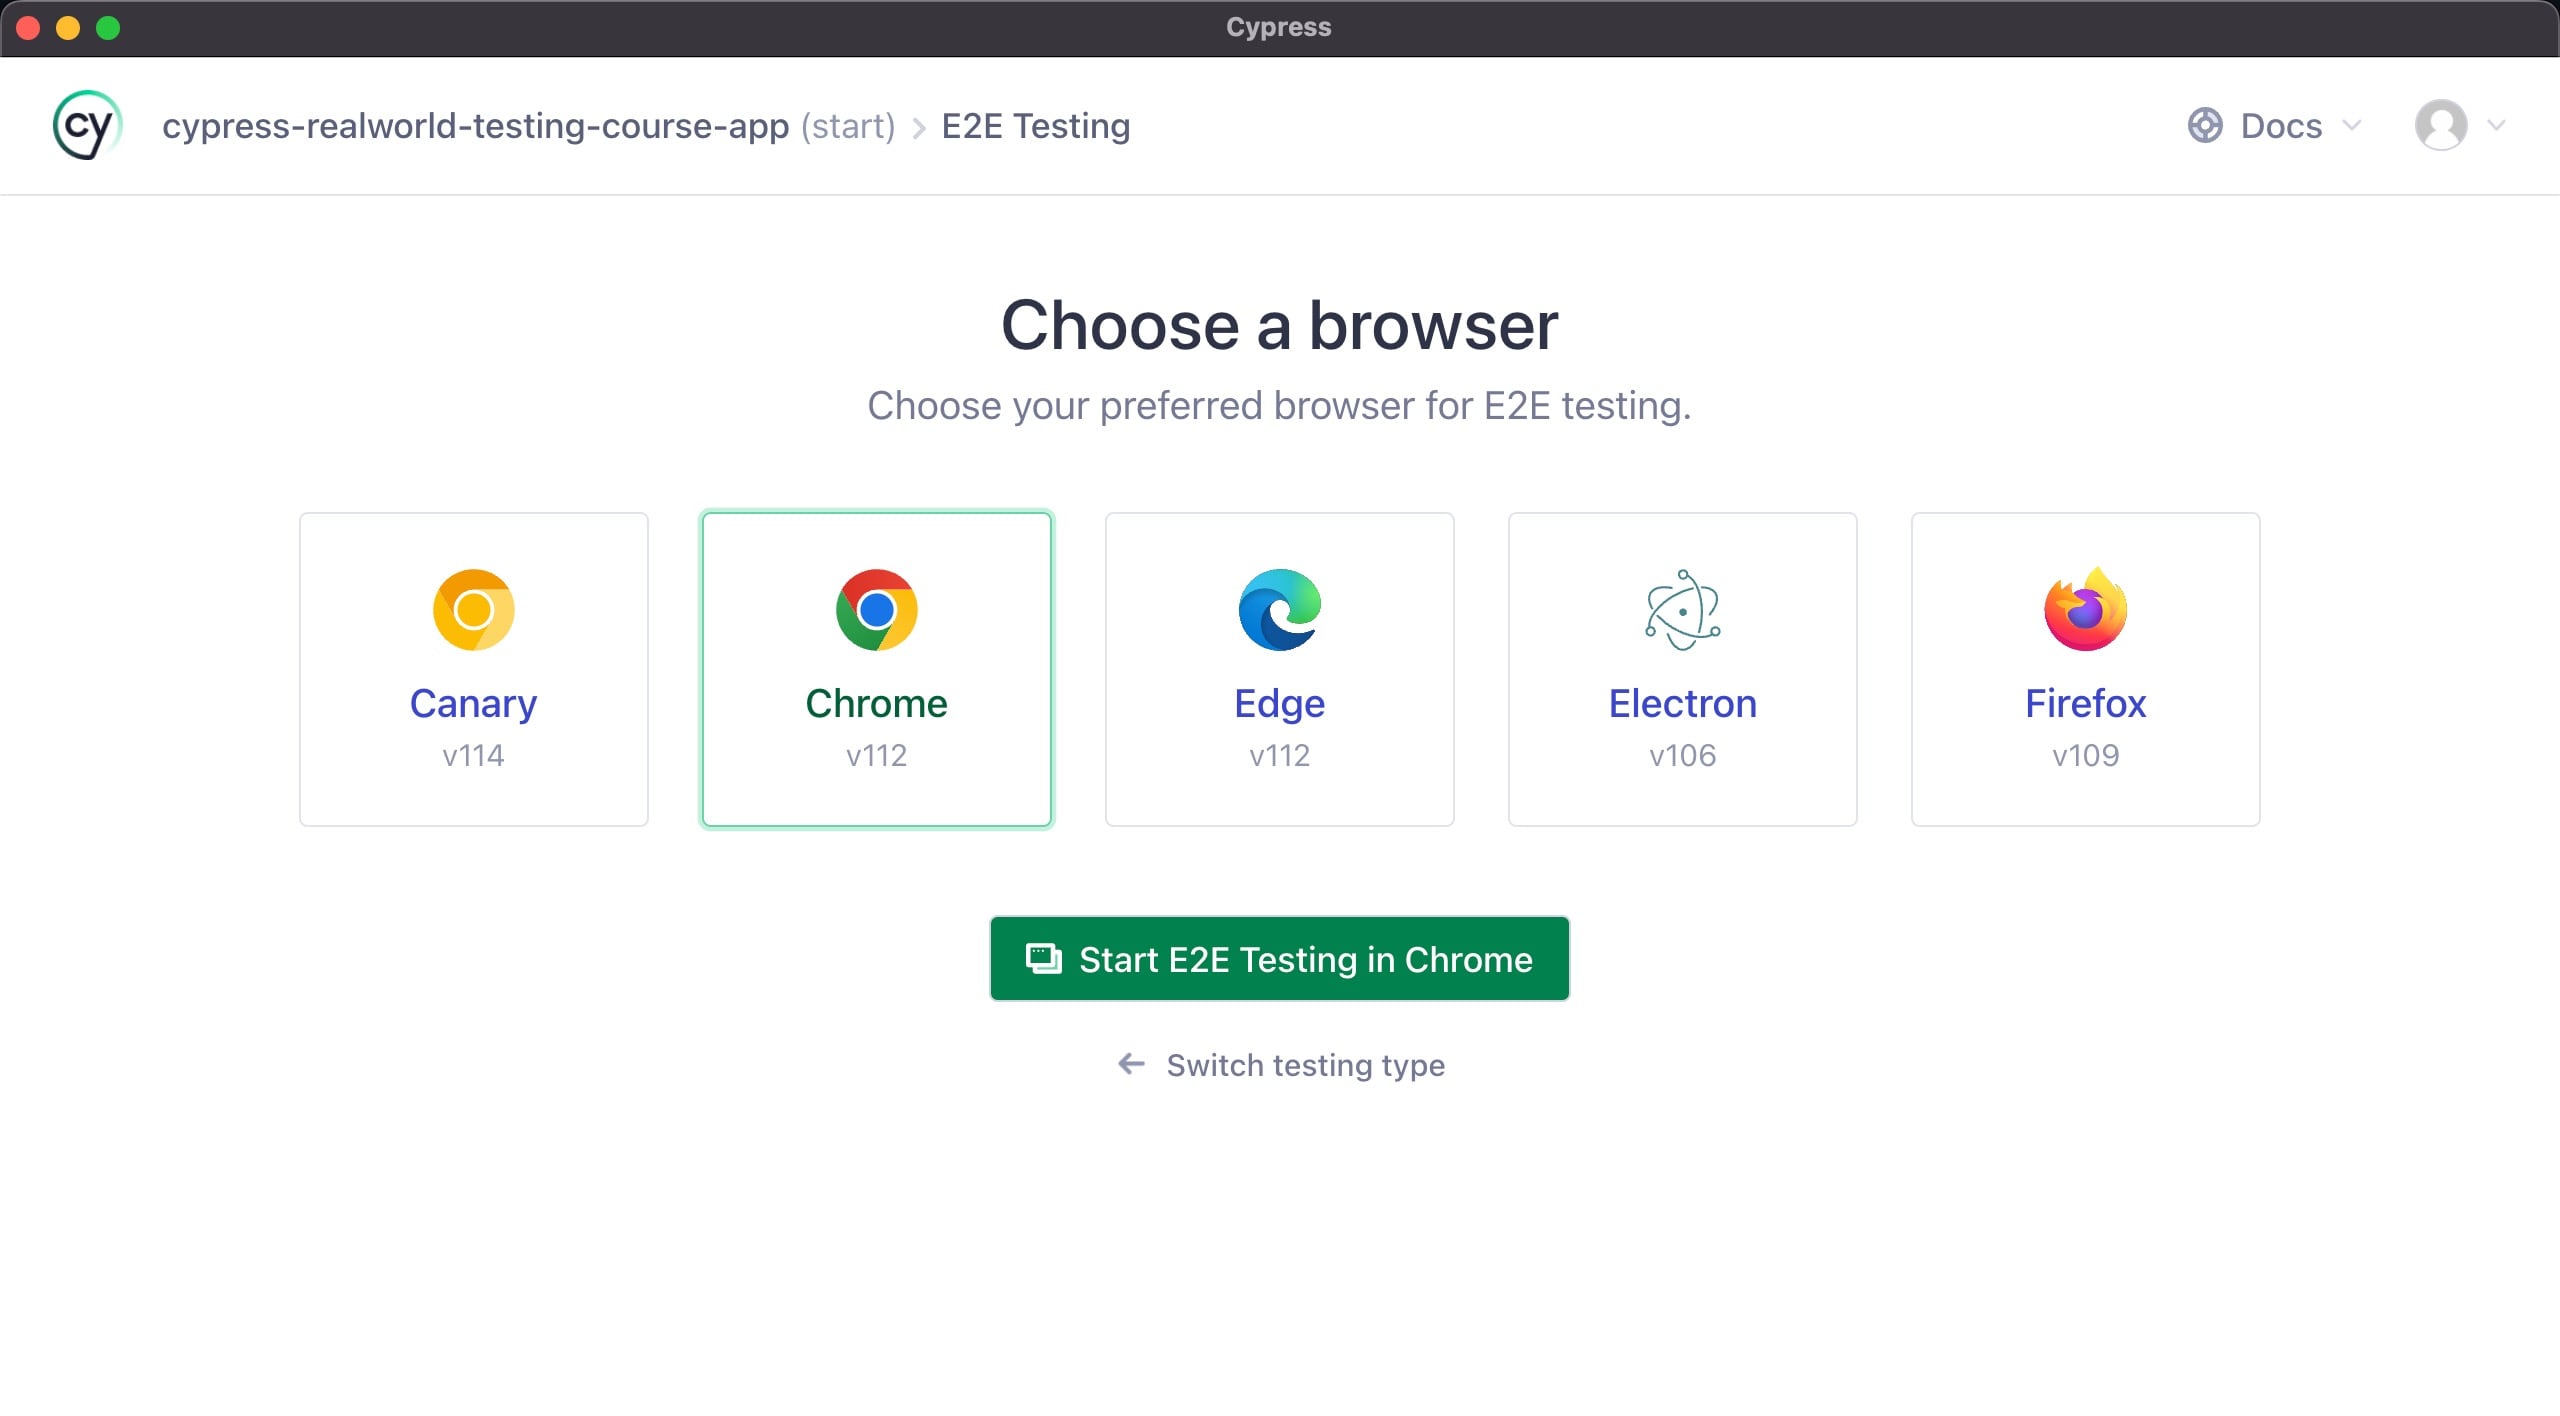
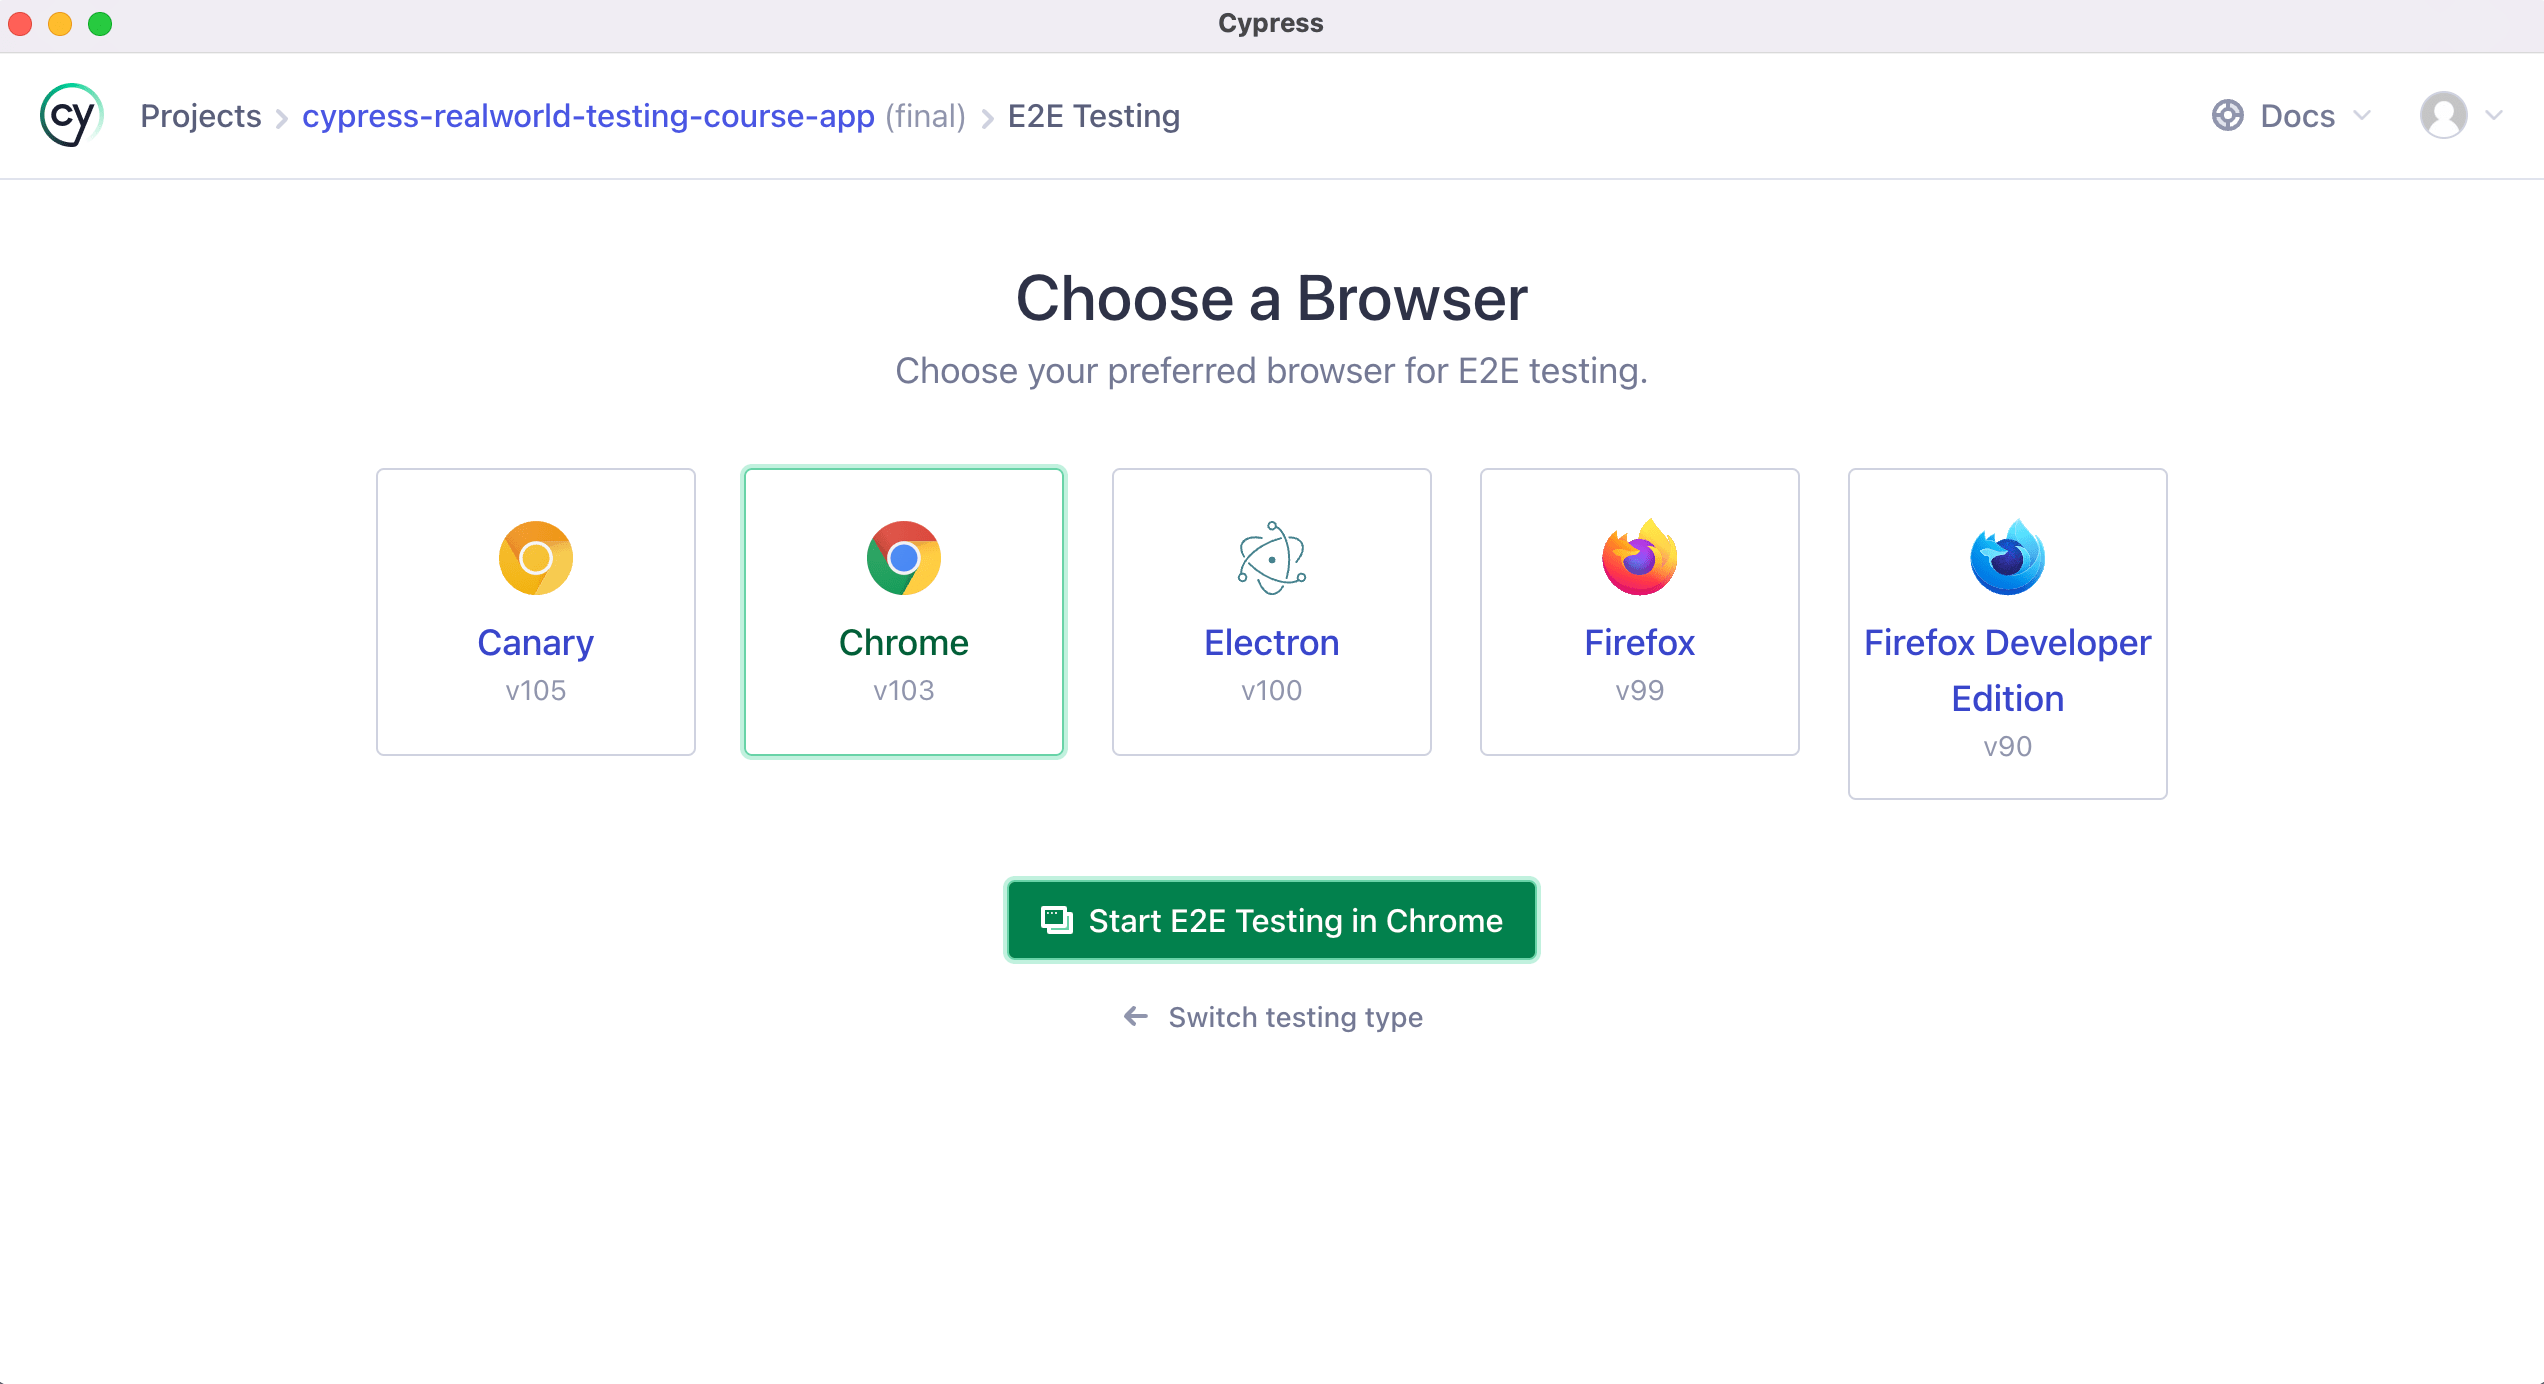
Next, you will be presented with the “Choose a Browser” screen. You may have different options available depending upon which browsers you have installed on your computer. For this course, we are going to be running all of our tests inside of the “Chrome” browser.
info
If you do not see “Chrome” as an option, that means you do not have it installed. You can download it here. Once you install it, you will need to re-launch Cypress.
Click on “Chrome” and then the “Start E2E Testing in Chrome” button.
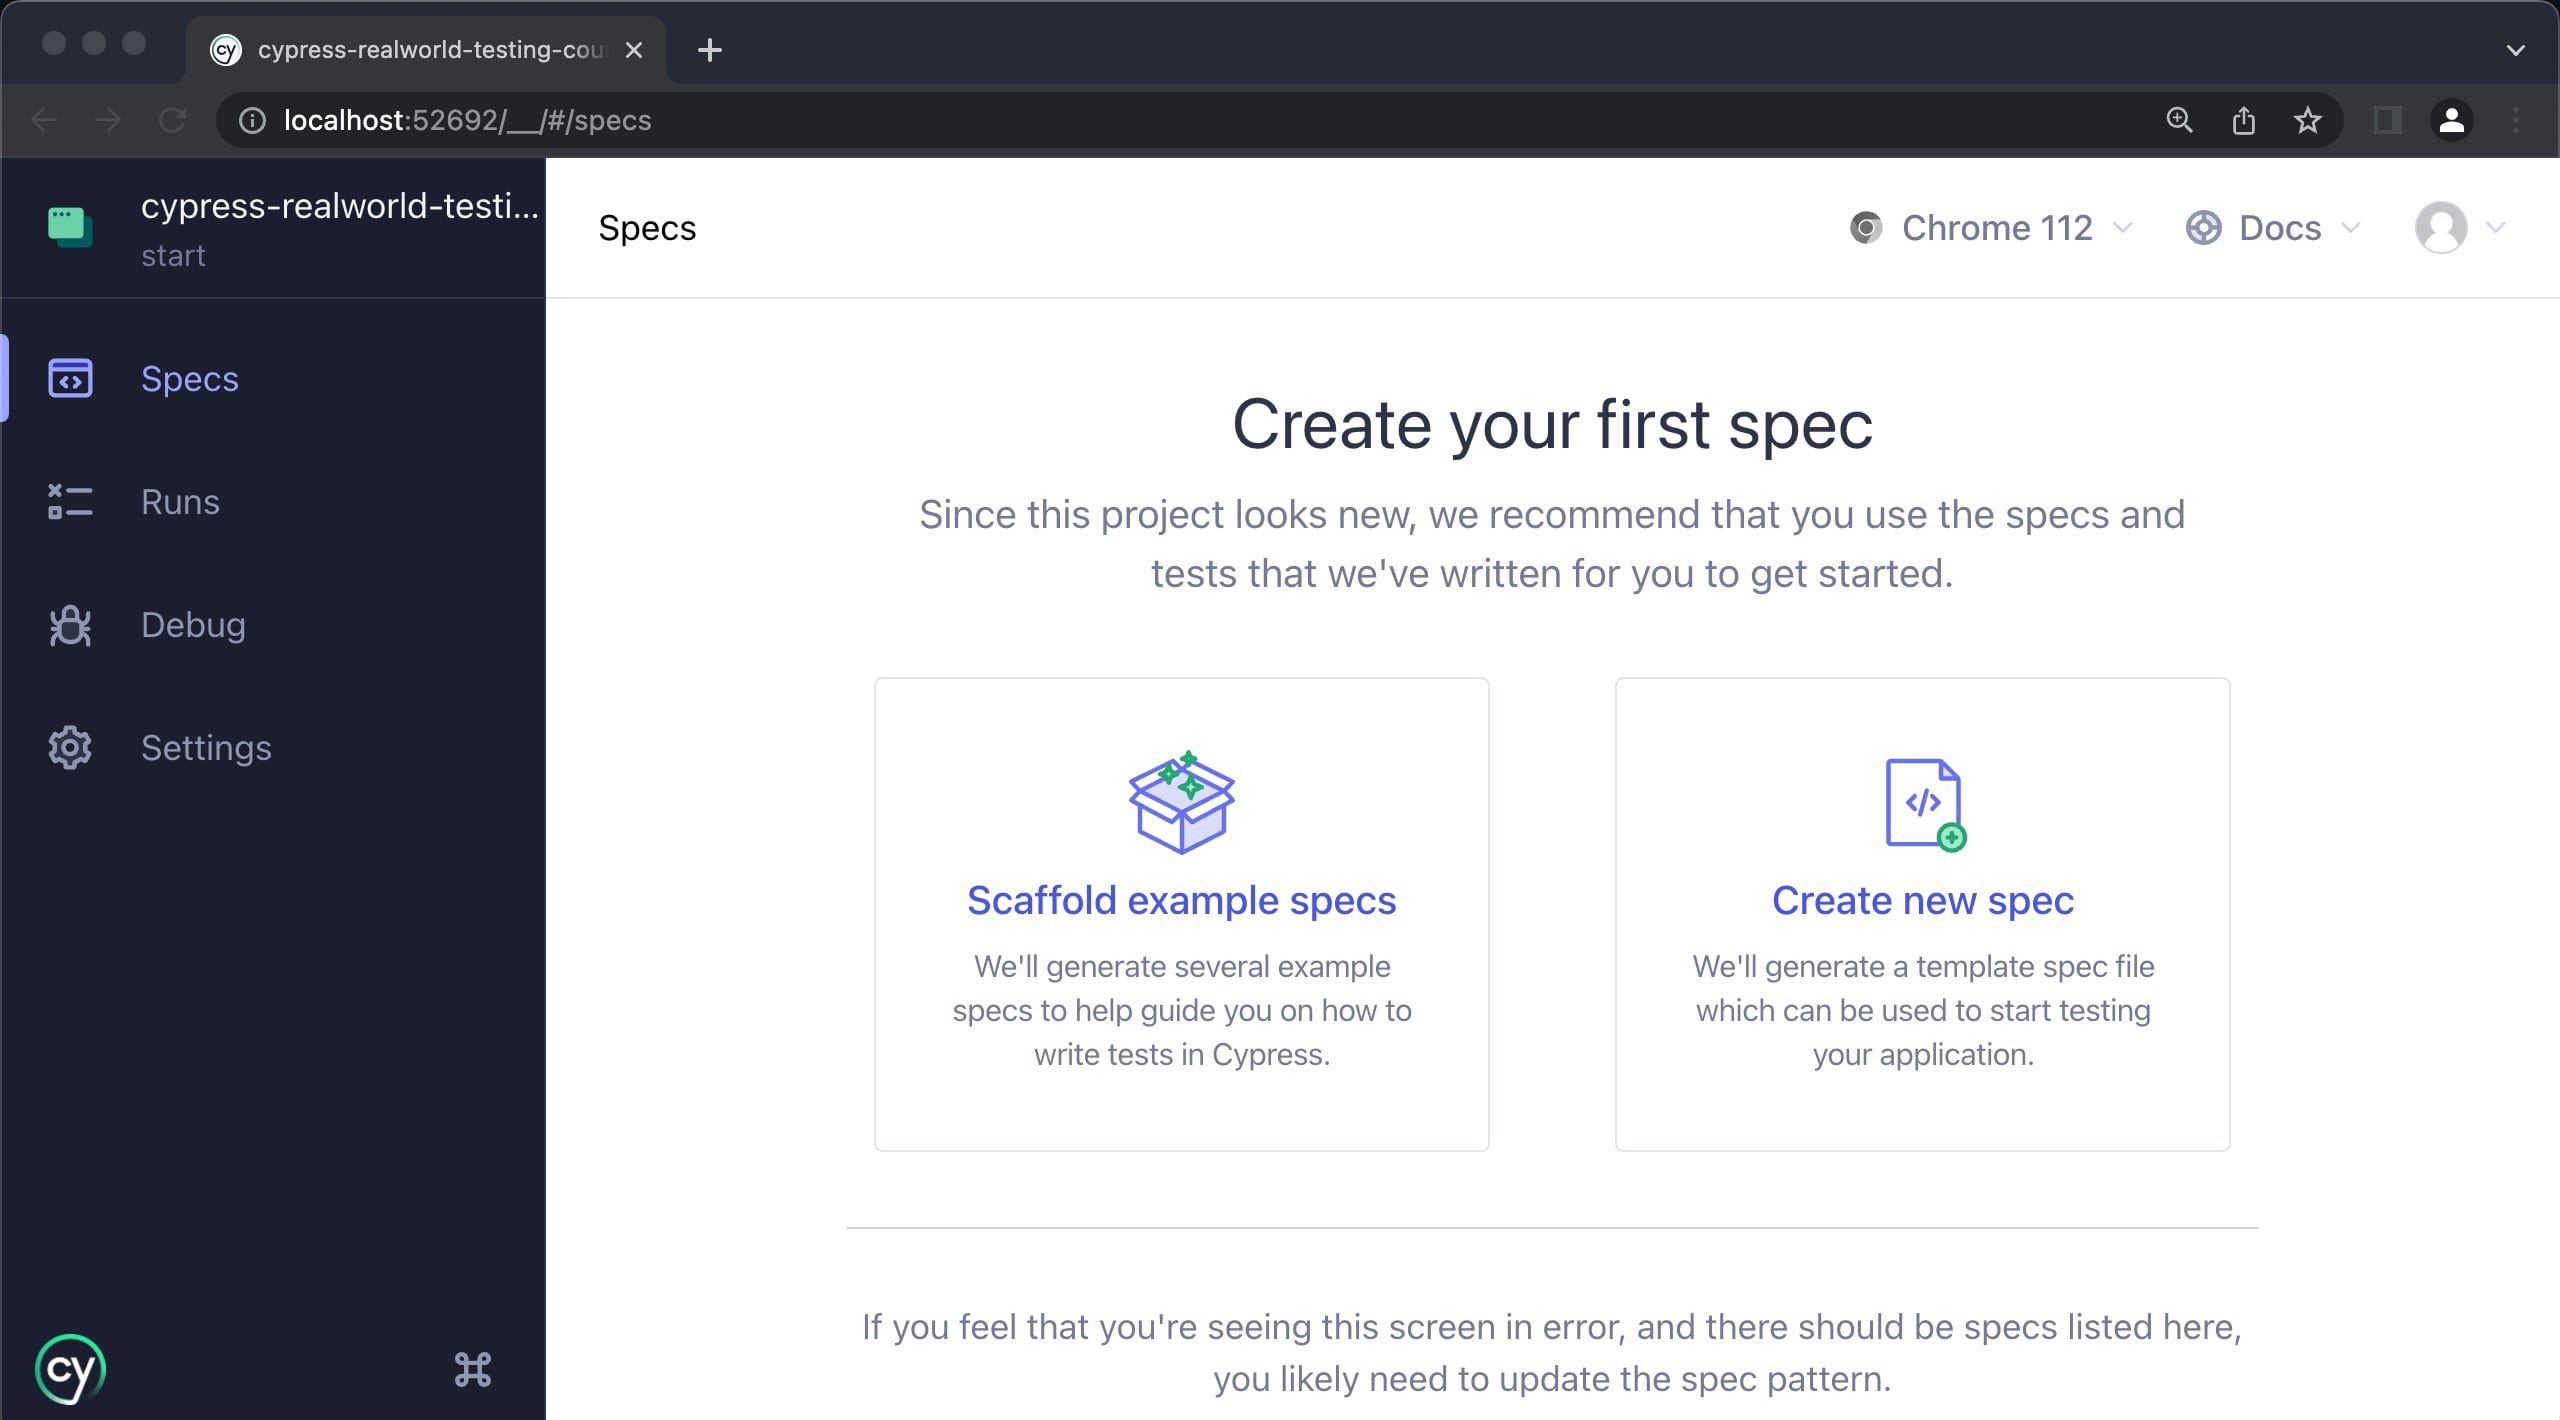
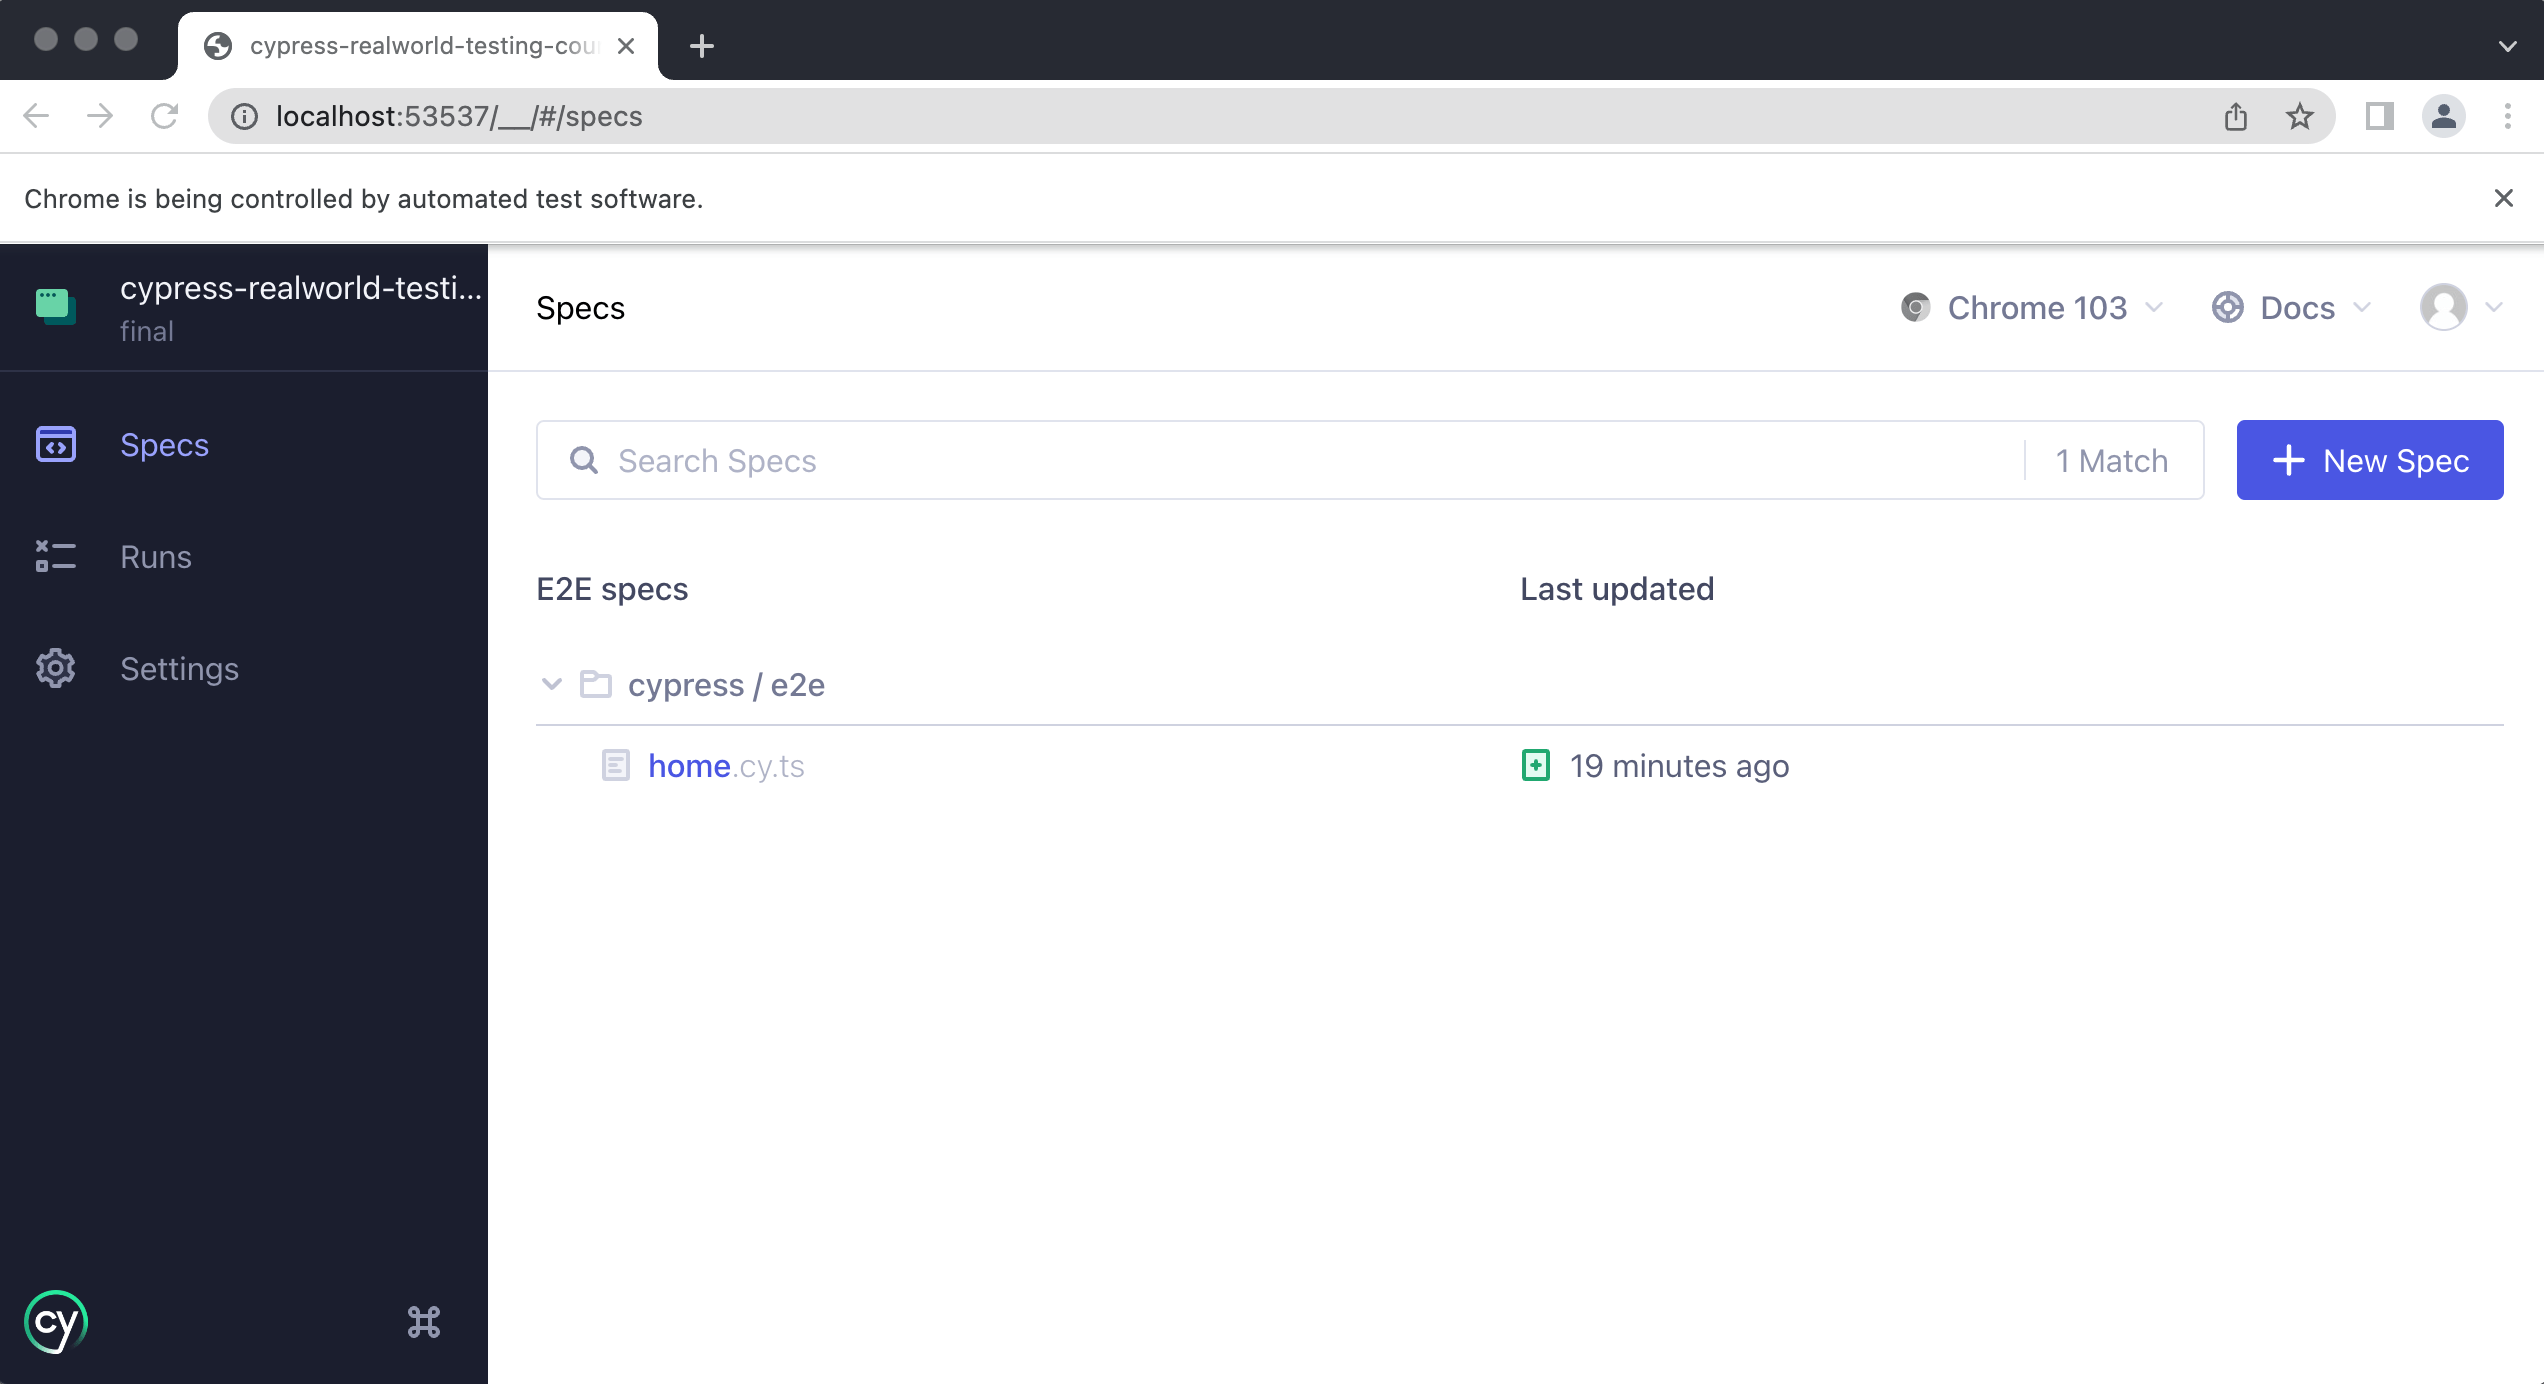
Cypress will then launch and ask us to create our first spec since we don't have any test files created yet.
Click on the “Create new spec” button.
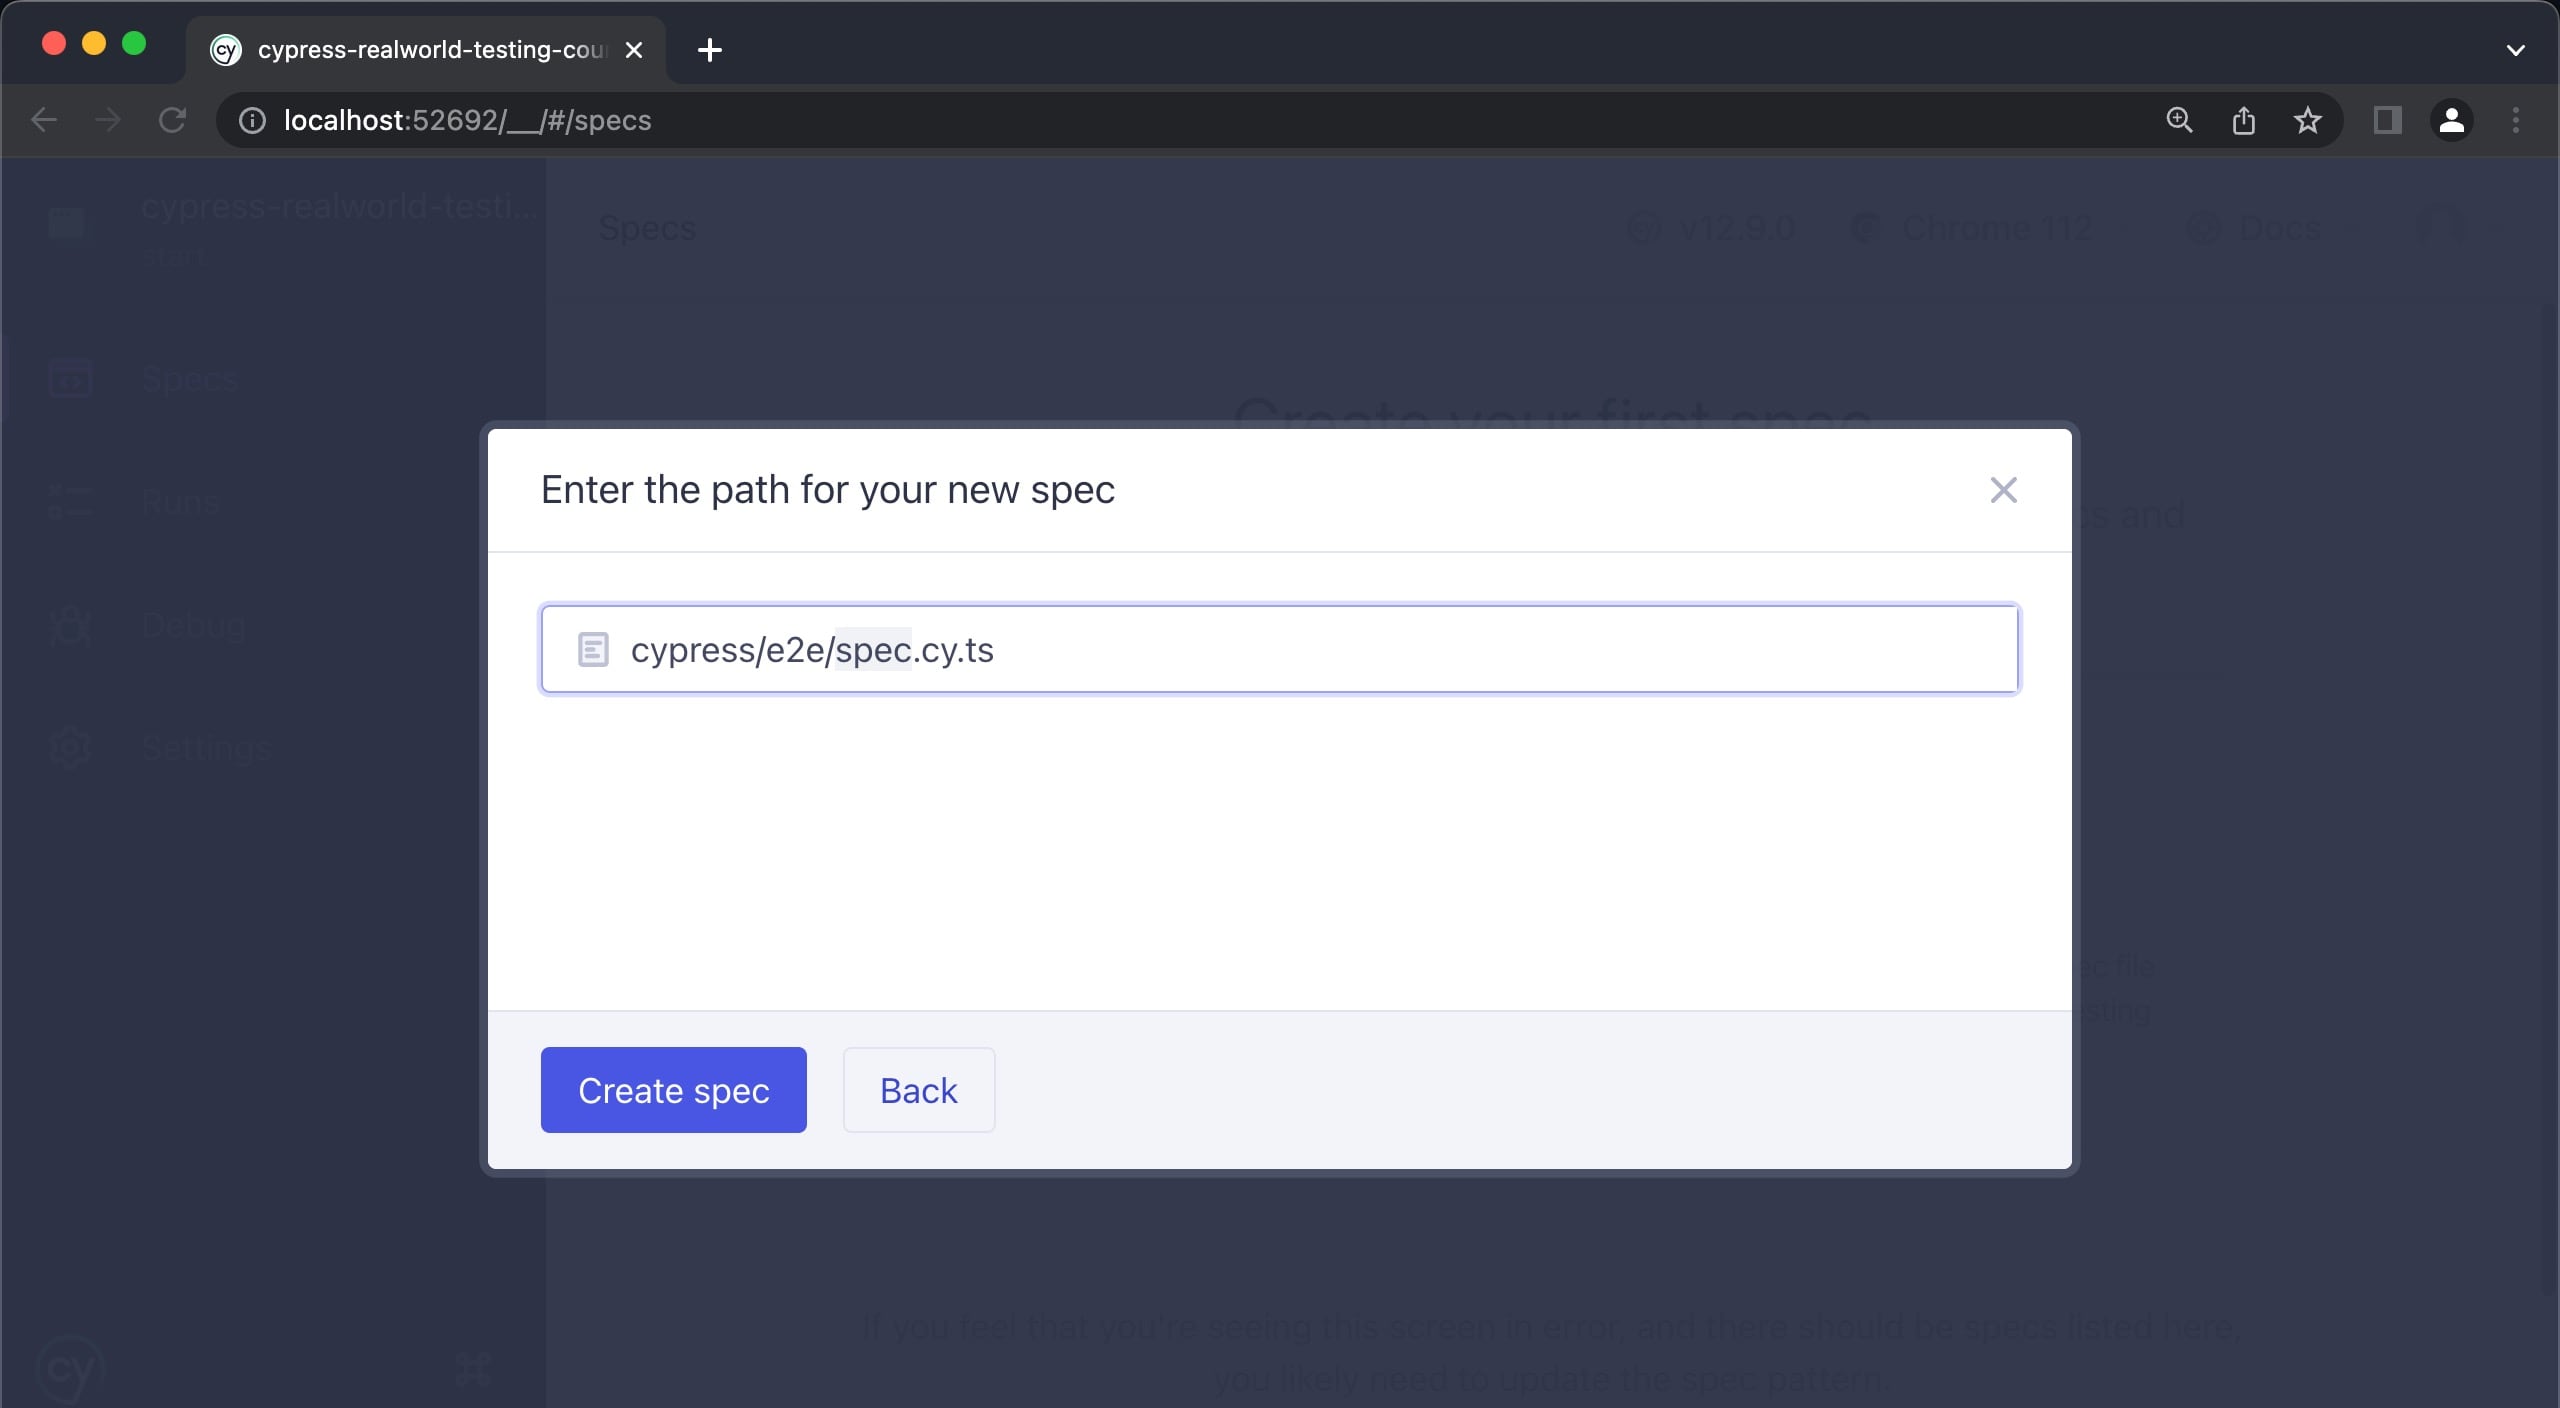
We are going to be writing tests for the application's home page so let's rename this file to “home.cy.ts”
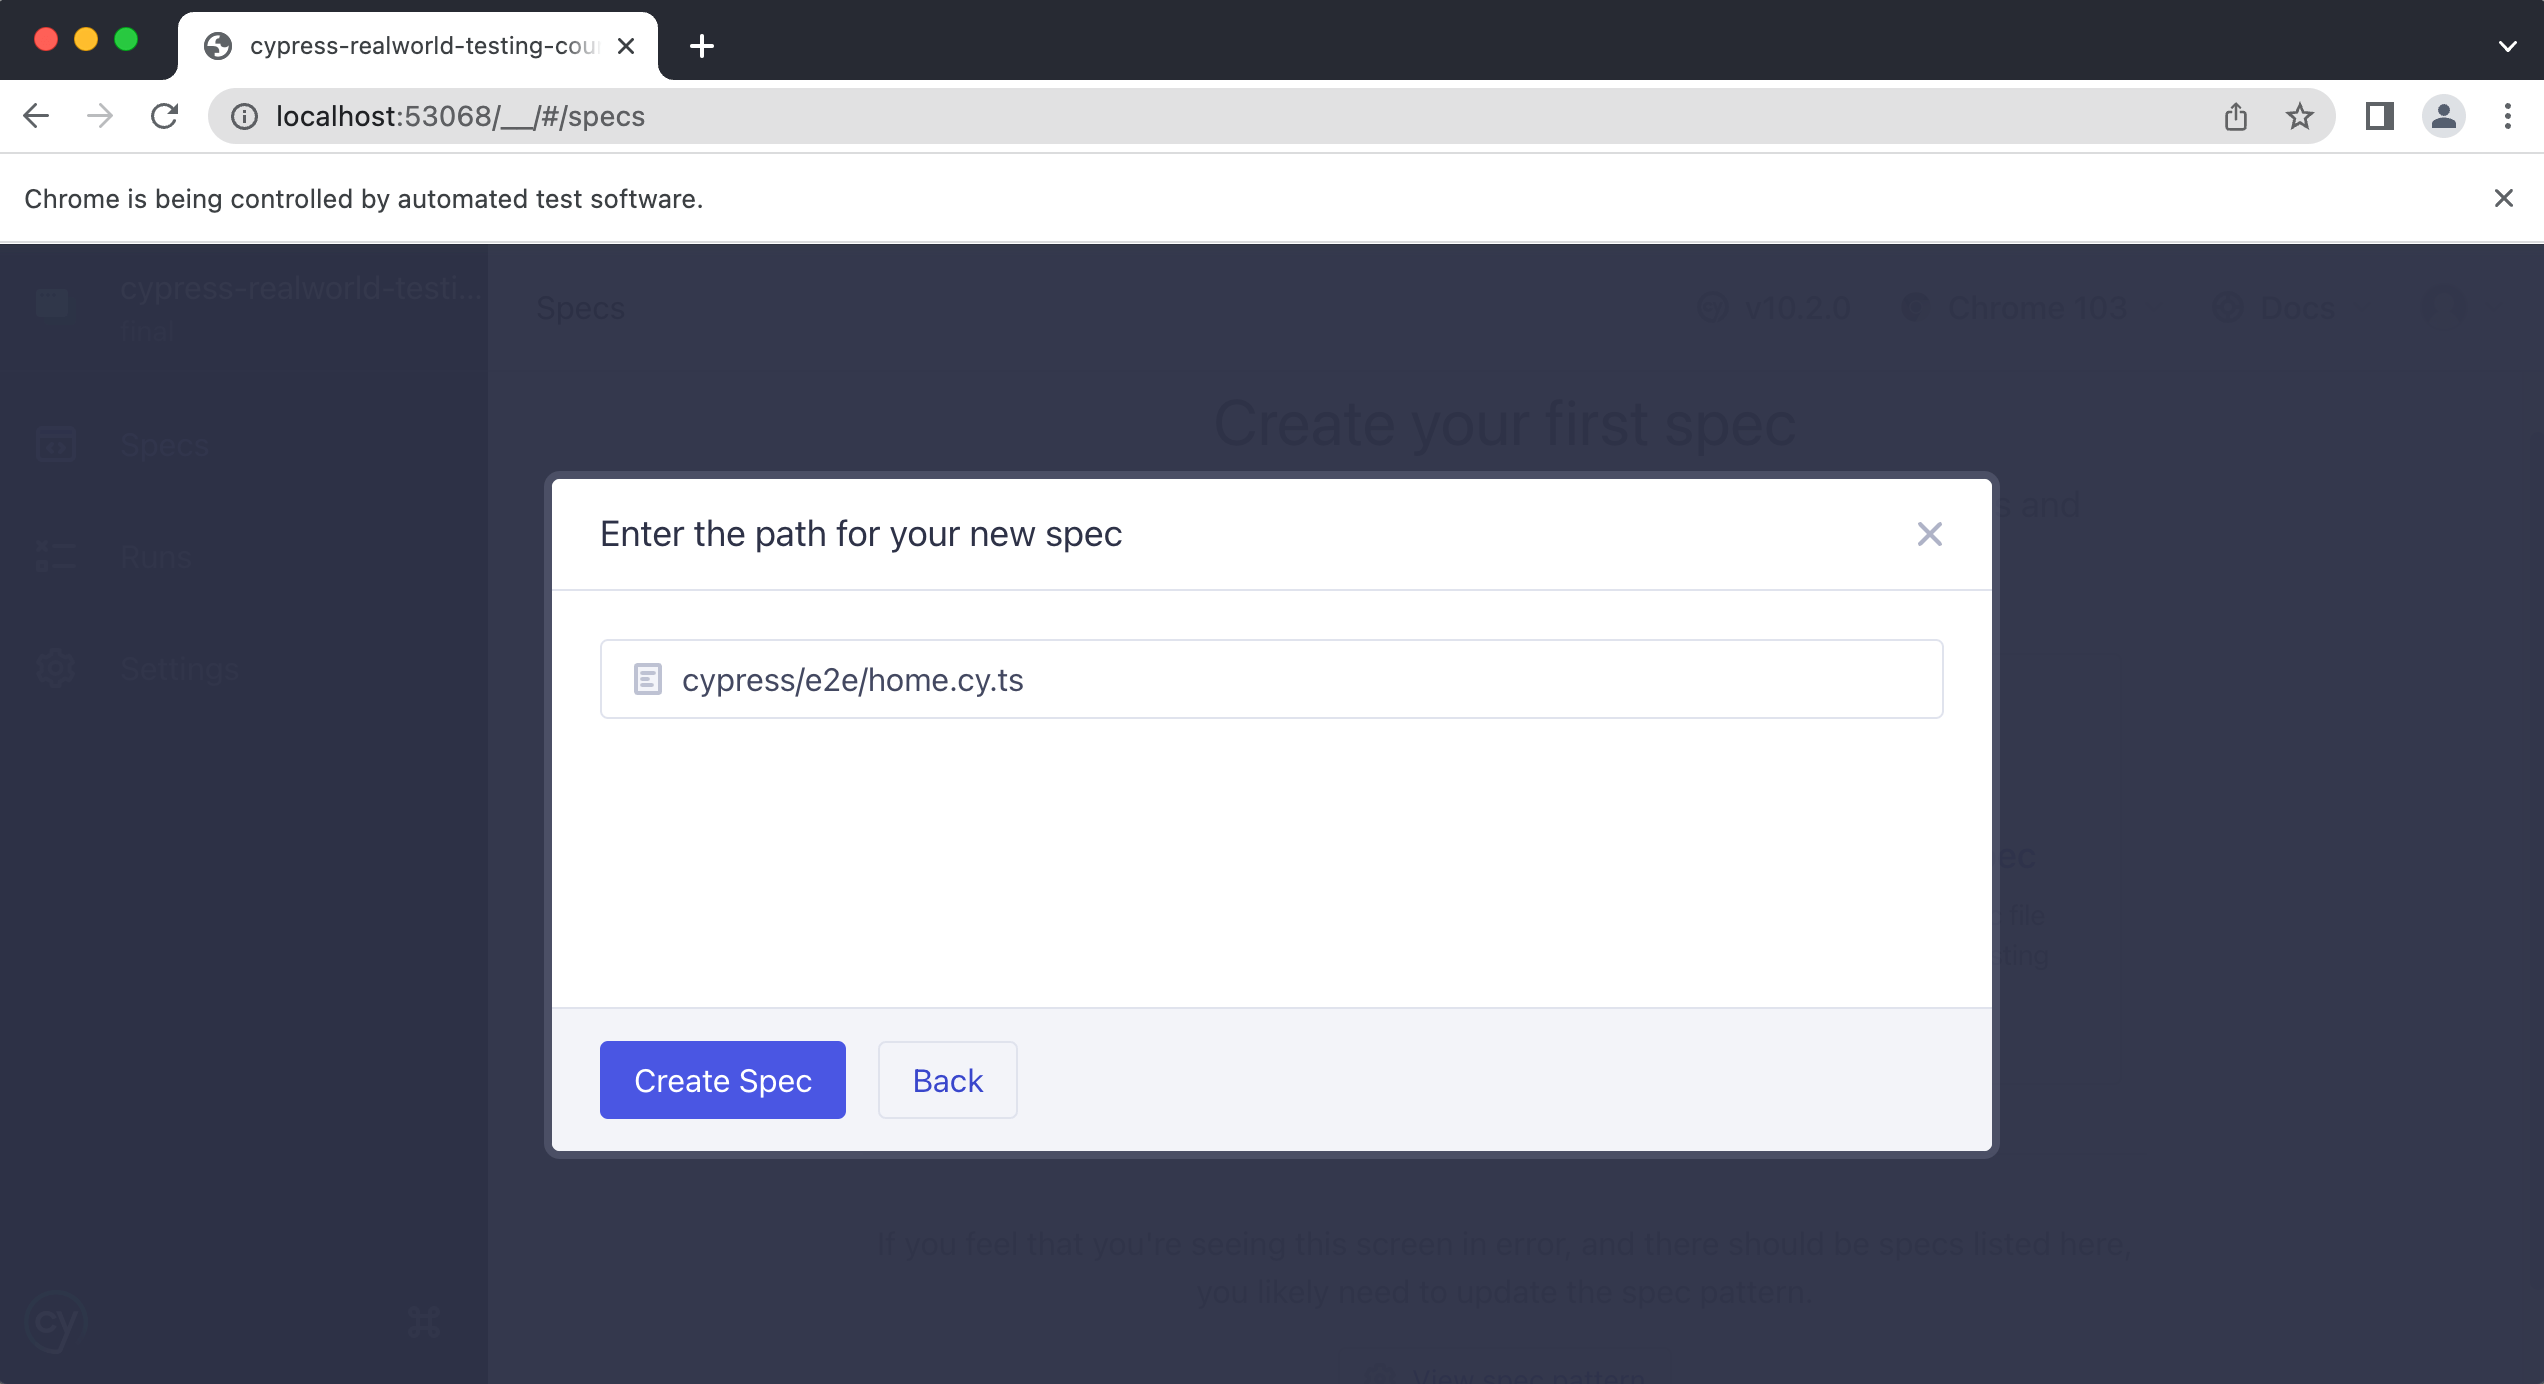
Then click on “Create Spec”
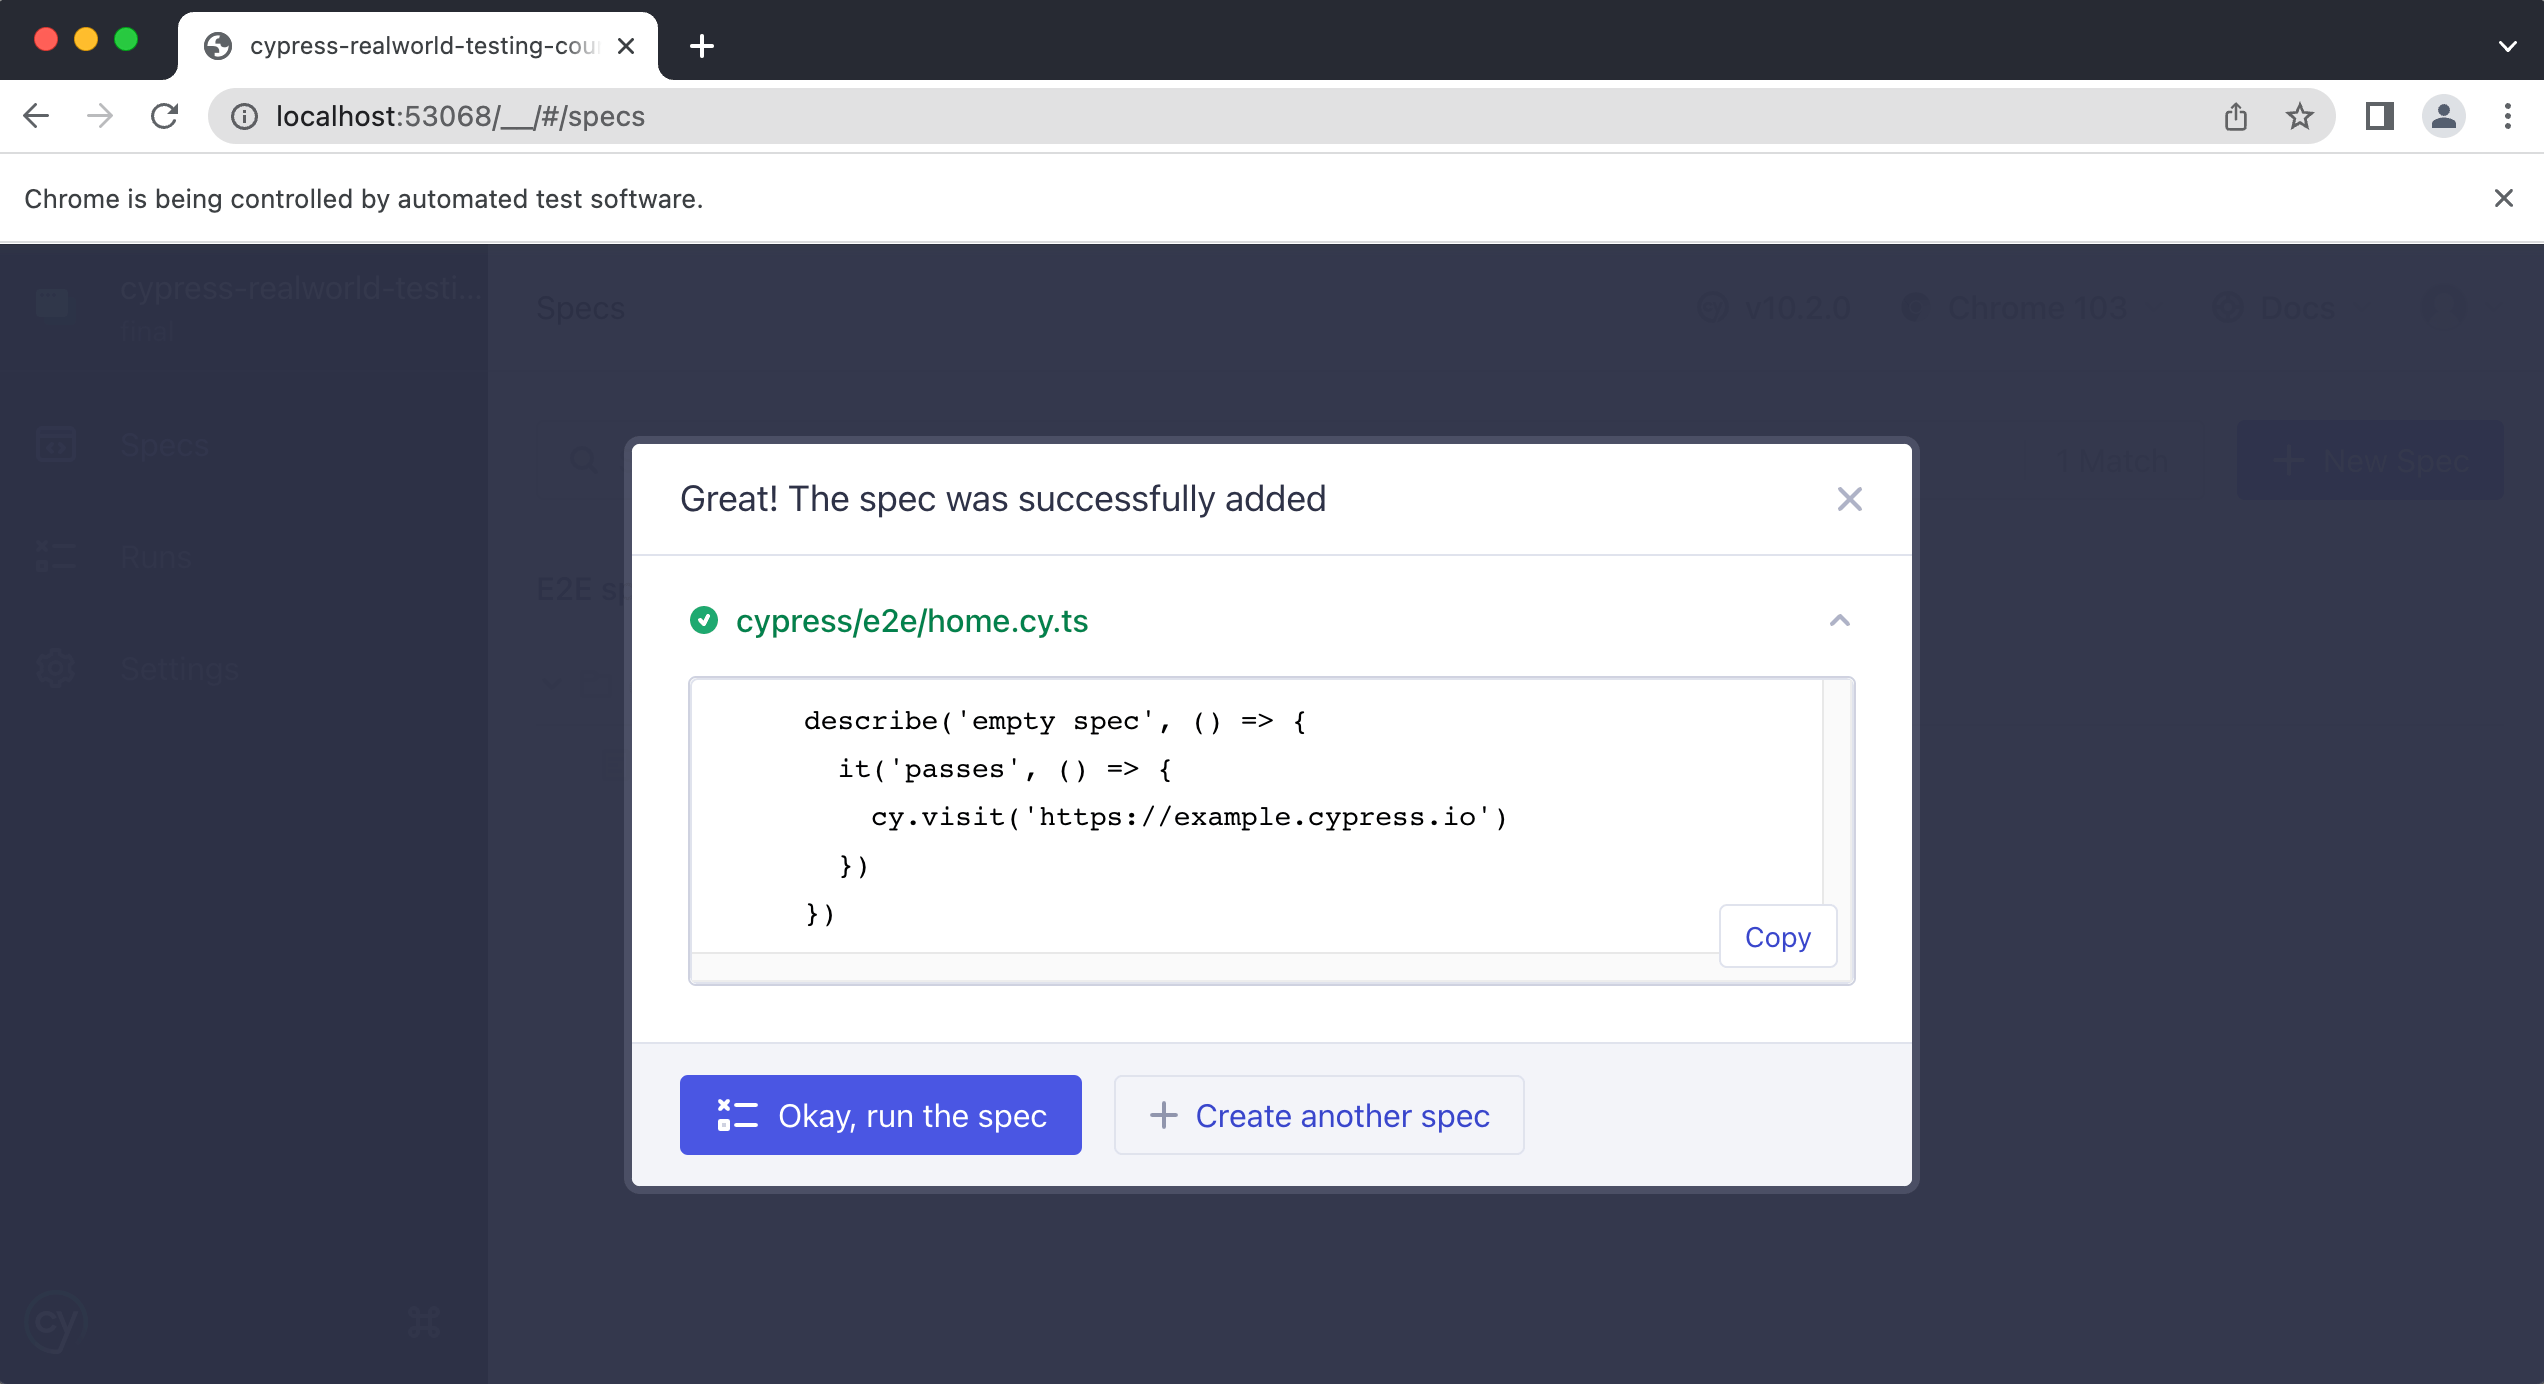
Then click on the “Okay, run the spec” button.
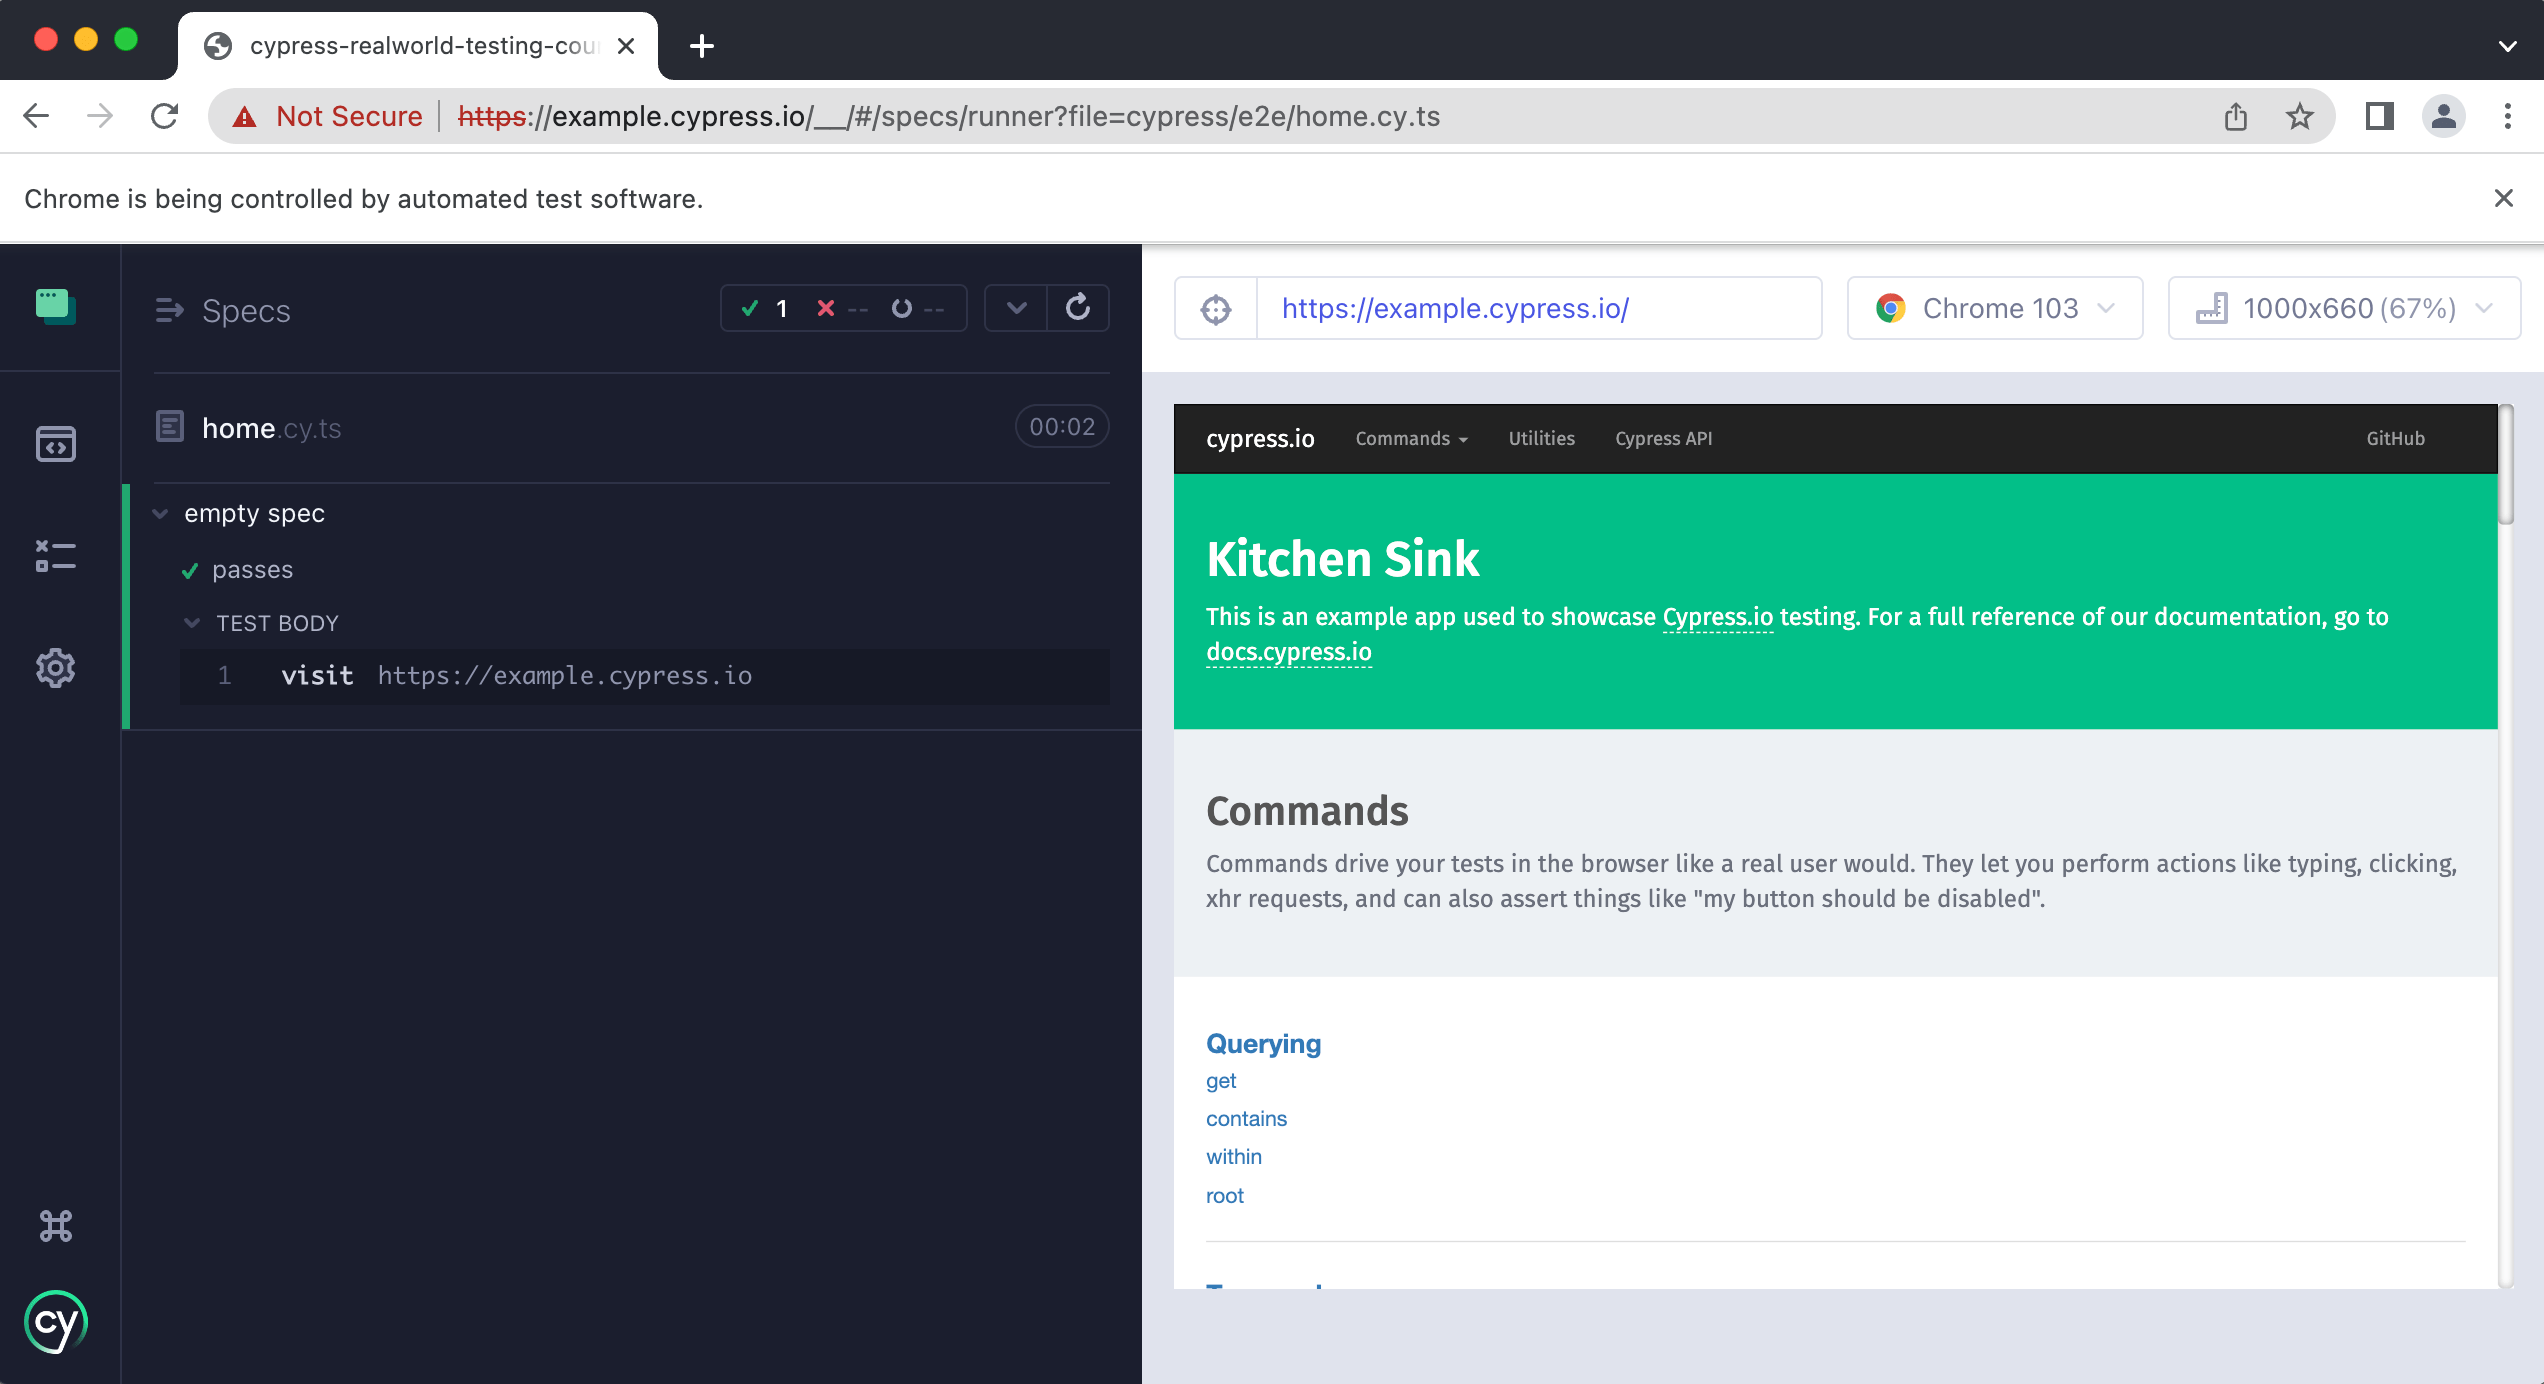
Cypress will then run our spec against our Kitchen Sink application.
Now that we have created our spec file, we need to update it for our course application.
Breaking down the home spec file
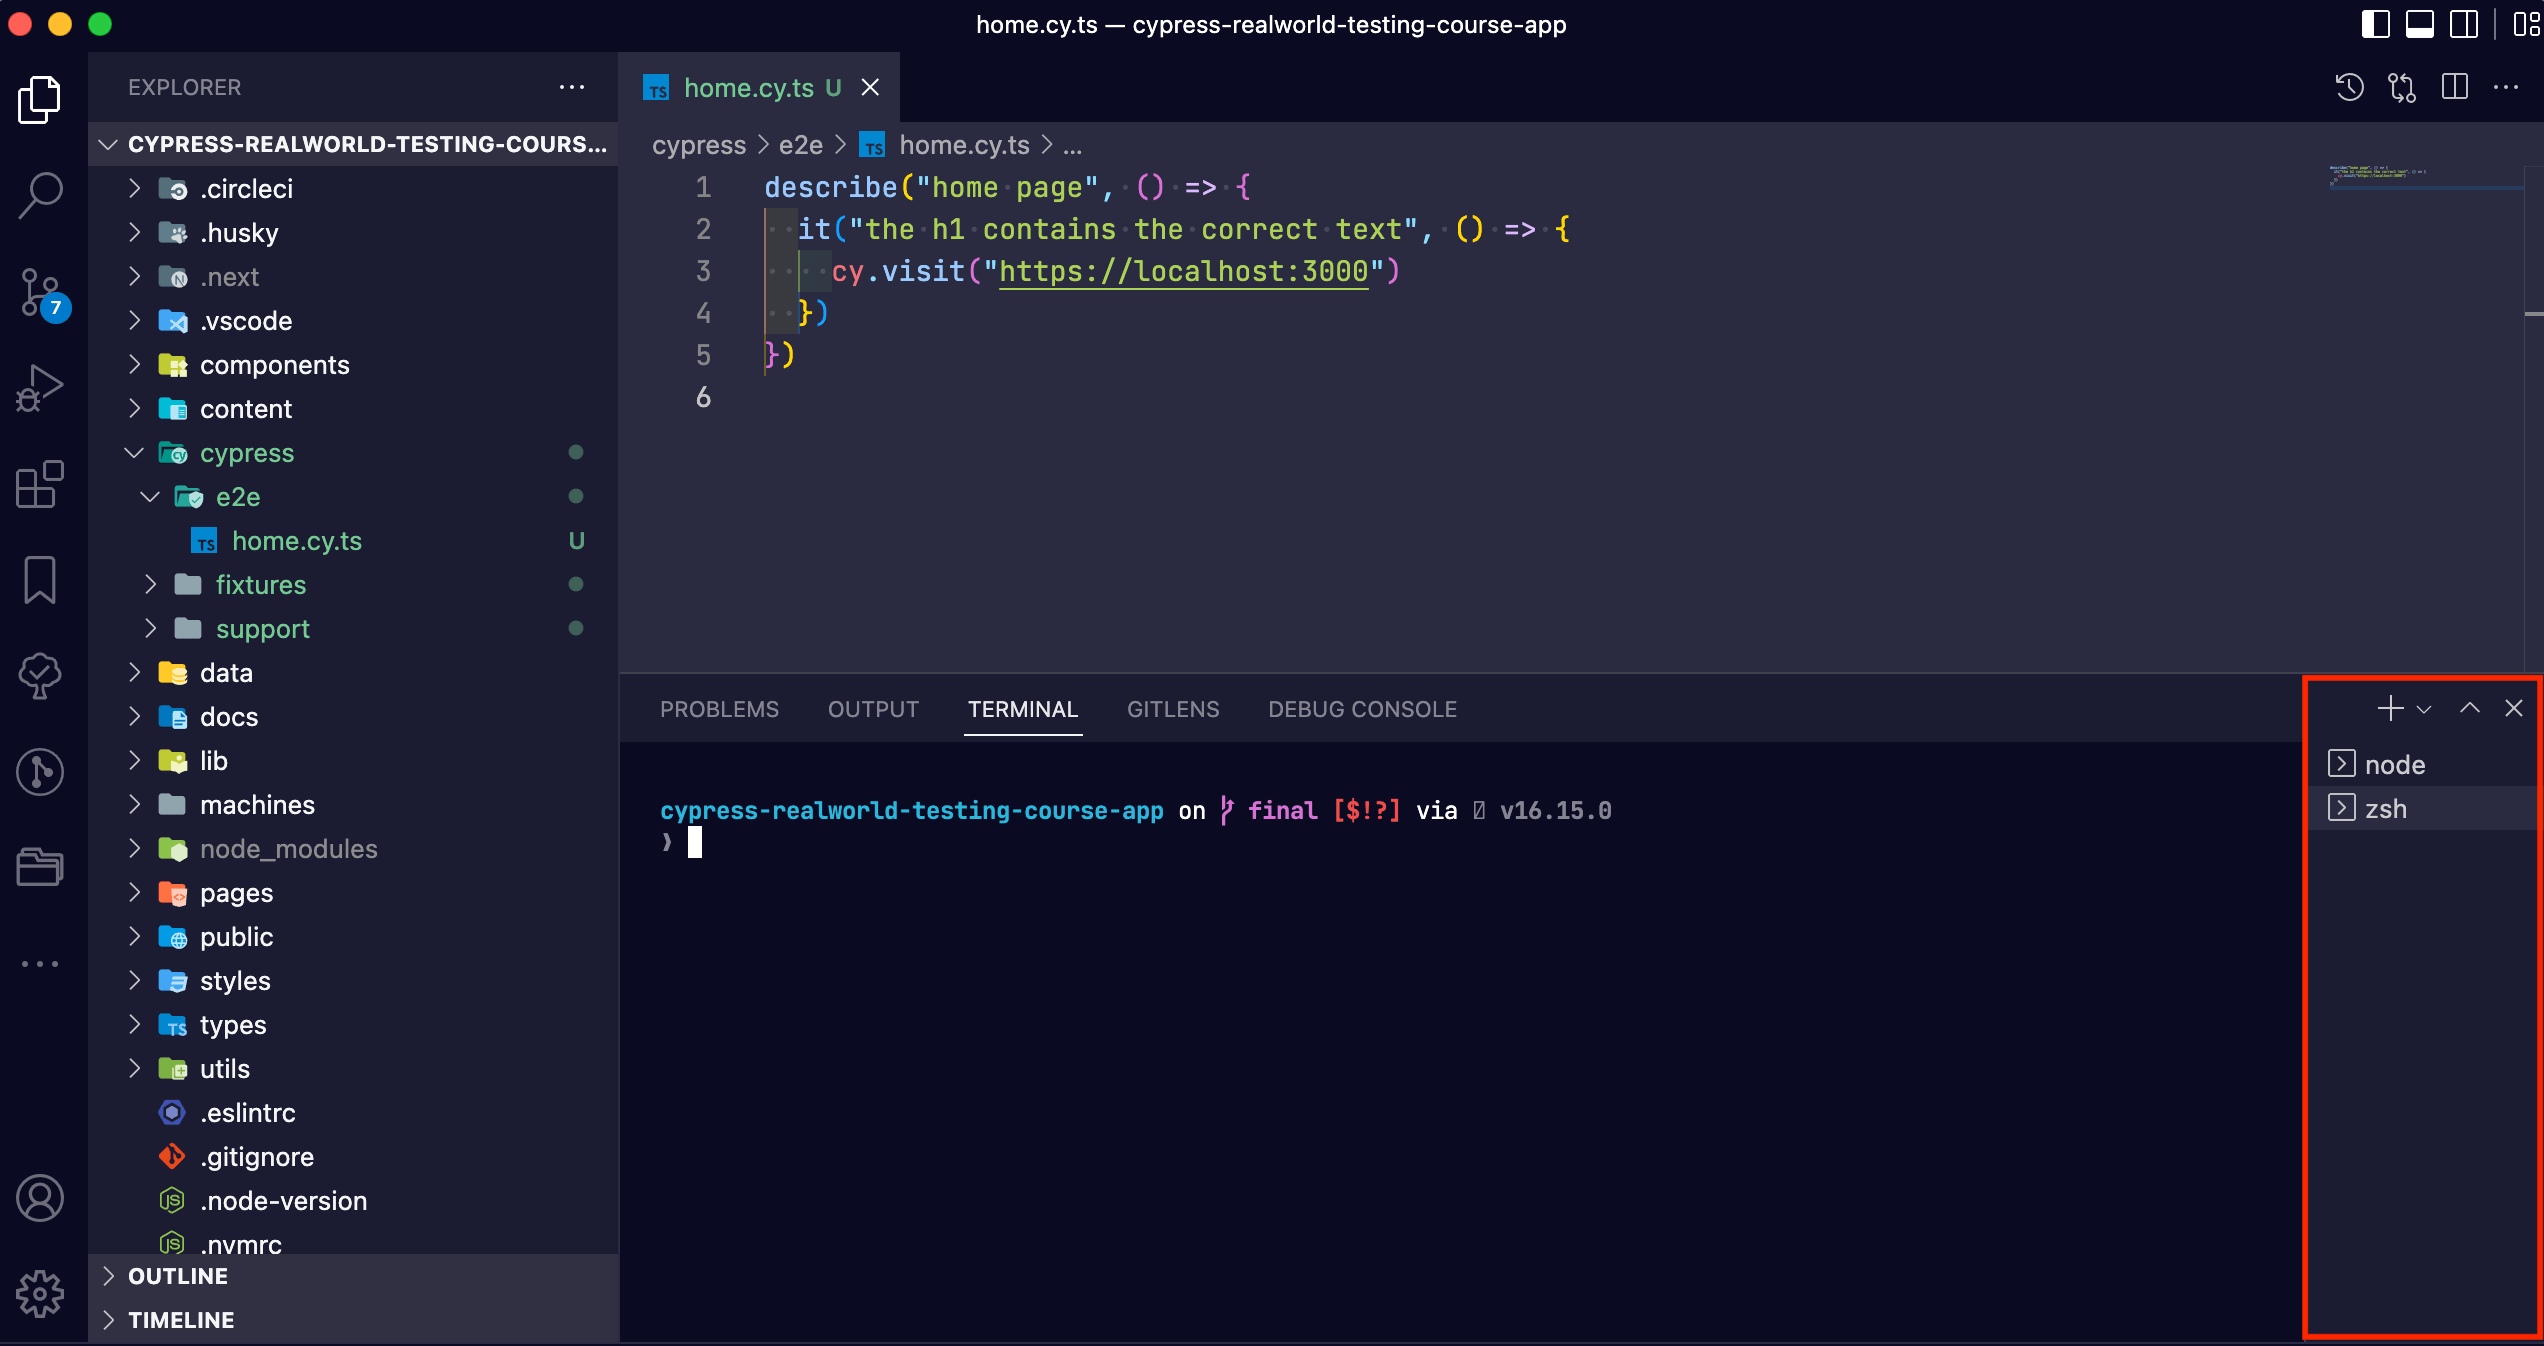
Open the cypress/e2e/home.cy.ts file in VSCode.
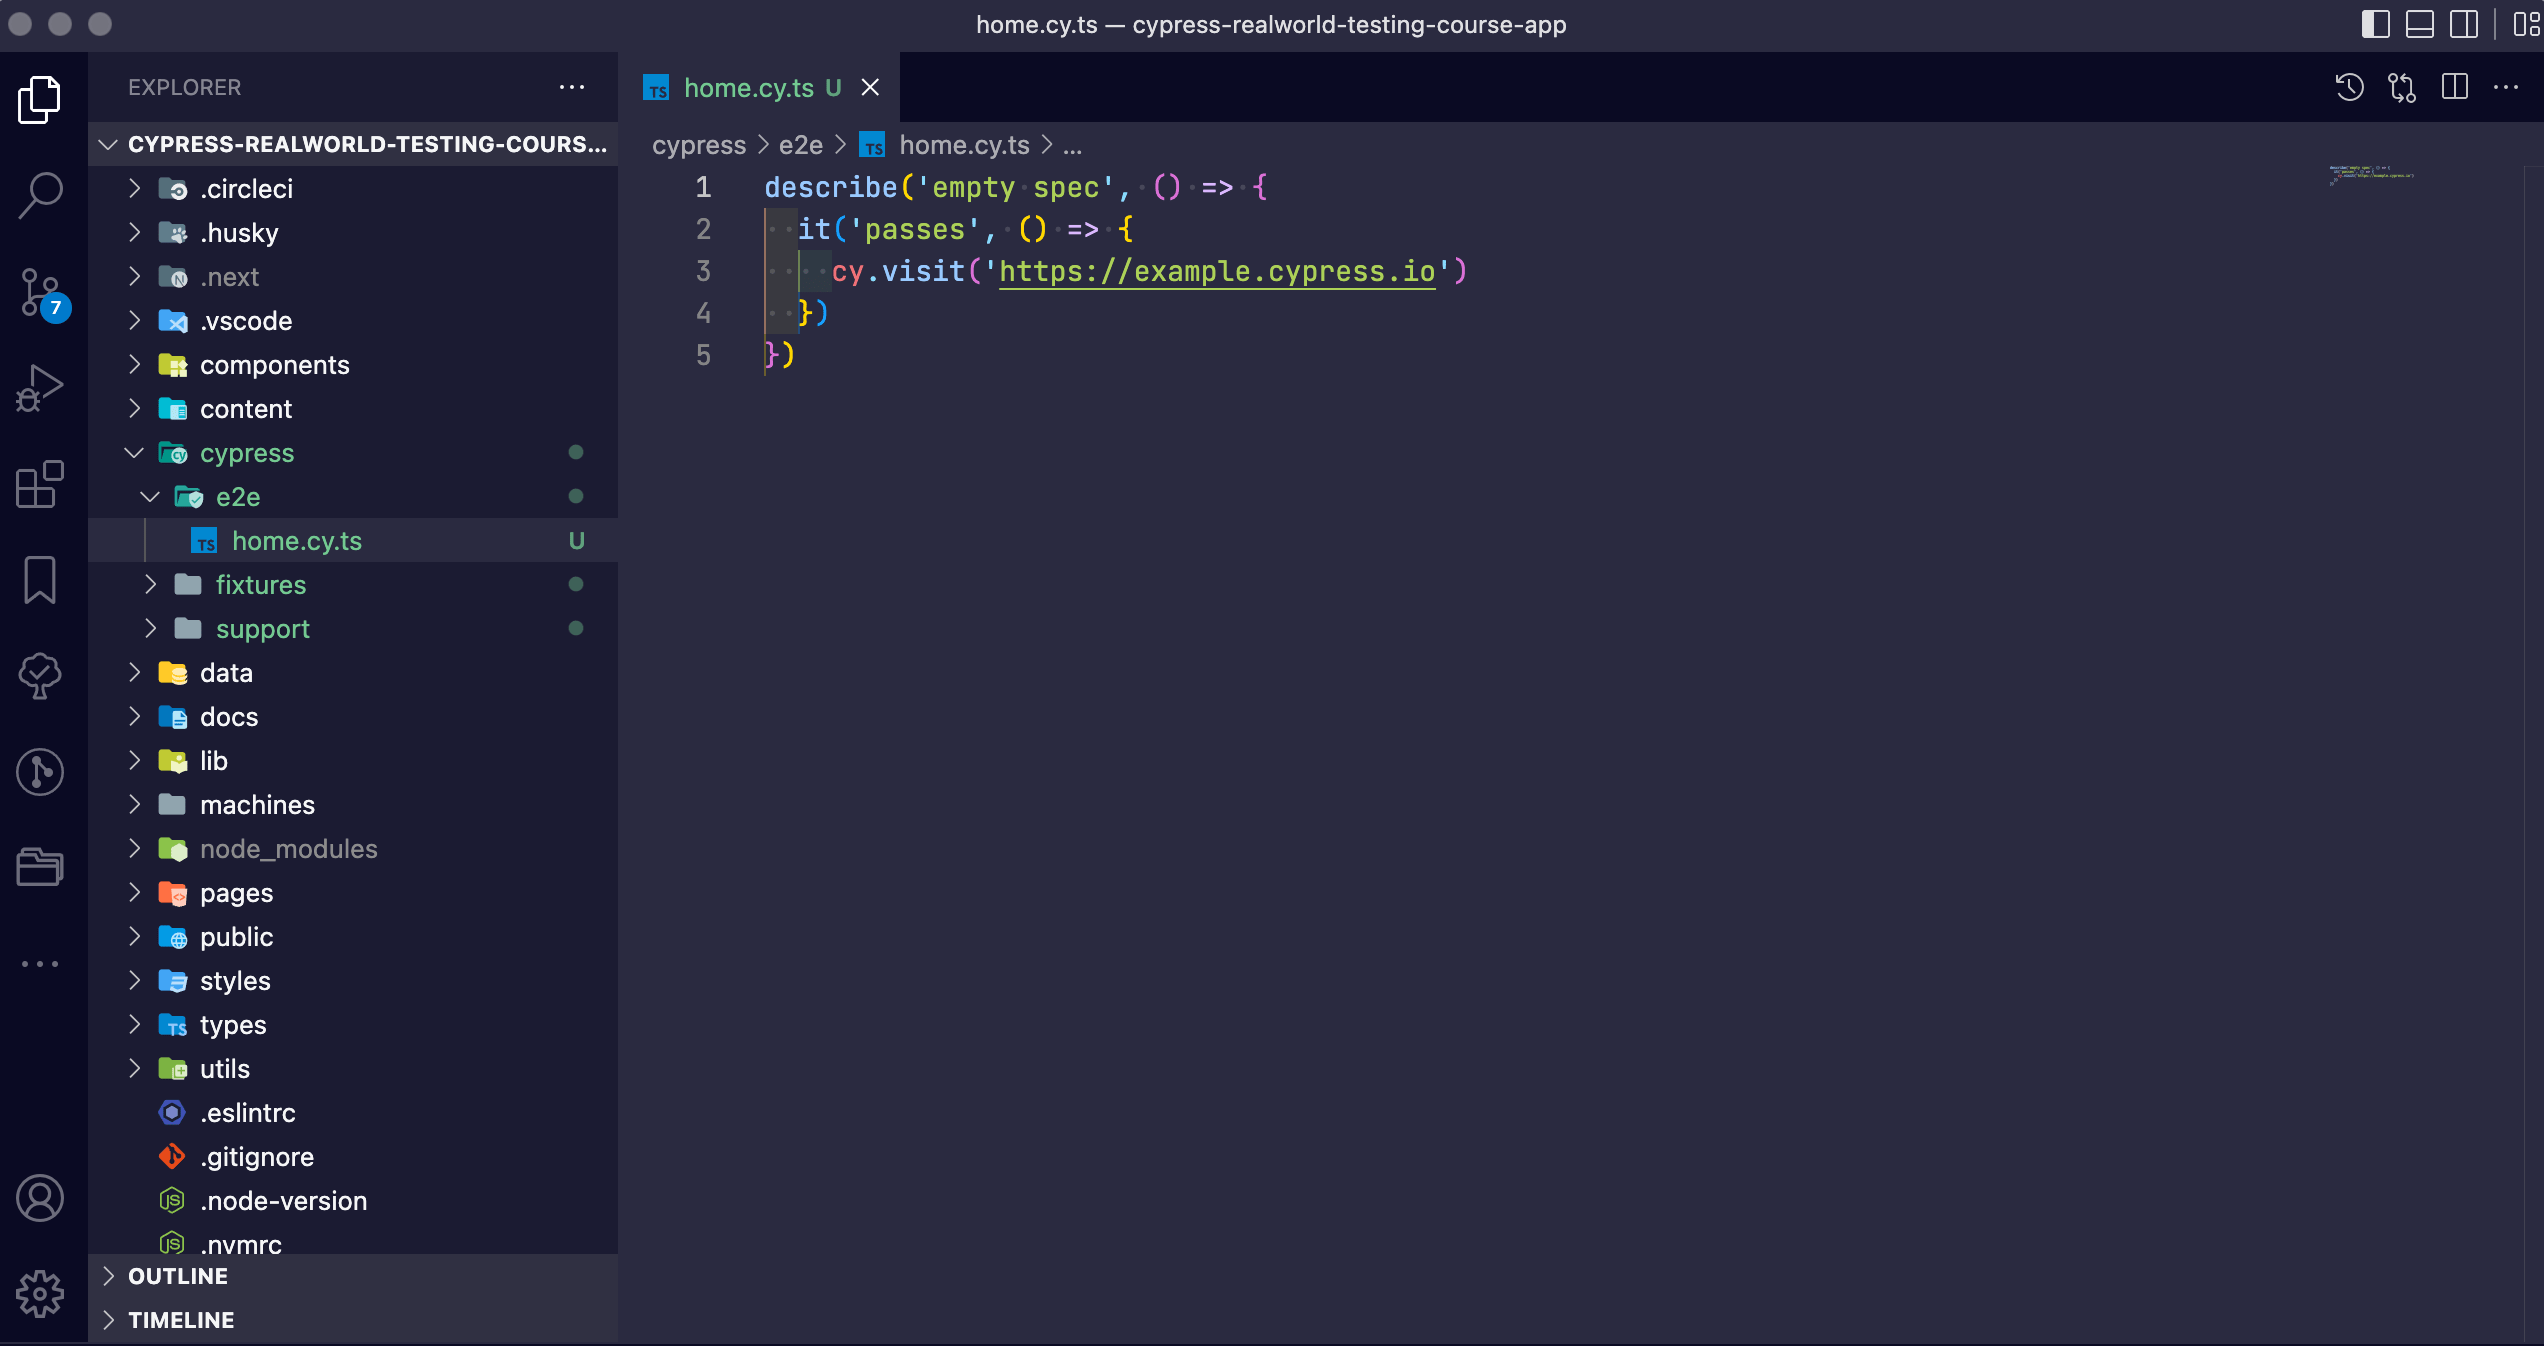
This is the default test that Cypress created when we asked it to create our spec file. We need to update it to run tests against our course application, but before we do that, let's break down the code that is in this file.
describe("empty spec", () => {
  it("passes", () => {
    cy.visit("https://example.cypress.io")
  })
})
On the first line, we see what is commonly referred to as a “describe block.”
describe("empty spec", () => {})
The describe() function takes two arguments. The first is a string which is a description of the tests contained within it. The second is a callback function. Since this file is going to contain tests for our home page, let's update this to say “home page.”
describe("home page", () => {
  it("passes", () => {
    cy.visit("https://example.cypress.io")
  })
})
Next, within the body of our describe() is what is commonly referred to as an “it block.”
This is our actual test.
Each time you see it() within a given spec file that is a single test. It takes the exact same arguments as the describe() function: first a string and then a callback function. Let’s update the string to the following:
describe("home page", () => {
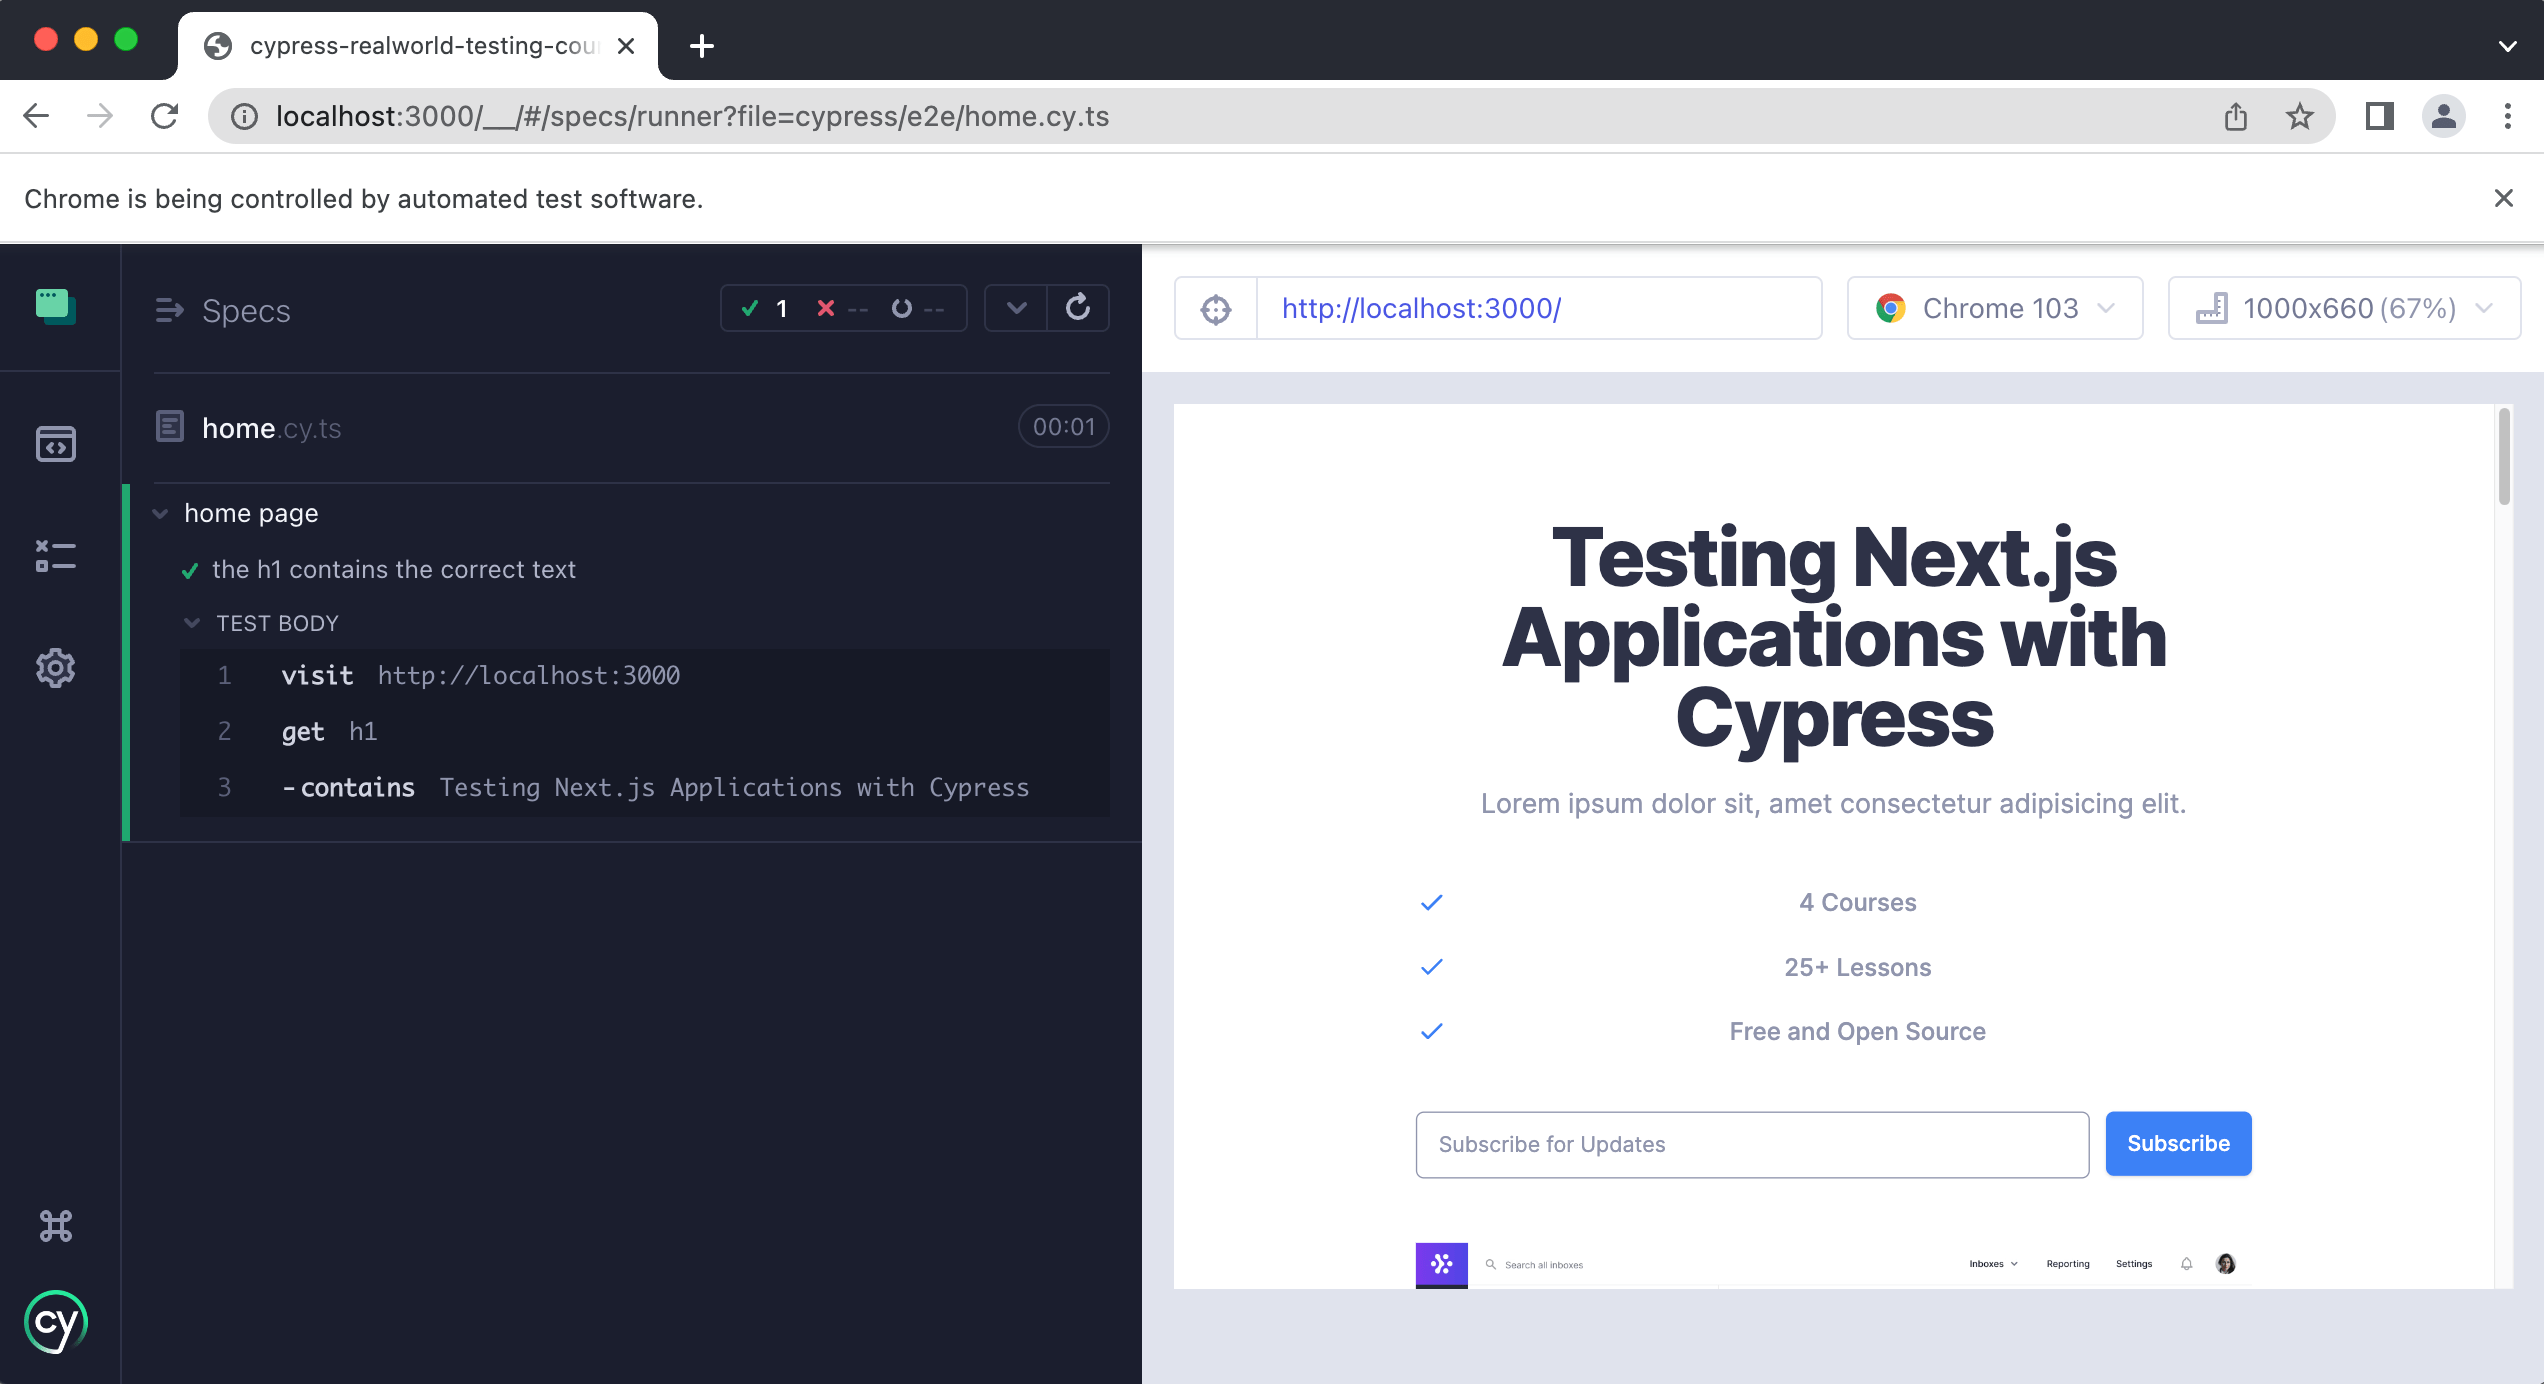
it("the h1 contains the correct text", () => {
cy.visit("https://example.cypress.io")
})
})
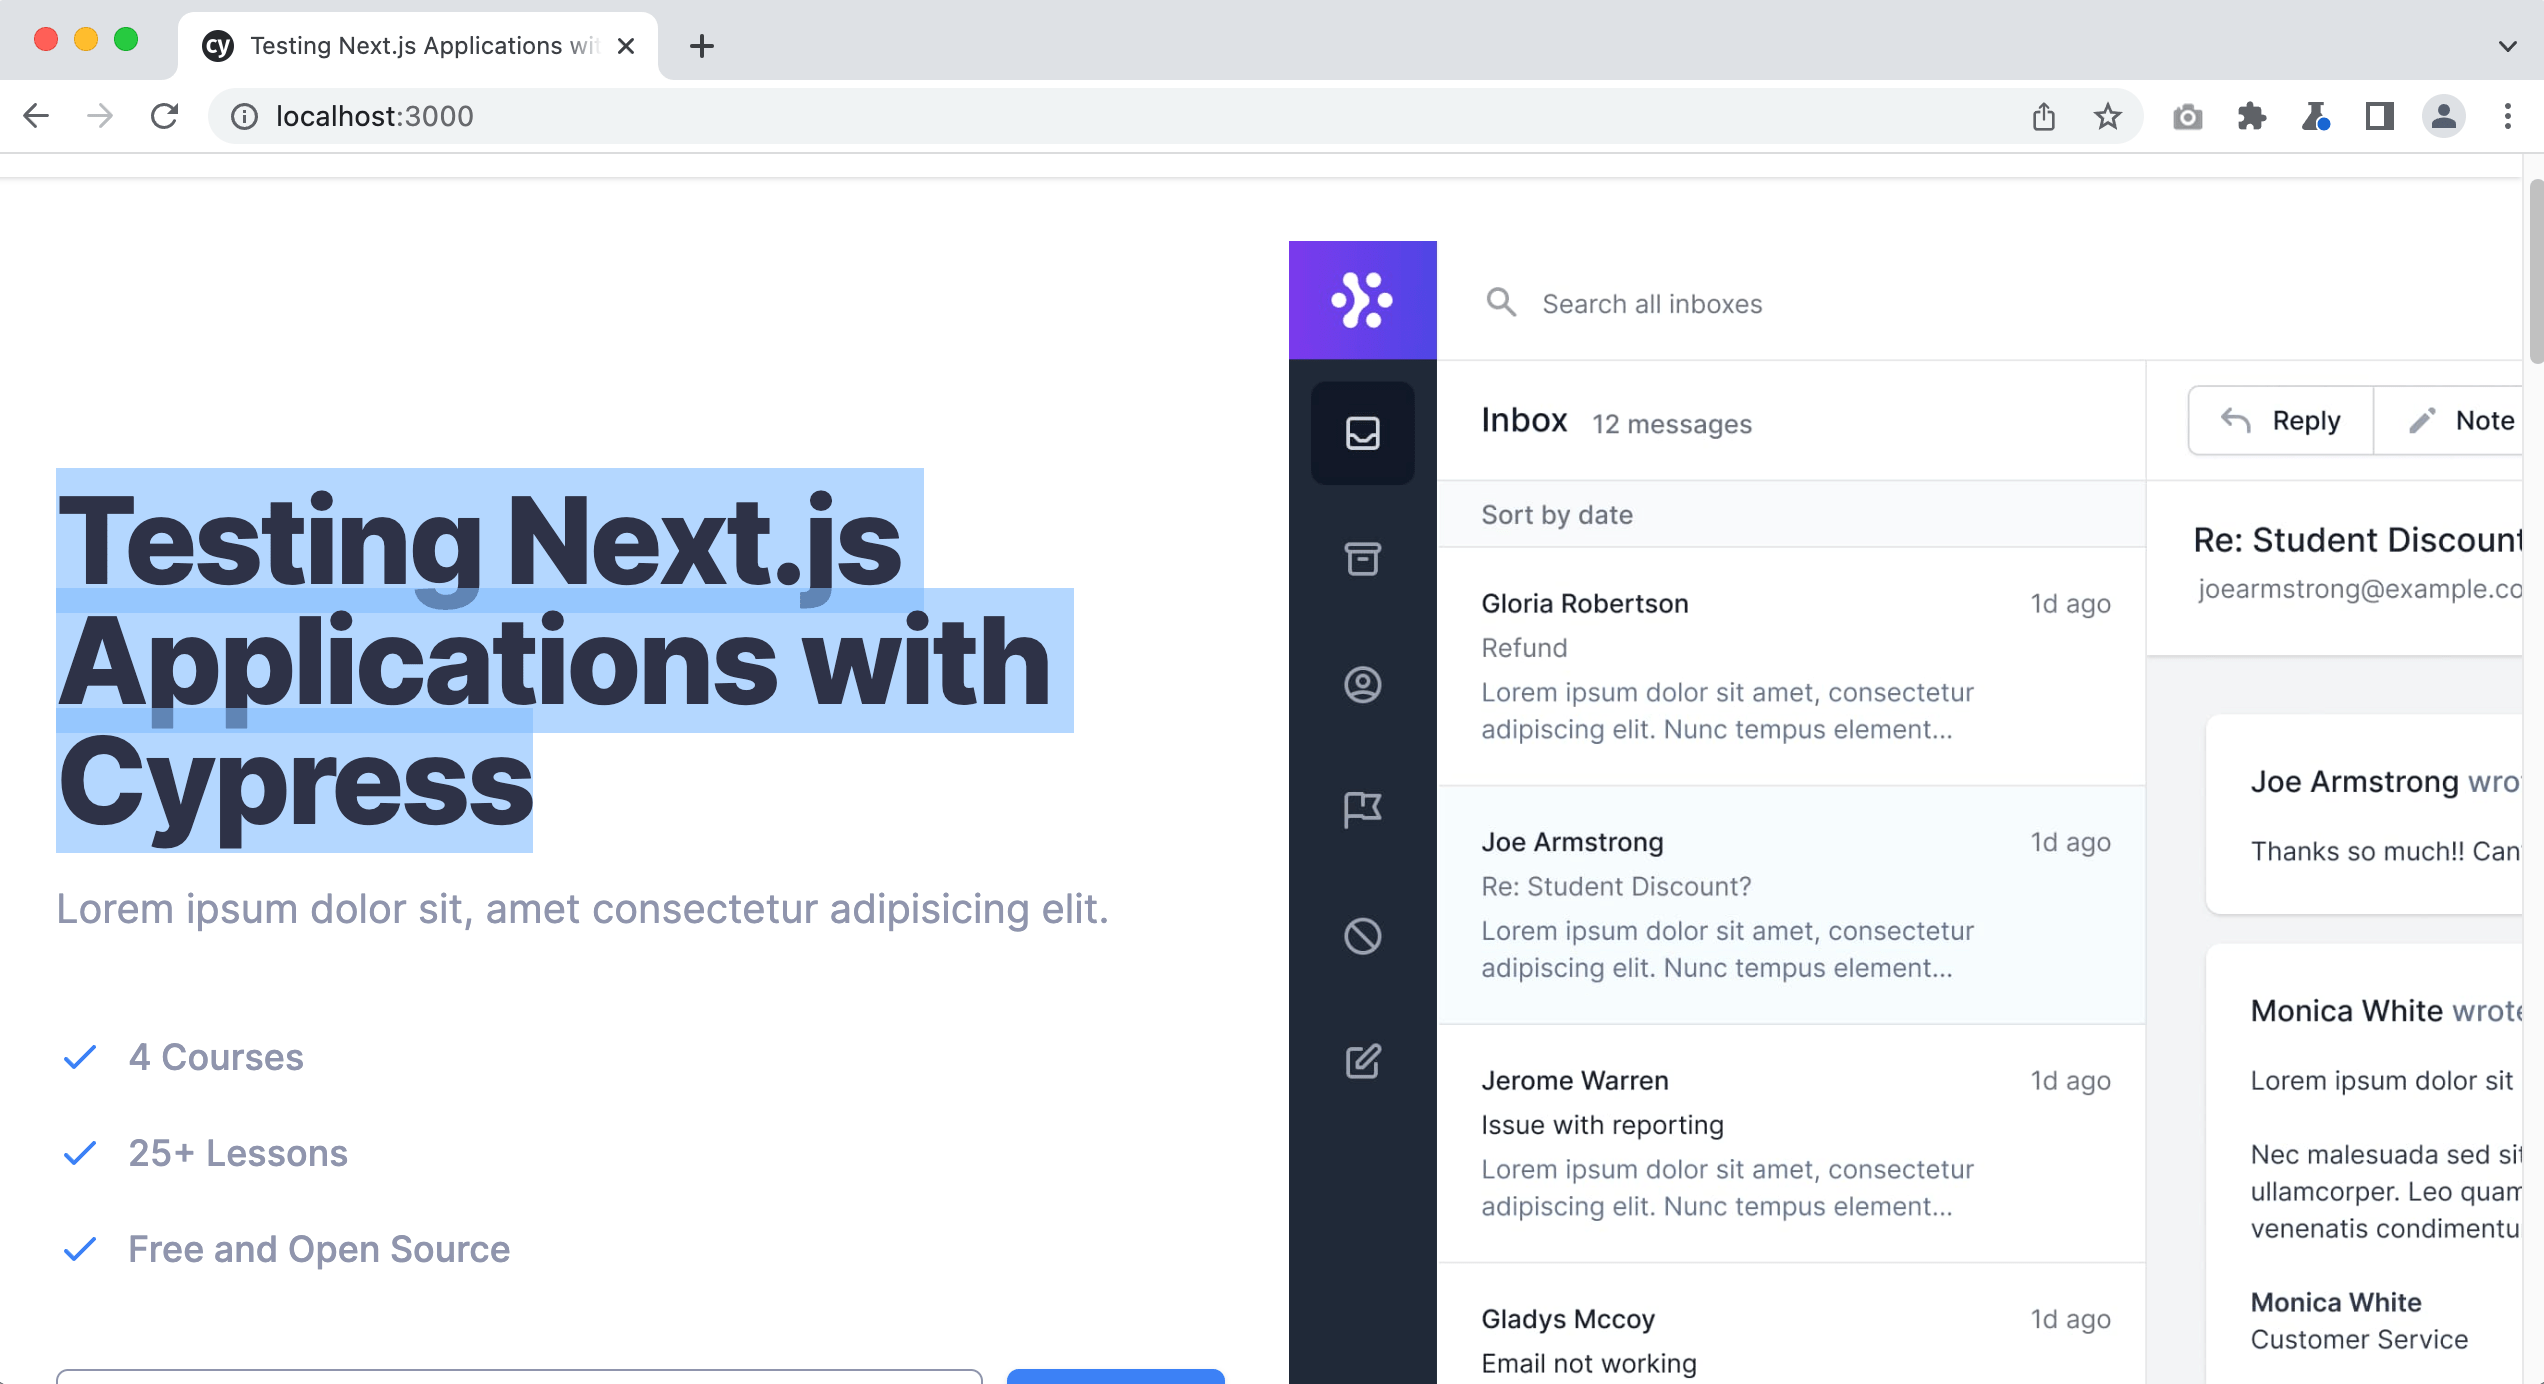
For our first test, we are going to be writing a test that asserts that the h1 on the home page contains the correct text (which is highlighted in the screenshot below).
Finally, we see cy.visit() within the body of our it() block.
visit is a command that tells Cypress where to execute our tests. We are going to be running our application locally on localhost:3000 so let's update the cy.visit() with the correct address.
describe("home page", () => {
  it("the h1 contains the correct text", () => {
    cy.visit("http://localhost:3000")
  })
})
Now let's run our test.
info
Remember, to launch Cypress enter the following in your terminal.
npx cypress open
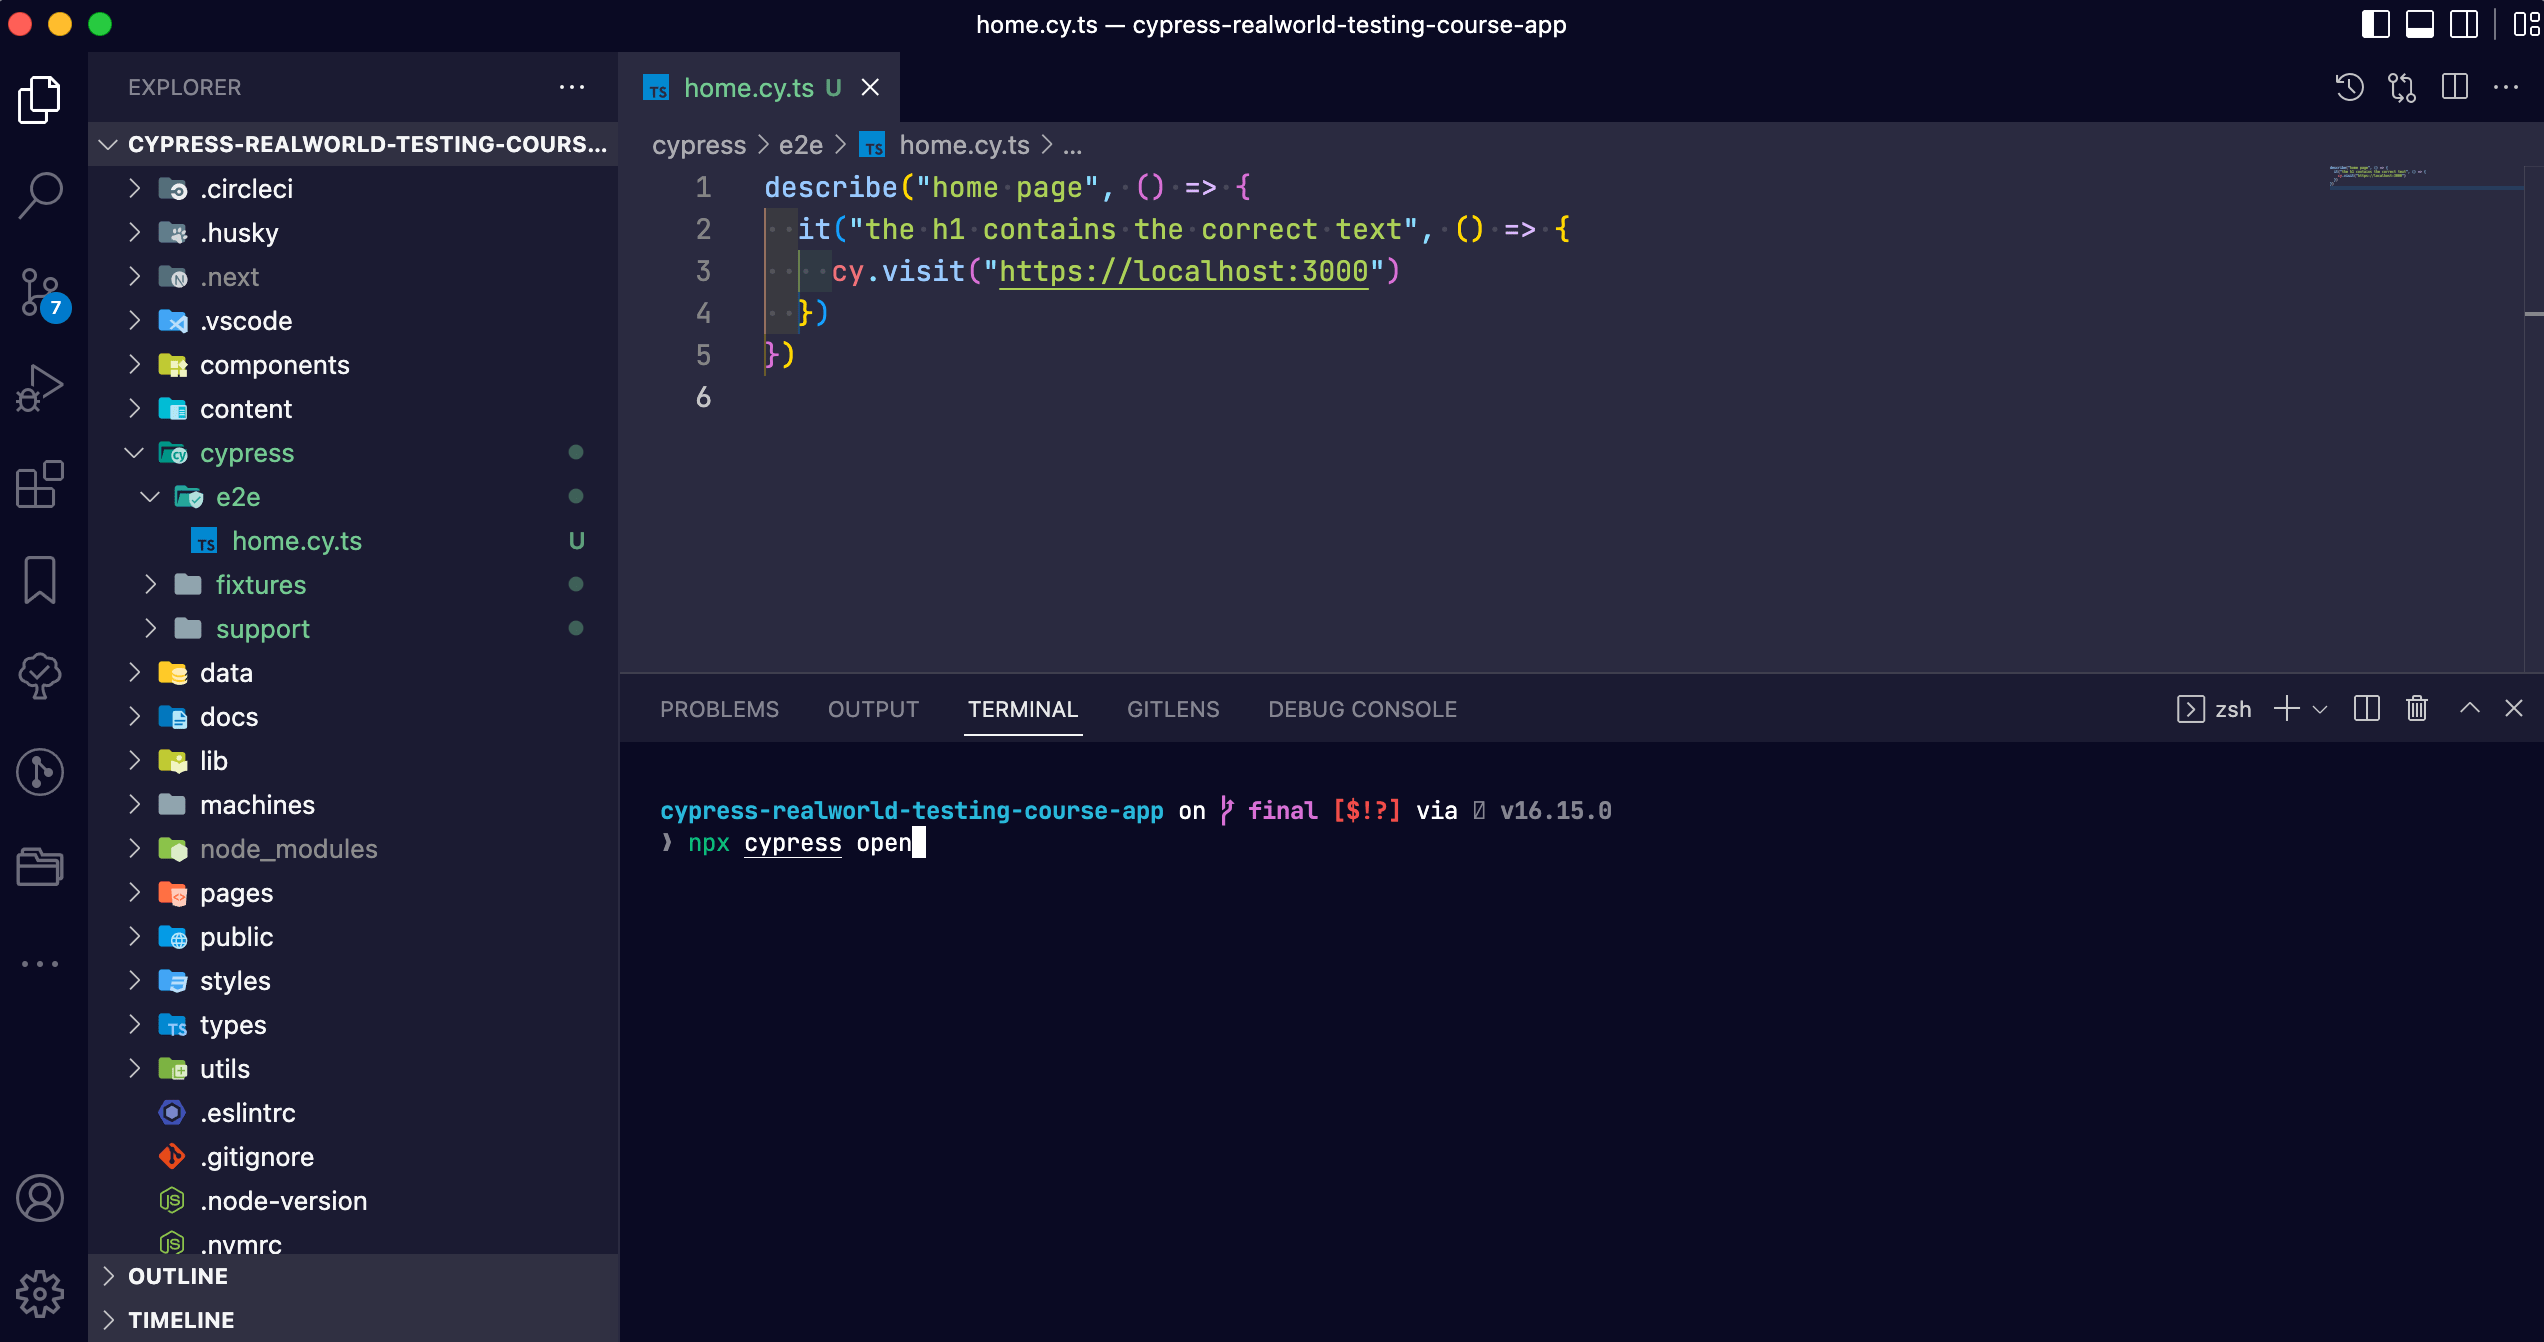
Click on “E2E Testing”
Then click on “Chrome” and the “Start E2E Testing in Chrome” button.
Next click on the “home.cy.ts” spec file.
You should see the following.
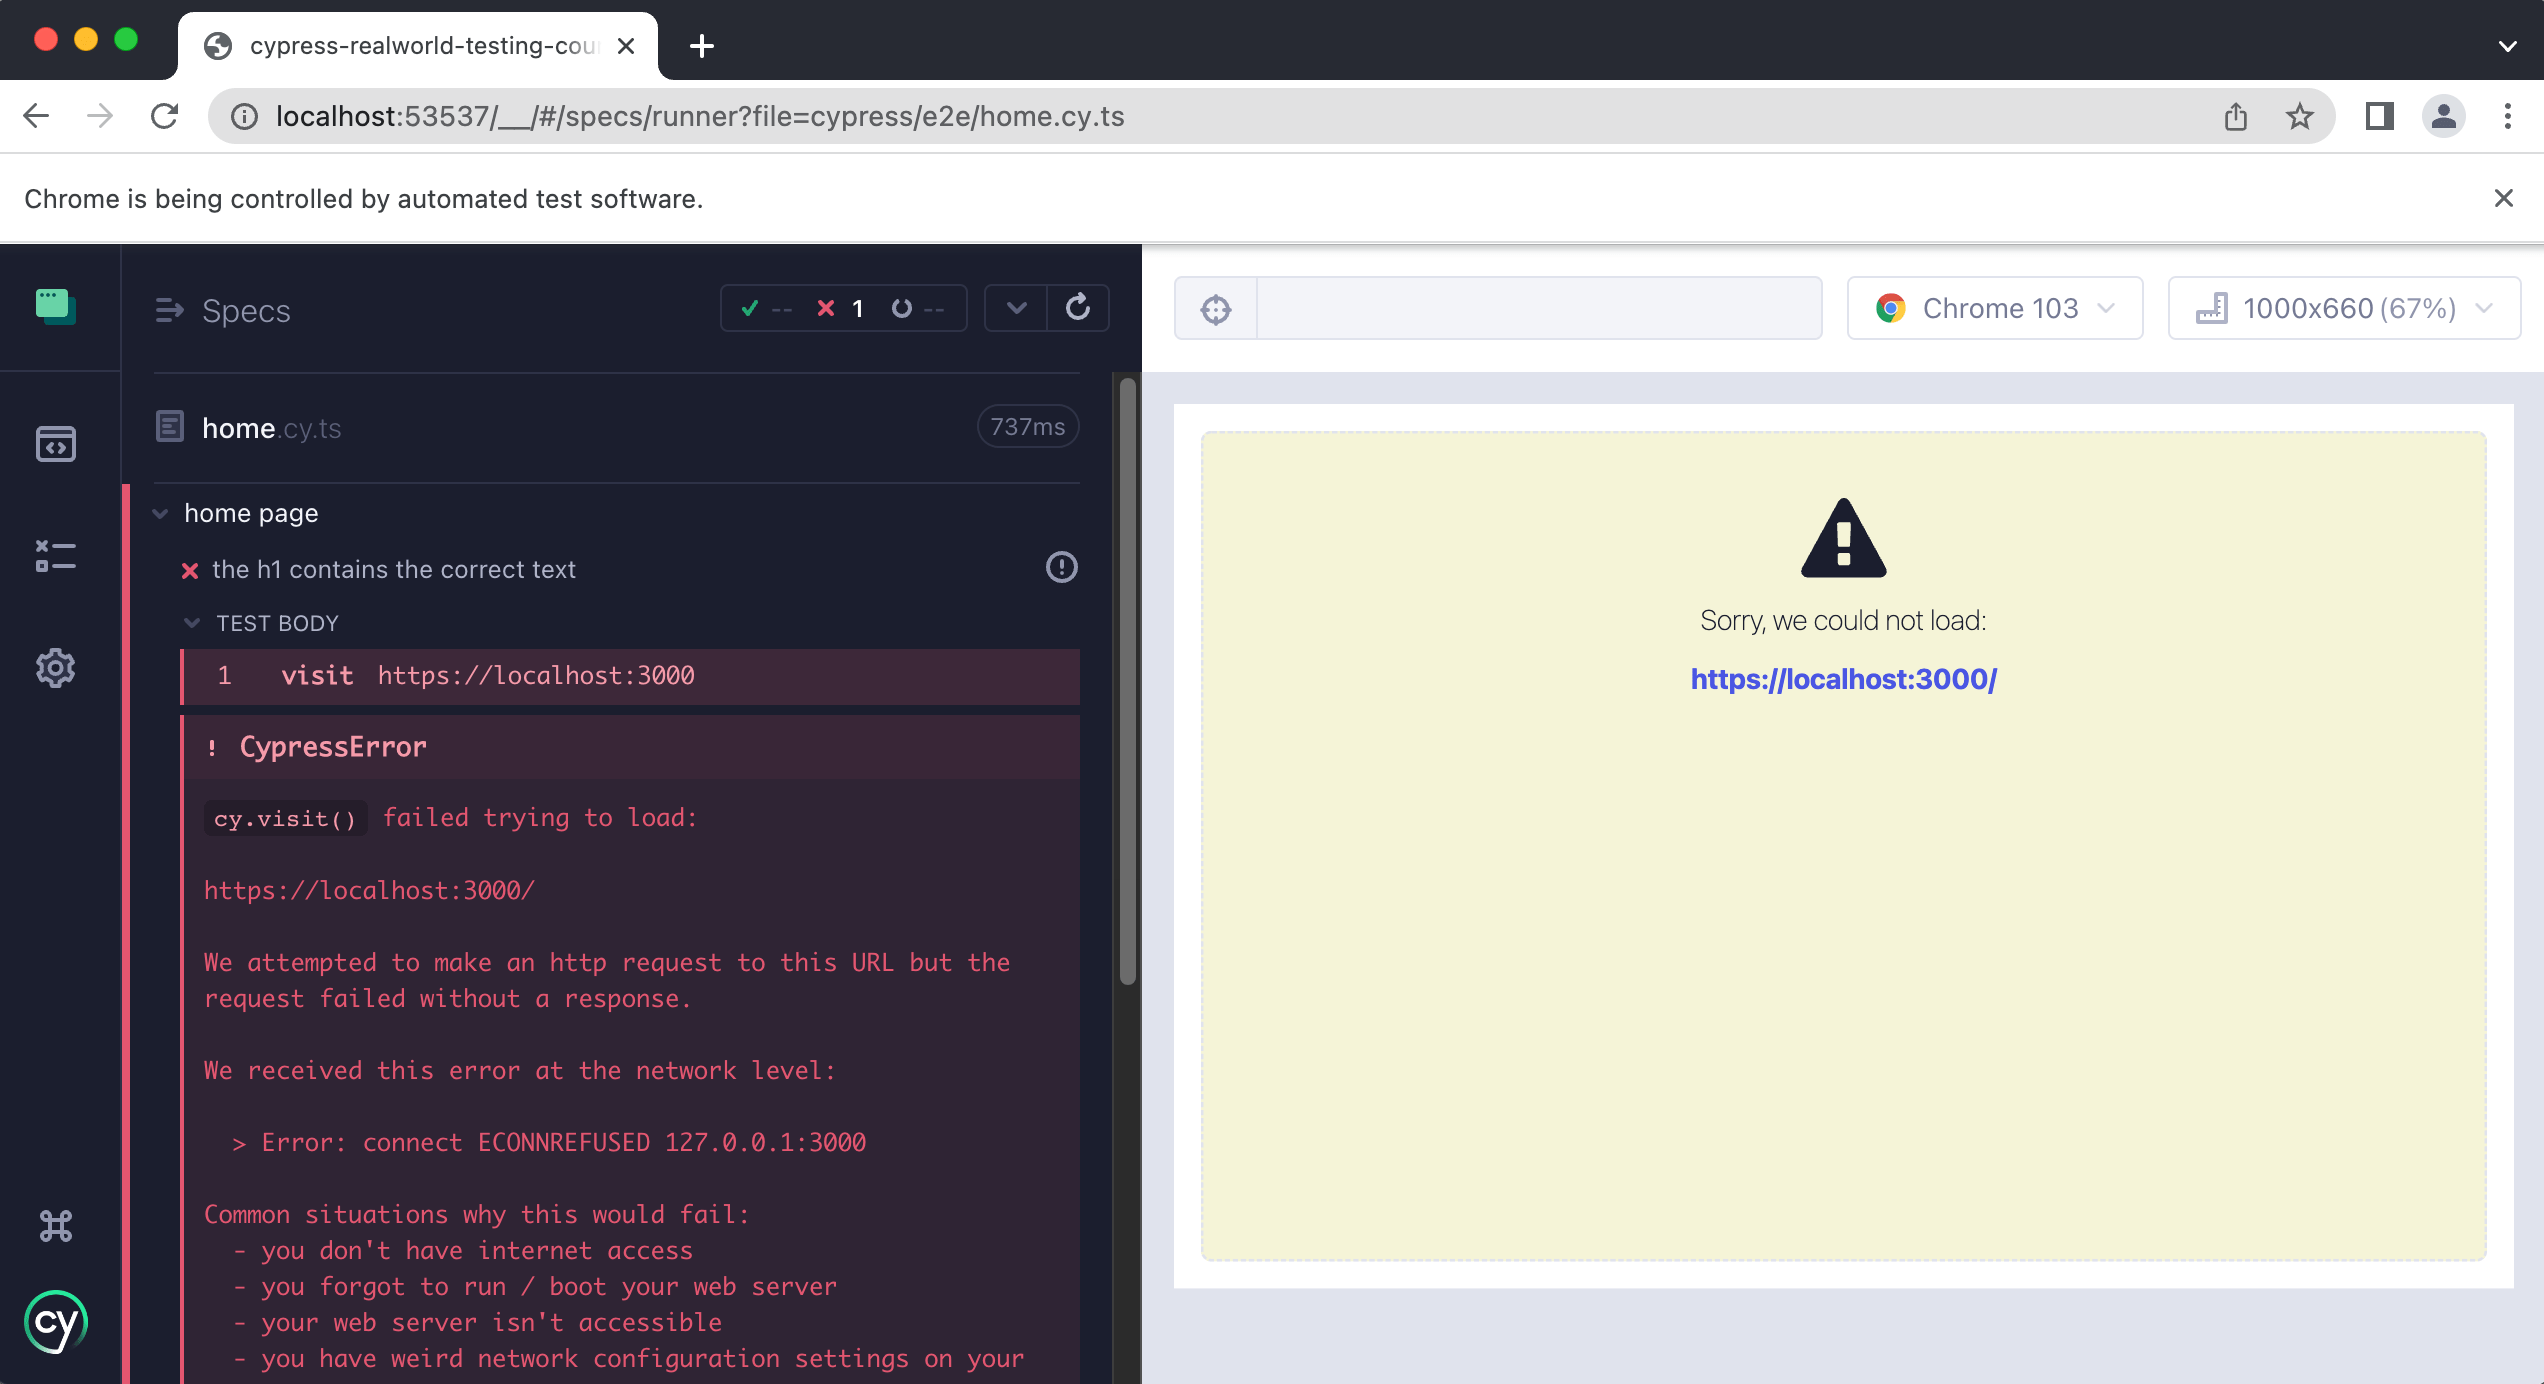
Debugging our first error
Cypress is throwing an error and says that it cannot load localhost:3000. The reason this is happening is that our application's dev server is not running. When running our Cypress tests we always need to have our application's local dev server running. Otherwise, we are going to see this error.
Since Cypress is currently running in our terminal like so:

We need to open another terminal window to run our application's dev server. You can do this in VSCode via the Terminal > New Terminal in the menu bar at the top.
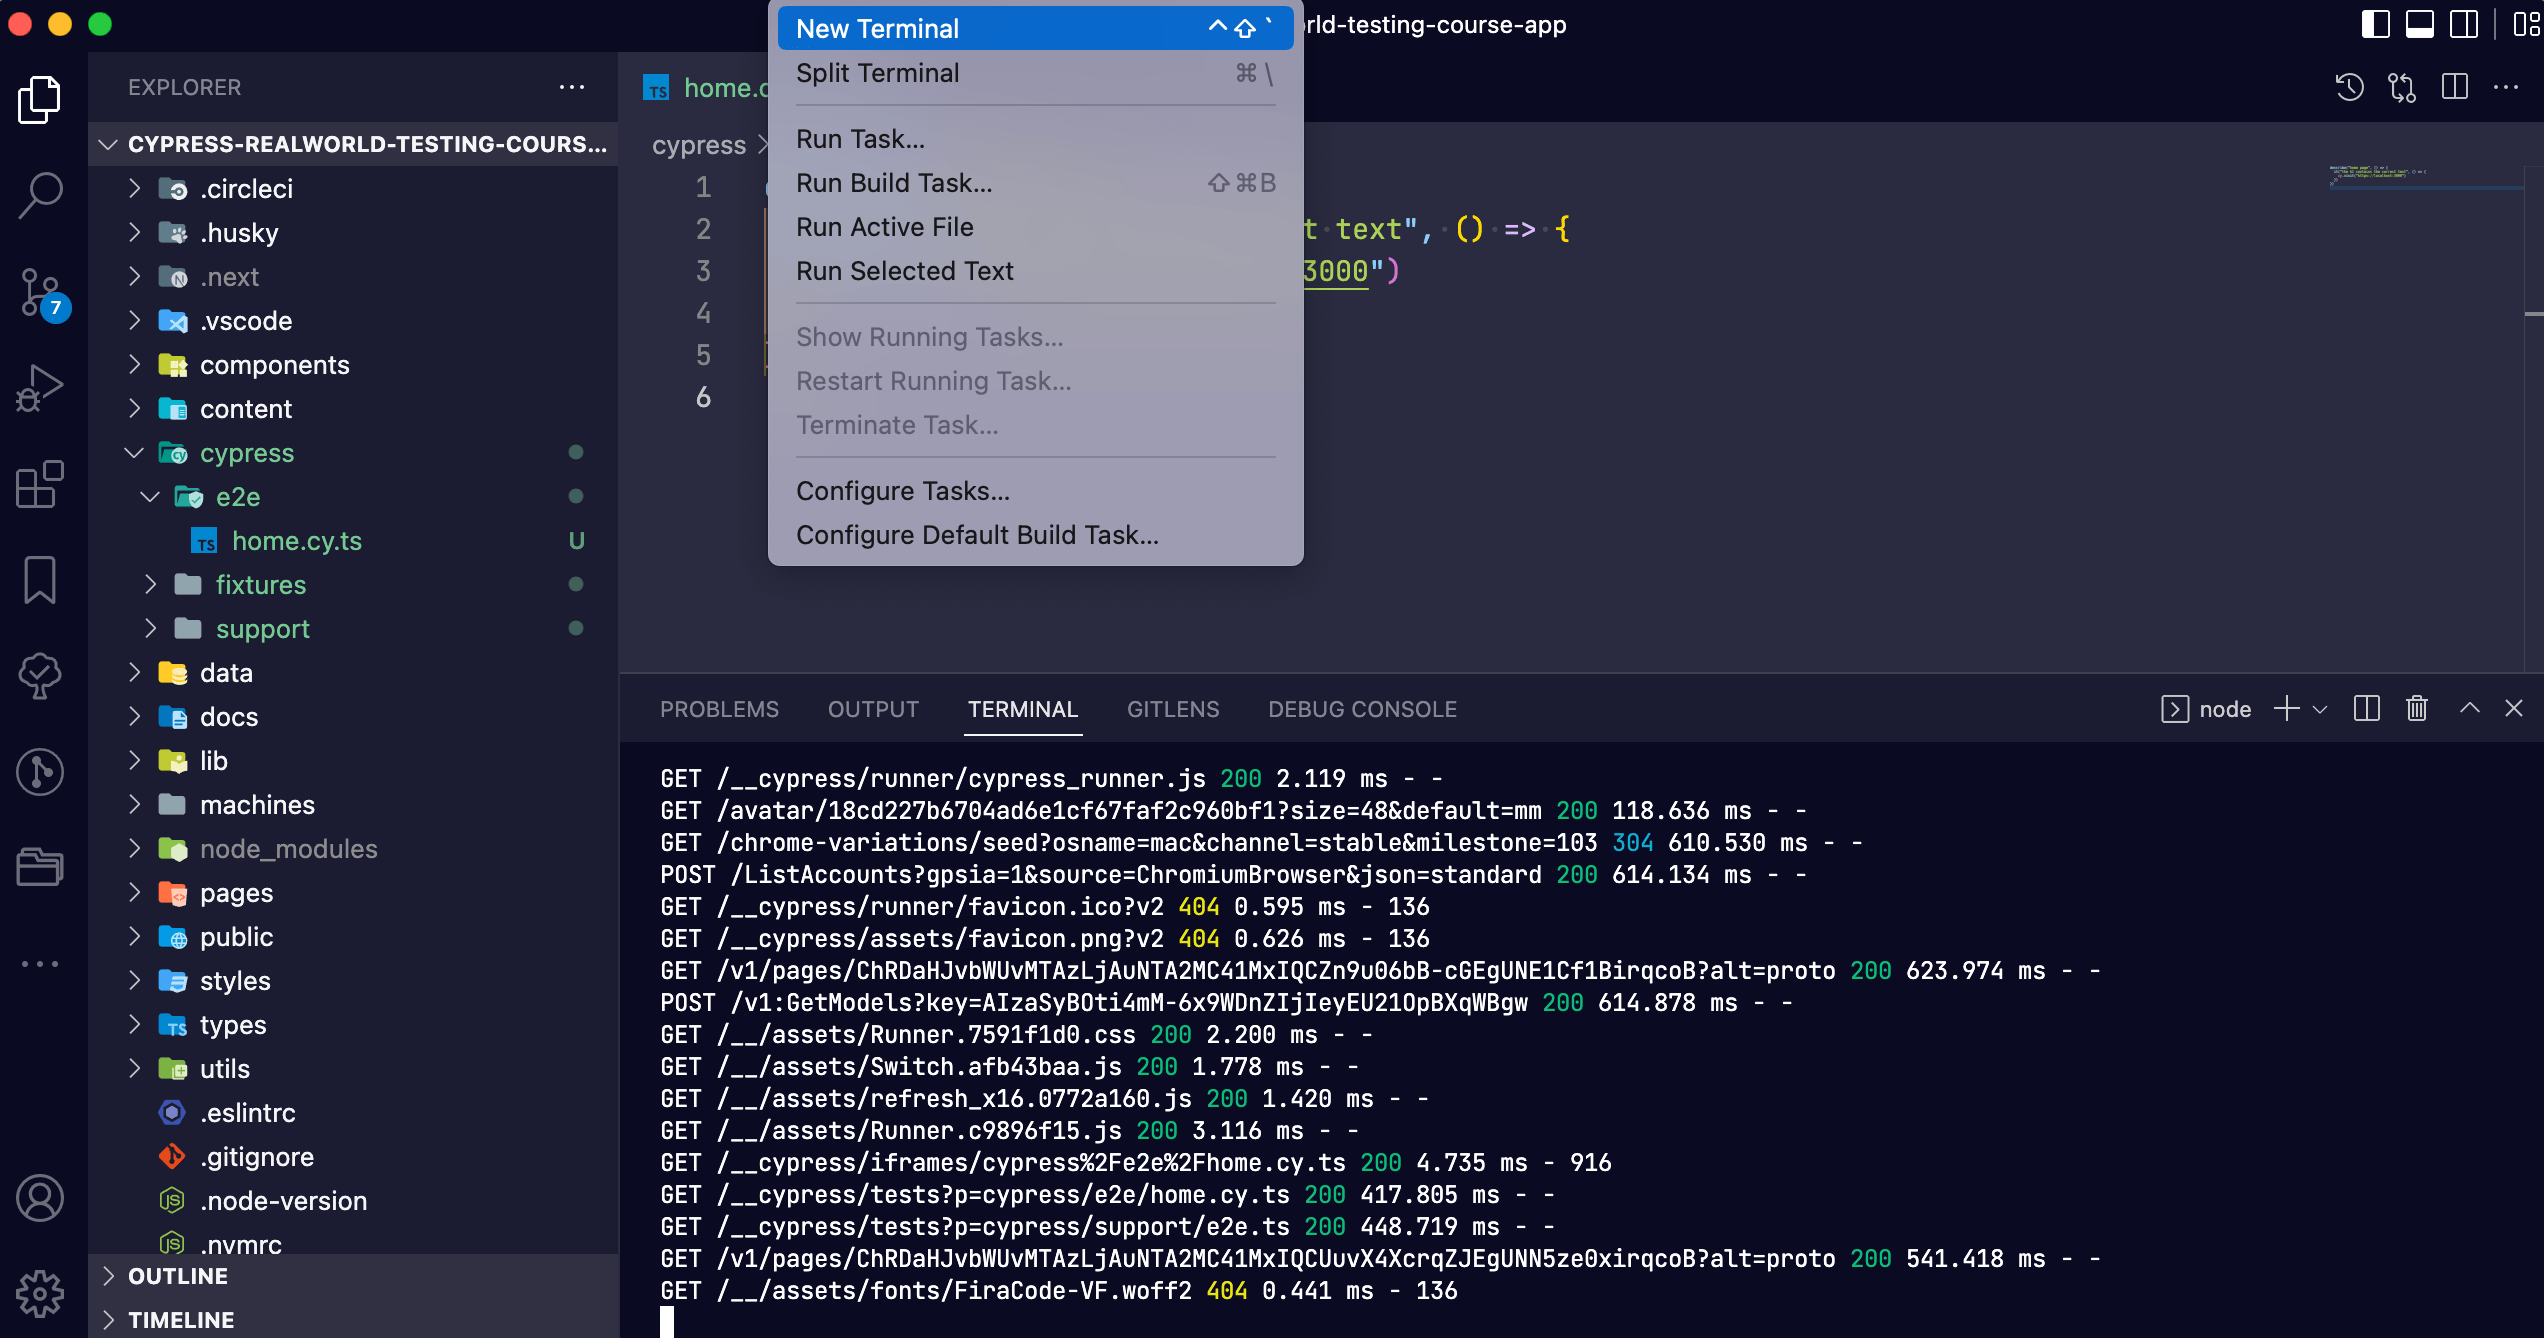
This will open a new terminal window within VSCode and a small sidebar on the right-hand side. You can navigate between both terminals by clicking on the icons in the right-hand sidebar.
Within this new terminal window, type the following to start our applications dev server:
npm run dev
Then open the Cypress test runner and re-run the test. You can do this by clicking on the “Run all tests” button at the top.
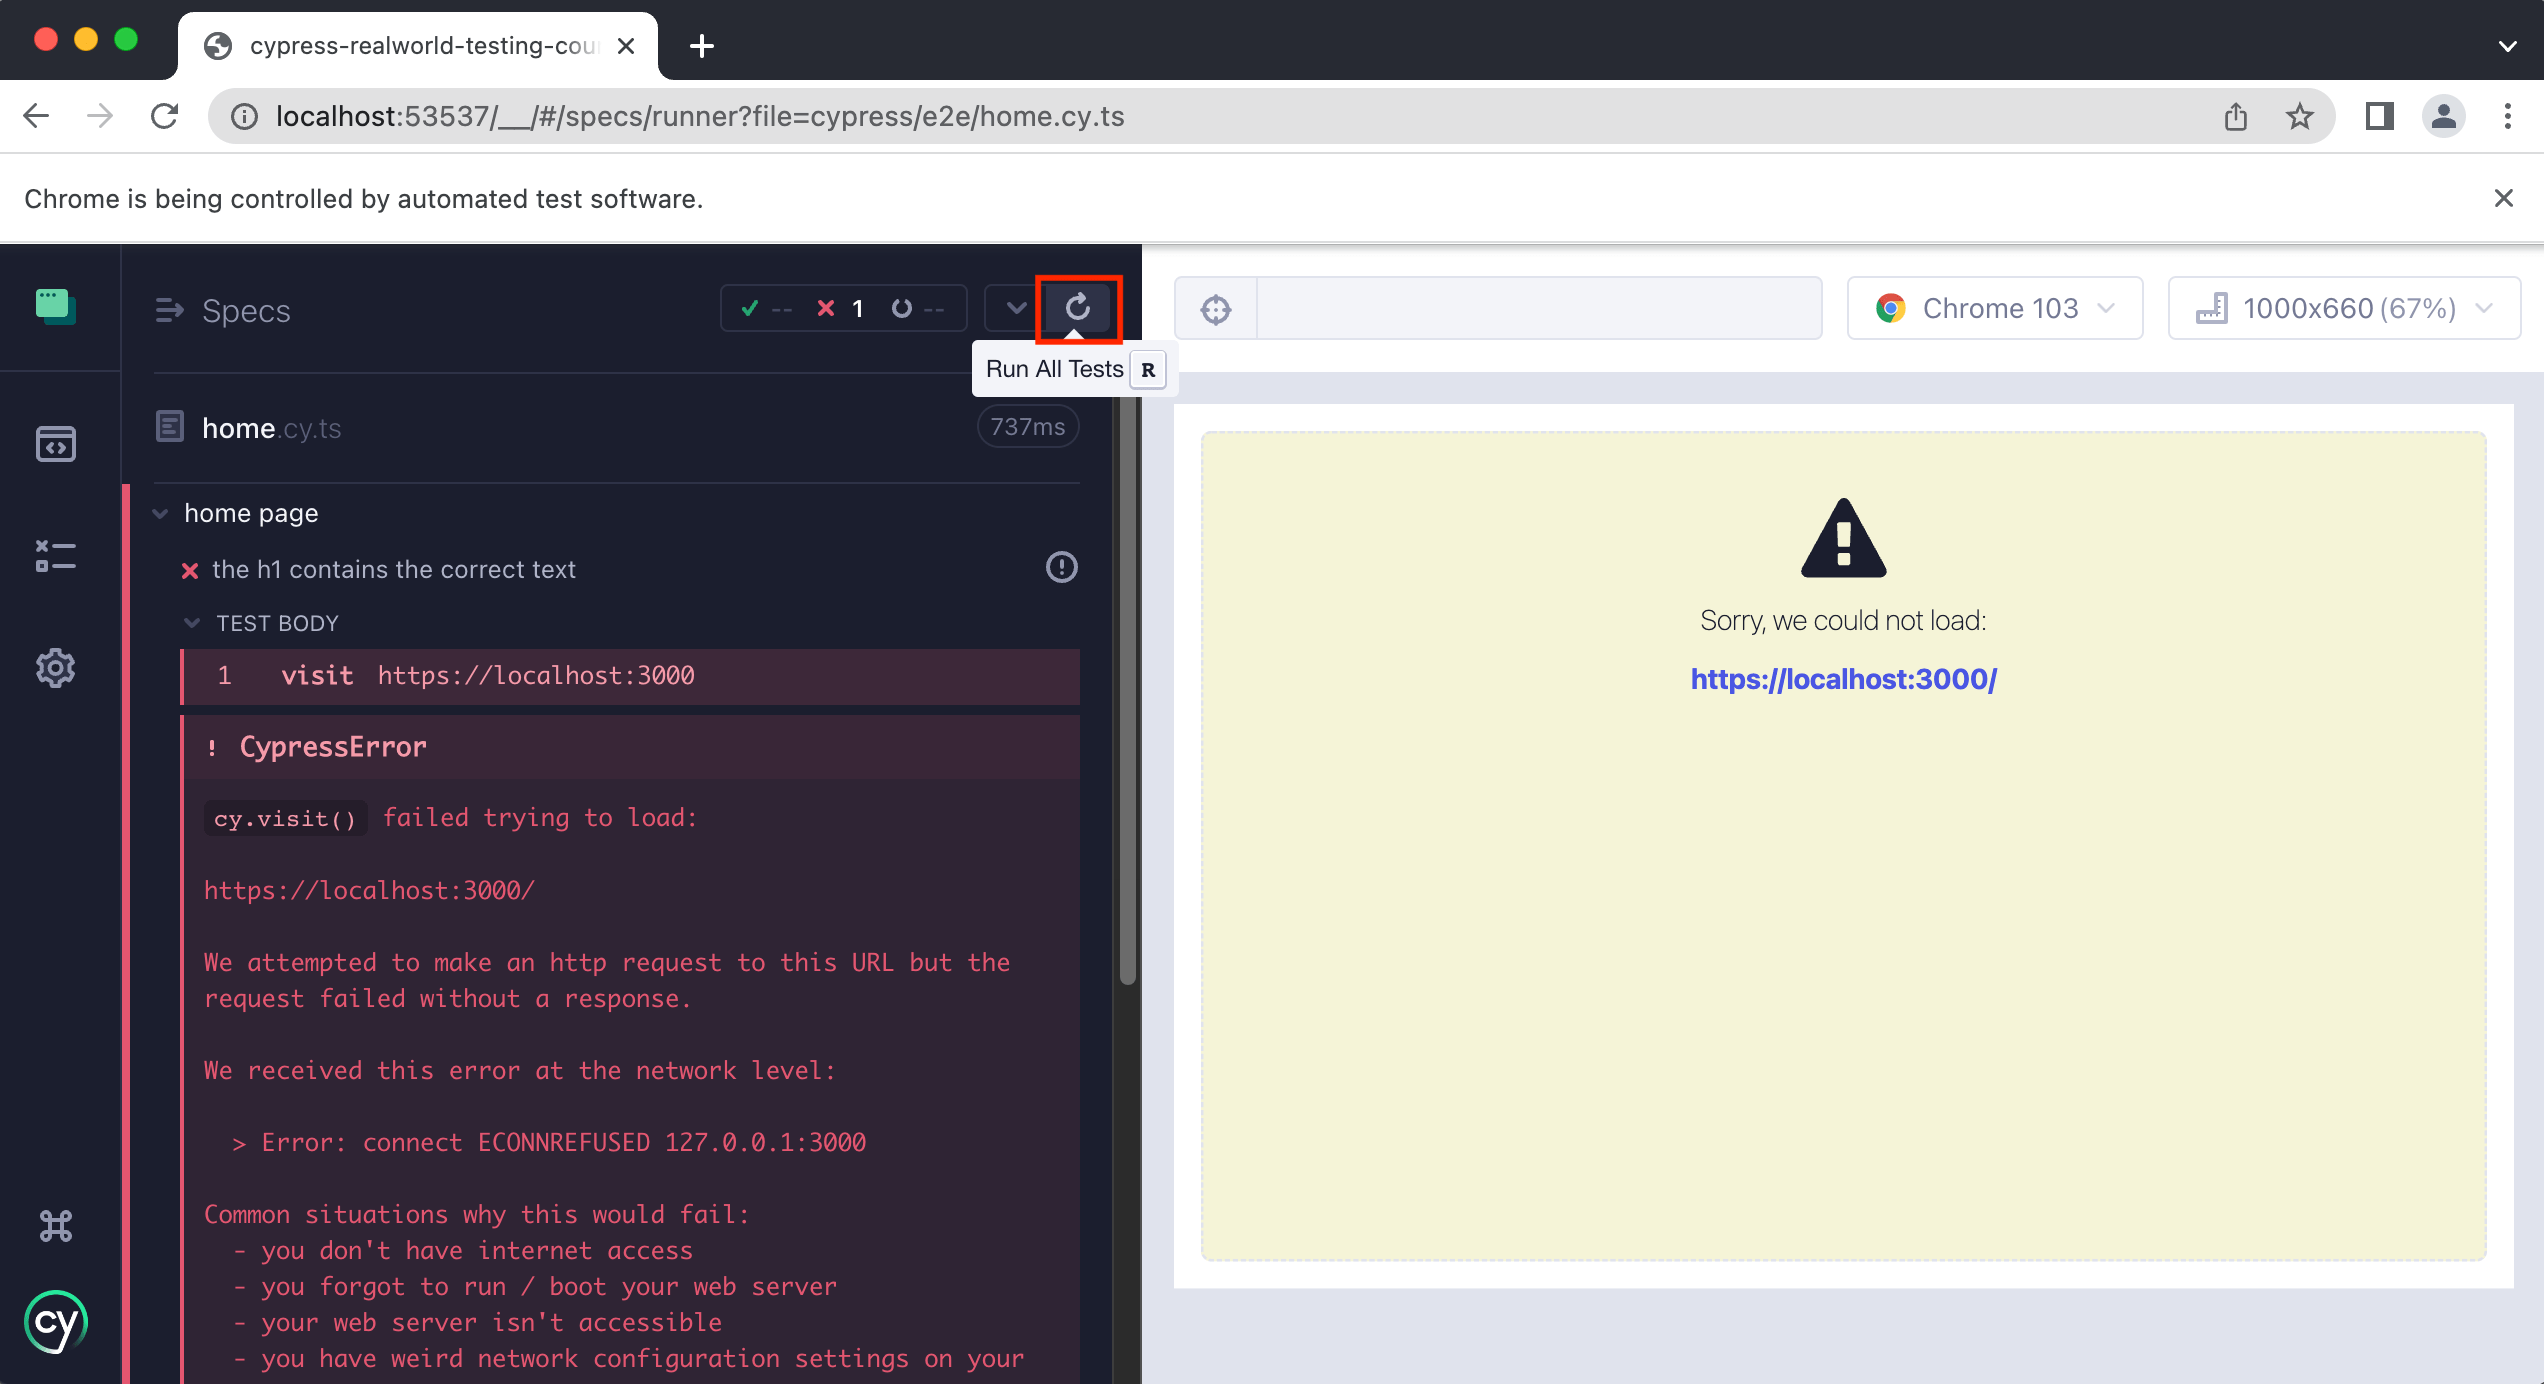
Or you can use the keyboard shortcut of r and that will do the same thing. Once you re-run the test, it should now be passing.
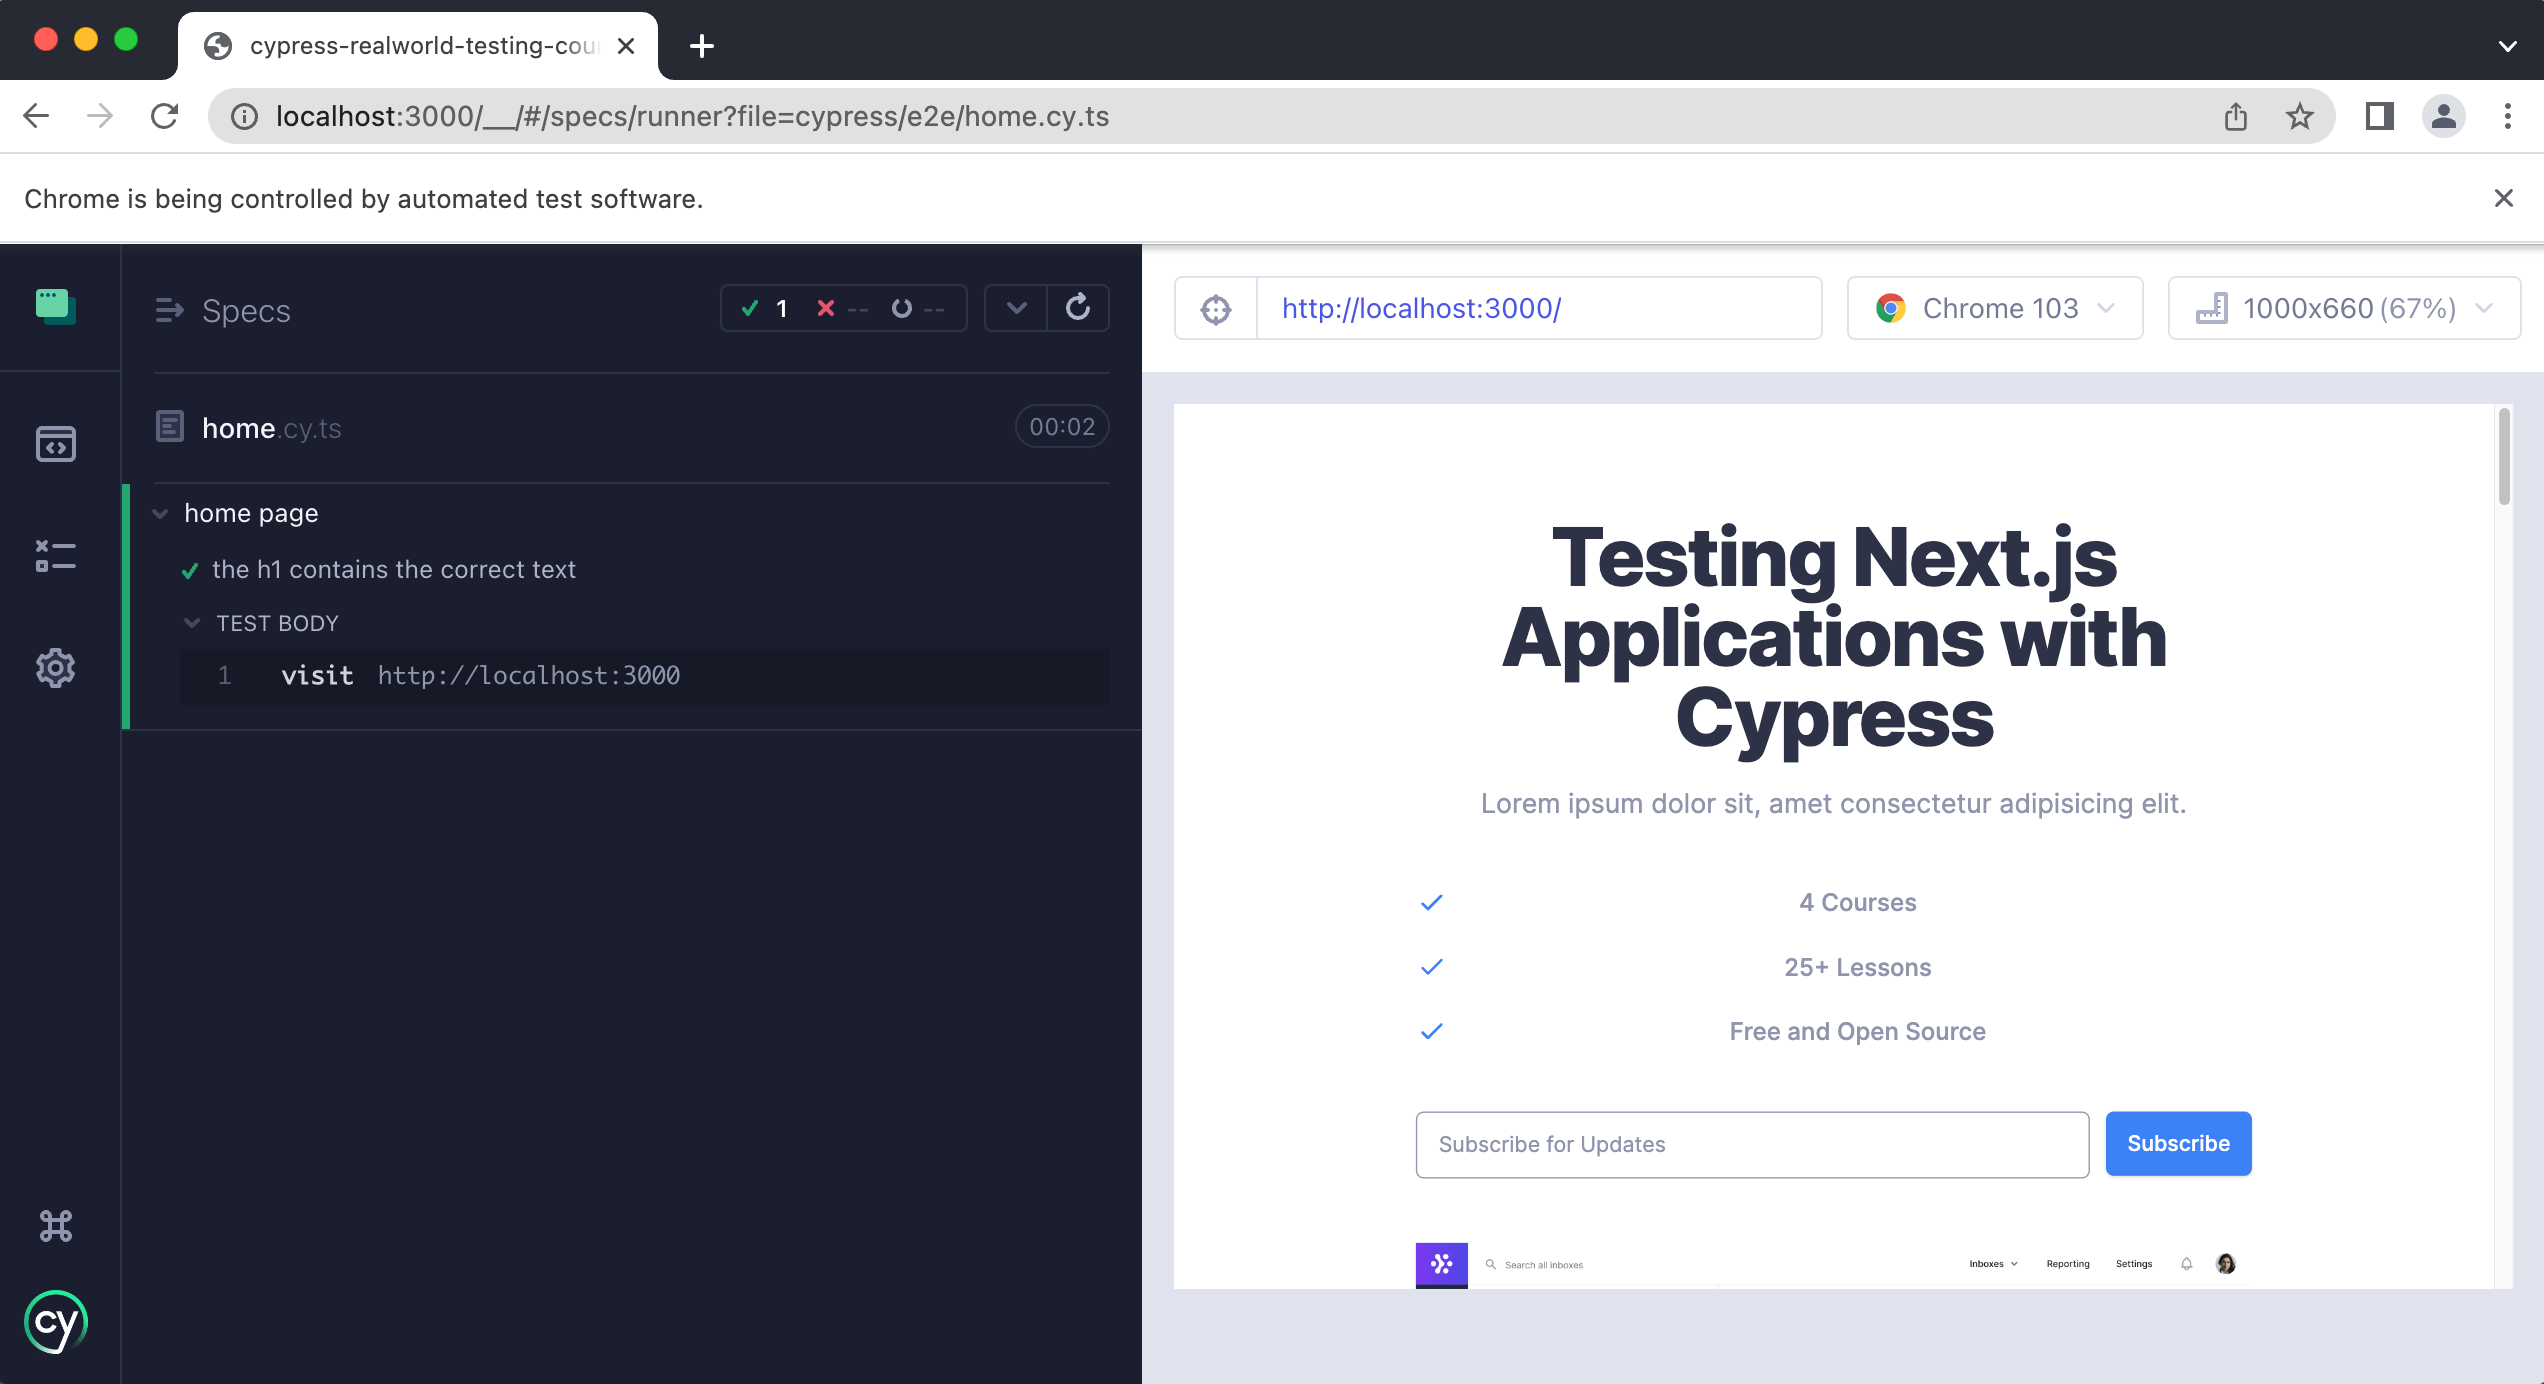
Testing the h1 on the home page
Now that we understand the basic makeup of a spec file and a test, let's write our test that verifies the h1 on the home page contains the correct text.
The first thing we need to do is tell Cypress which element to get, which in this case is the h1.
Typically a page should only have a single h1 if they are following SEO best practices, which is true of our application. This means we can get our h1 like so.
We will use the .get() method from cypress.
describe("home page", () => {
  it("the h1 contains the correct text", () => {
    cy.visit("http://localhost:3000")
    cy.get("h1")
  })
})
tip
After saving our spec file, Cypress will automatically re-run all of our tests within this file. This allows us to quickly iterate and verify that our tests are working correctly.

You will see on the left-hand side of the Cypress command log all of the steps Cypress is taking during our test.
- Step 1 is when we use
cy.visit()to visit the application’s home page. - Step 2 is when we use
cy.get()to get theh1on the home page.
If we click on each step, we can see exactly what Cypress is doing. This is also called “time travel debugging” as we can go “back in time” and see exactly what Cypress did for each step.
If you click on step 2, you will see that Cypress highlights the h1 on the right-hand side showing which element it is getting.
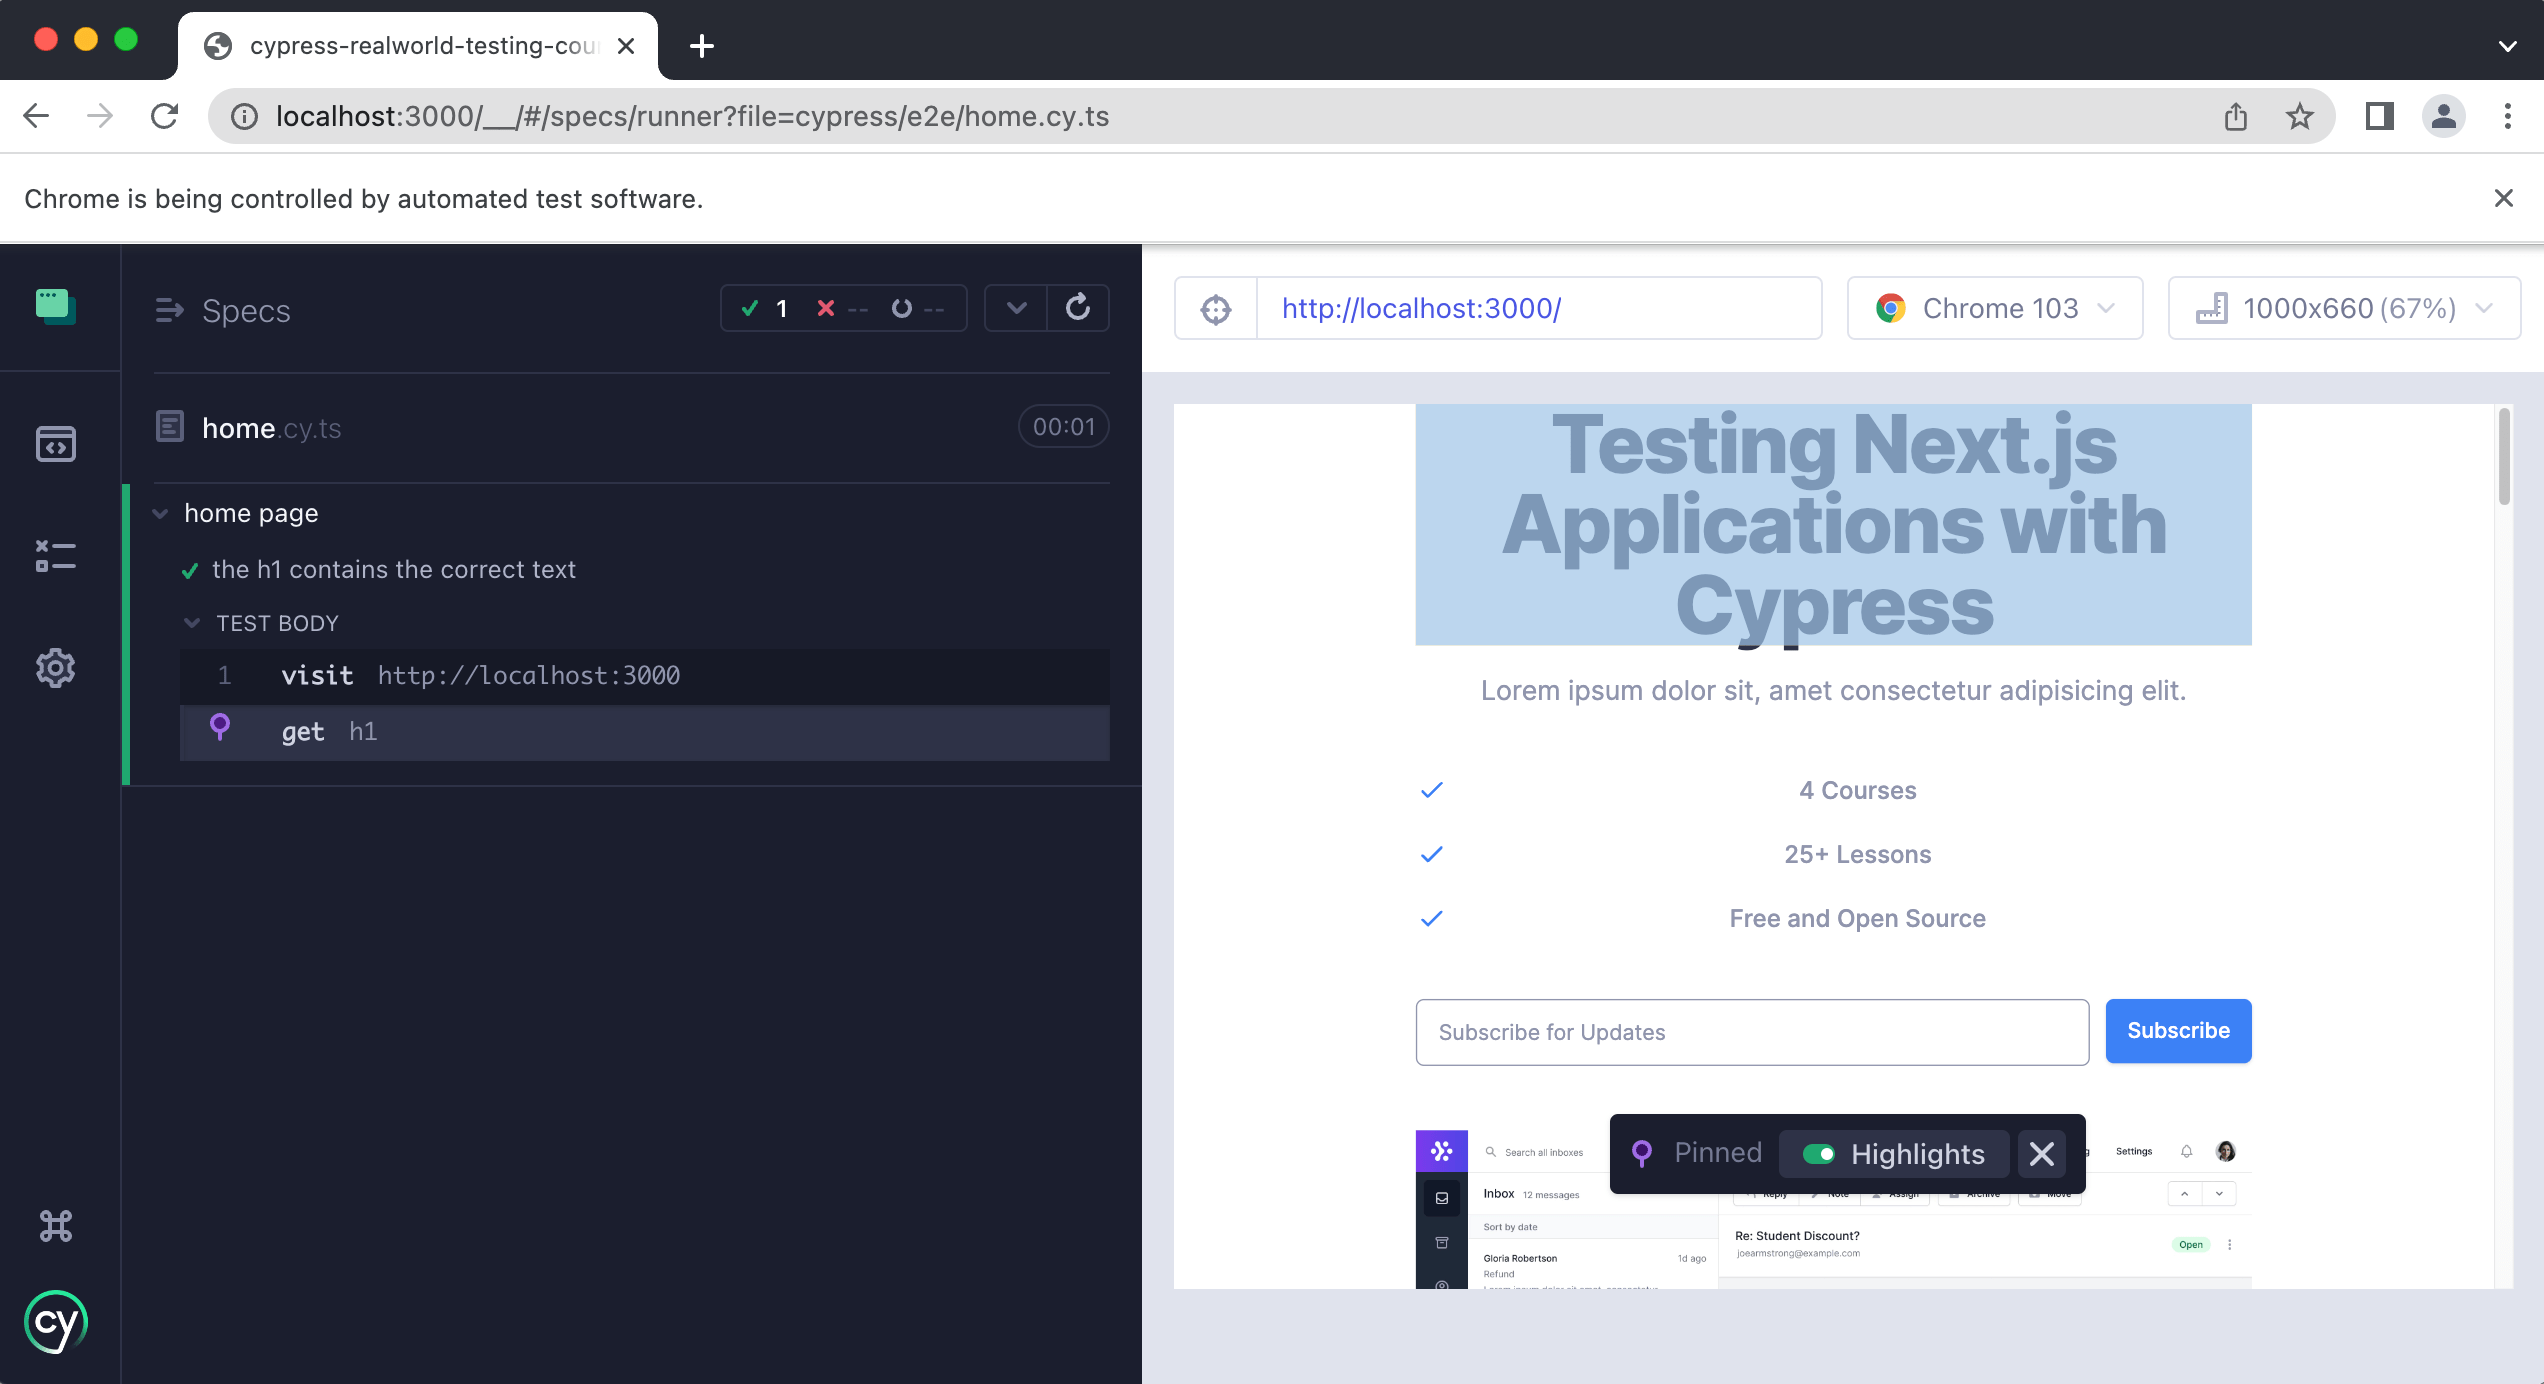
Now that we know Cypress has the correct element, we need to write an assertion that the text contained within it is correct. We can do this like so:
describe("home page", () => {
  it("the h1 contains the correct text", () => {
    cy.visit("http://localhost:3000")
    cy.get("h1").contains("Testing Next.js Applications with Cypress")
  })
})
After saving the file, if we open Cypress again, we should see everything still passing.
Congratulations! You just wrote your first Cypress E2E test 🎉
Aside: Command Chaining
Let's briefly discuss what is happening on this line:
cy.get("h1").contains("Testing Next.js Applications with Cypress")
First, we are using cy.get() to get the h1 element on our home page.
Next, we are chaining another command called contains onto the cy.get() which accepts a string. We are passing into the contains command a string of text which we expect to be inside of the h1 element.
Command chaining is when you “chain” multiple commands off of one another. This is incredibly powerful and you will see this a lot in Cypress tests. Throughout this course, you will see countless examples of this, but we wanted to bring it to your attention early on.
If you would like to learn more about command chaining, we have a lesson on that here.
Aside: Getting elements best practices
While we are just getting started with writing Cypress tests, we think it is important to help you understand some best practices along the way.
In our first test we are getting the h1 element by simply passing in the element to cypress, like so:
cy.get("h1")
While this obviously works (because our test is passing), this is not ideal.
Why?
If you take a look at the get command API documentation you will see it accepts a variety of different things. You can pass in HTML elements, classes like .button, or IDs like #button. However, at Cypress, we believe it is important to use things that do not change.
What do we mean?
Typically, classes and IDs are used for styling and for targeting elements with JavaScript. Both classes and IDs tend to change over time, which means that if you are using them in your tests, your tests will break.
To prevent this from happening, we recommend using data attributes on your elements. In this course, we will be using data-test attributes, specifically. This way we have attributes that are used solely for testing purposes. They are not going to change if the design of your site changes in the future since we are not relying upon class names or IDs.
tip
If you would like to learn more about this topic you can read some of our best practices over on our docs site here.
Updating our get selector
Now that you have learned about using data specific test attributes on elements, let's now update our test to see how this works in practice.
Currently our test looks like this:
describe("home page", () => {
  it("the h1 contains the correct text", () => {
    cy.visit("http://localhost:3000")
    cy.get("h1").contains("Testing Next.js Applications with Cypress")
  })
})
We are going to replace the cy.get("h1") with the data-test attribute. If we open up Chrome’s dev tools and inspect the heading we will see it has the following HTML markup.
<h1
  data-test="hero-heading"
  class="mt-4 text-4xl font-extrabold tracking-tight text-white sm:mt-5 sm:text-6xl lg:mt-6 xl:text-6xl"
>
  <span class="block text-gray-900"
    >Testing Next.js Applications with Cypress</span
  >
</h1>
This element has a data-test="hero-heading" which we will use inside of cy.get() like so:
describe("home page", () => {
  it("the h1 contains the correct text", () => {
    cy.visit("http://localhost:3000")
    cy.get("[data-test='hero-heading']").contains(
      "Testing Next.js Applications with Cypress"
    )
  })
})
If we save our test, we should see it is still passing.

Now you may be thinking that cy.get("[data-test='hero-heading']") is fairly verbose. This may be ok for now since we only have one test, but imagine if we have hundreds of tests and we are using cy.get() hundreds of times.
We are going to clean this up soon and make it easier to work with data-test attributes in the next lesson when we teach you about custom Cypress commands. Hold on tight for a little bit longer!
Testing the course features
Next, we are going to write one more test in this lesson that verifies the features in the hero of our homepage are correct.
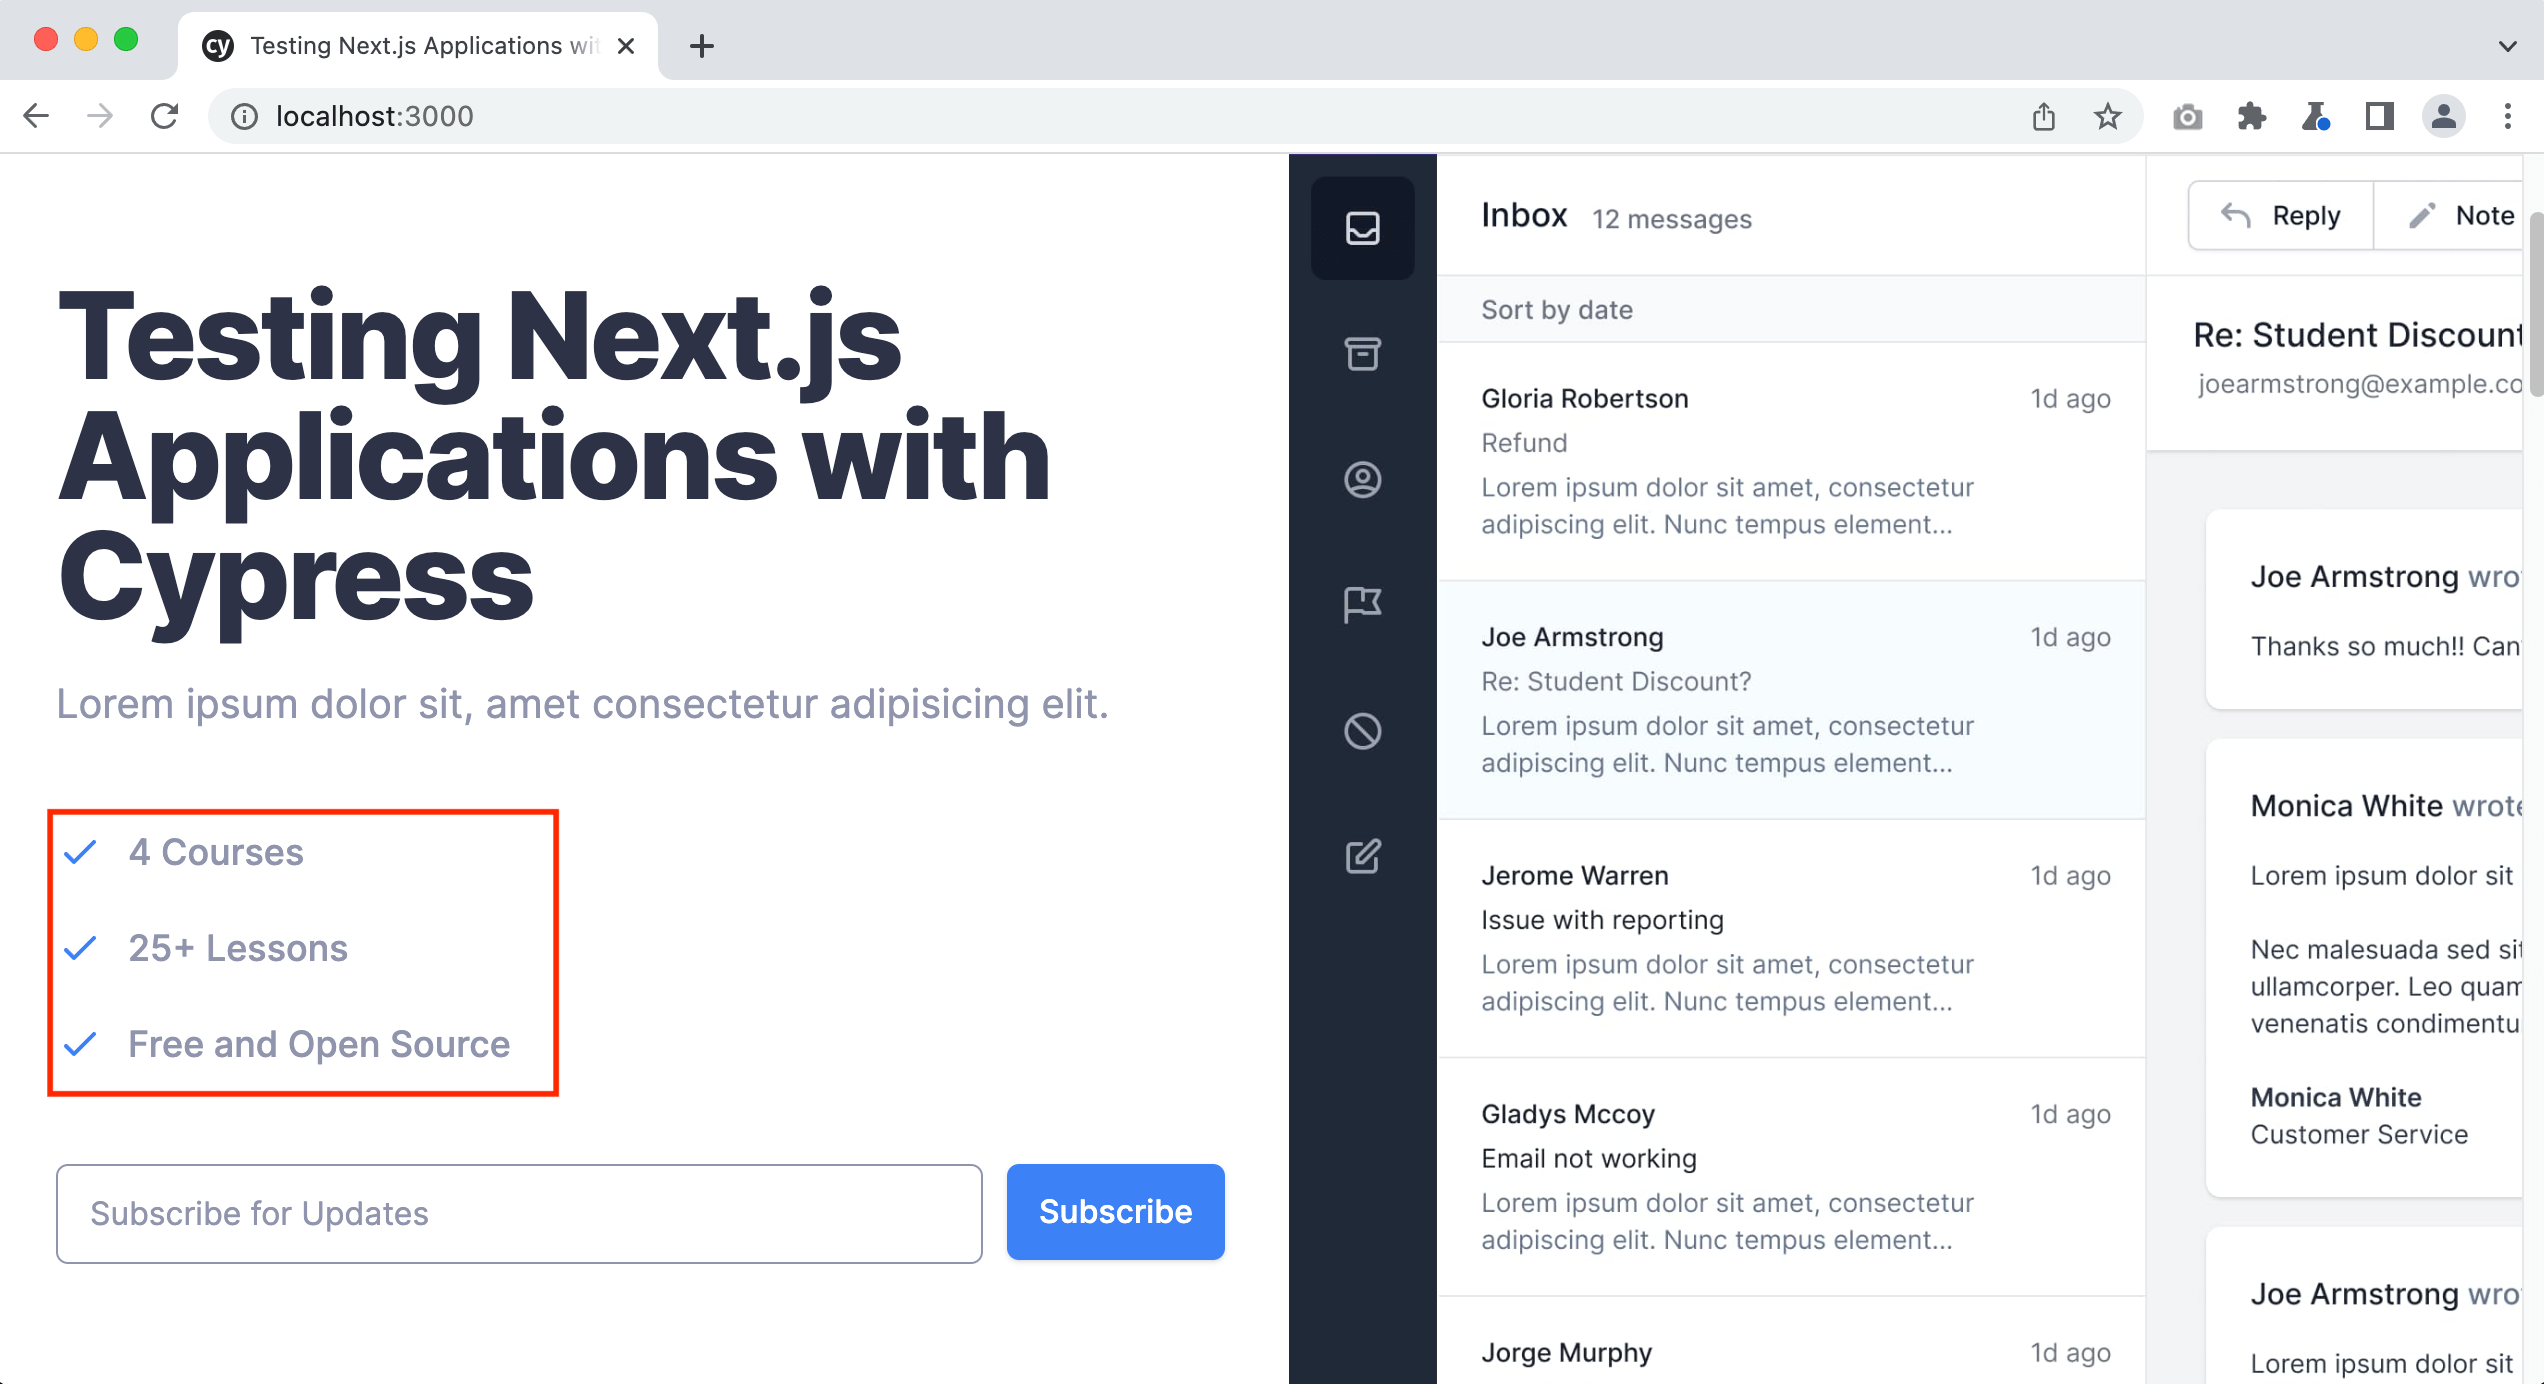
If we use dev tools to inspect one of these features, we will see the following HTML markup:
<div class="relative mb-6">
  <dt>
    <svg
      xmlns="http://www.w3.org/2000/svg"
      fill="none"
      viewBox="0 0 24 24"
      stroke-width="2"
      stroke="currentColor"
      aria-hidden="true"
      class="absolute w-6 h-6 text-blue-500"
    >
      <path
        stroke-linecap="round"
        stroke-linejoin="round"
        d="M5 13l4 4L19 7"
      ></path>
    </svg>
    <p class="text-lg font-medium leading-6 text-gray-500 ml-9">4 Courses</p>
  </dt>
  <dd class="mt-2 text-base text-gray-500 ml-9"></dd>
</div>
There doesn’t seem to be any data-test attributes or anything very specific we can use within cy.get() to get these elements. While we always recommend using data attributes whenever possible, sometimes you do not have access to the underlying HTML markup.
For instance, let’s say you are using a 3rd party component library. Typically you do not have the ability to modify the underlying HTML markup and add custom attributes to the elements. What do you do in that case?
What is the best approach for getting these elements?
Let's create a new test and add it just below our first test.
it("the features on the homepage are correct", () => {
  cy.visit("http://localhost:3000")
})
info
Notice that within each test, we have to specifically tell Cypress where to navigate to in our application.
Let's run our test and make sure everything is passing.

Using only to run a single test
Now that we have two tests, each time we save our file, Cypress is going to re-run all of the tests in this file. This is ok when you only have a few tests, but what if we had dozens of tests in this single spec file? Each time we saved we would have to wait until Cypress finished running all of our tests. This is not ideal especially when we are really only concerned with the current test we are writing.
We can tell Cypress to only run a specific test by using it.only() like so:
describe("home page", () => {
  it("the h1 contains the correct text", () => {
    cy.visit("http://localhost:3000")
    cy.get("[data-test='hero-heading']").contains(
      "Testing Next.js Applications with Cypress"
    )
  })

  it.only("the features on the homepage are correct", () => {
    cy.visit("http://localhost:3000")
  })
})
By adding .only() after the it we are telling Cypress to only run this specific test.
tip
You can add .only() to multiple tests, and only those tests will run.

As you can see only the features test is being executed by Cypress now.
Next, let's use cy.get() to get the <dt> element and see what happens.
it.only("the features on the homepage are correct", () => {
  cy.visit("http://localhost:3000")
  cy.get("dt")
})
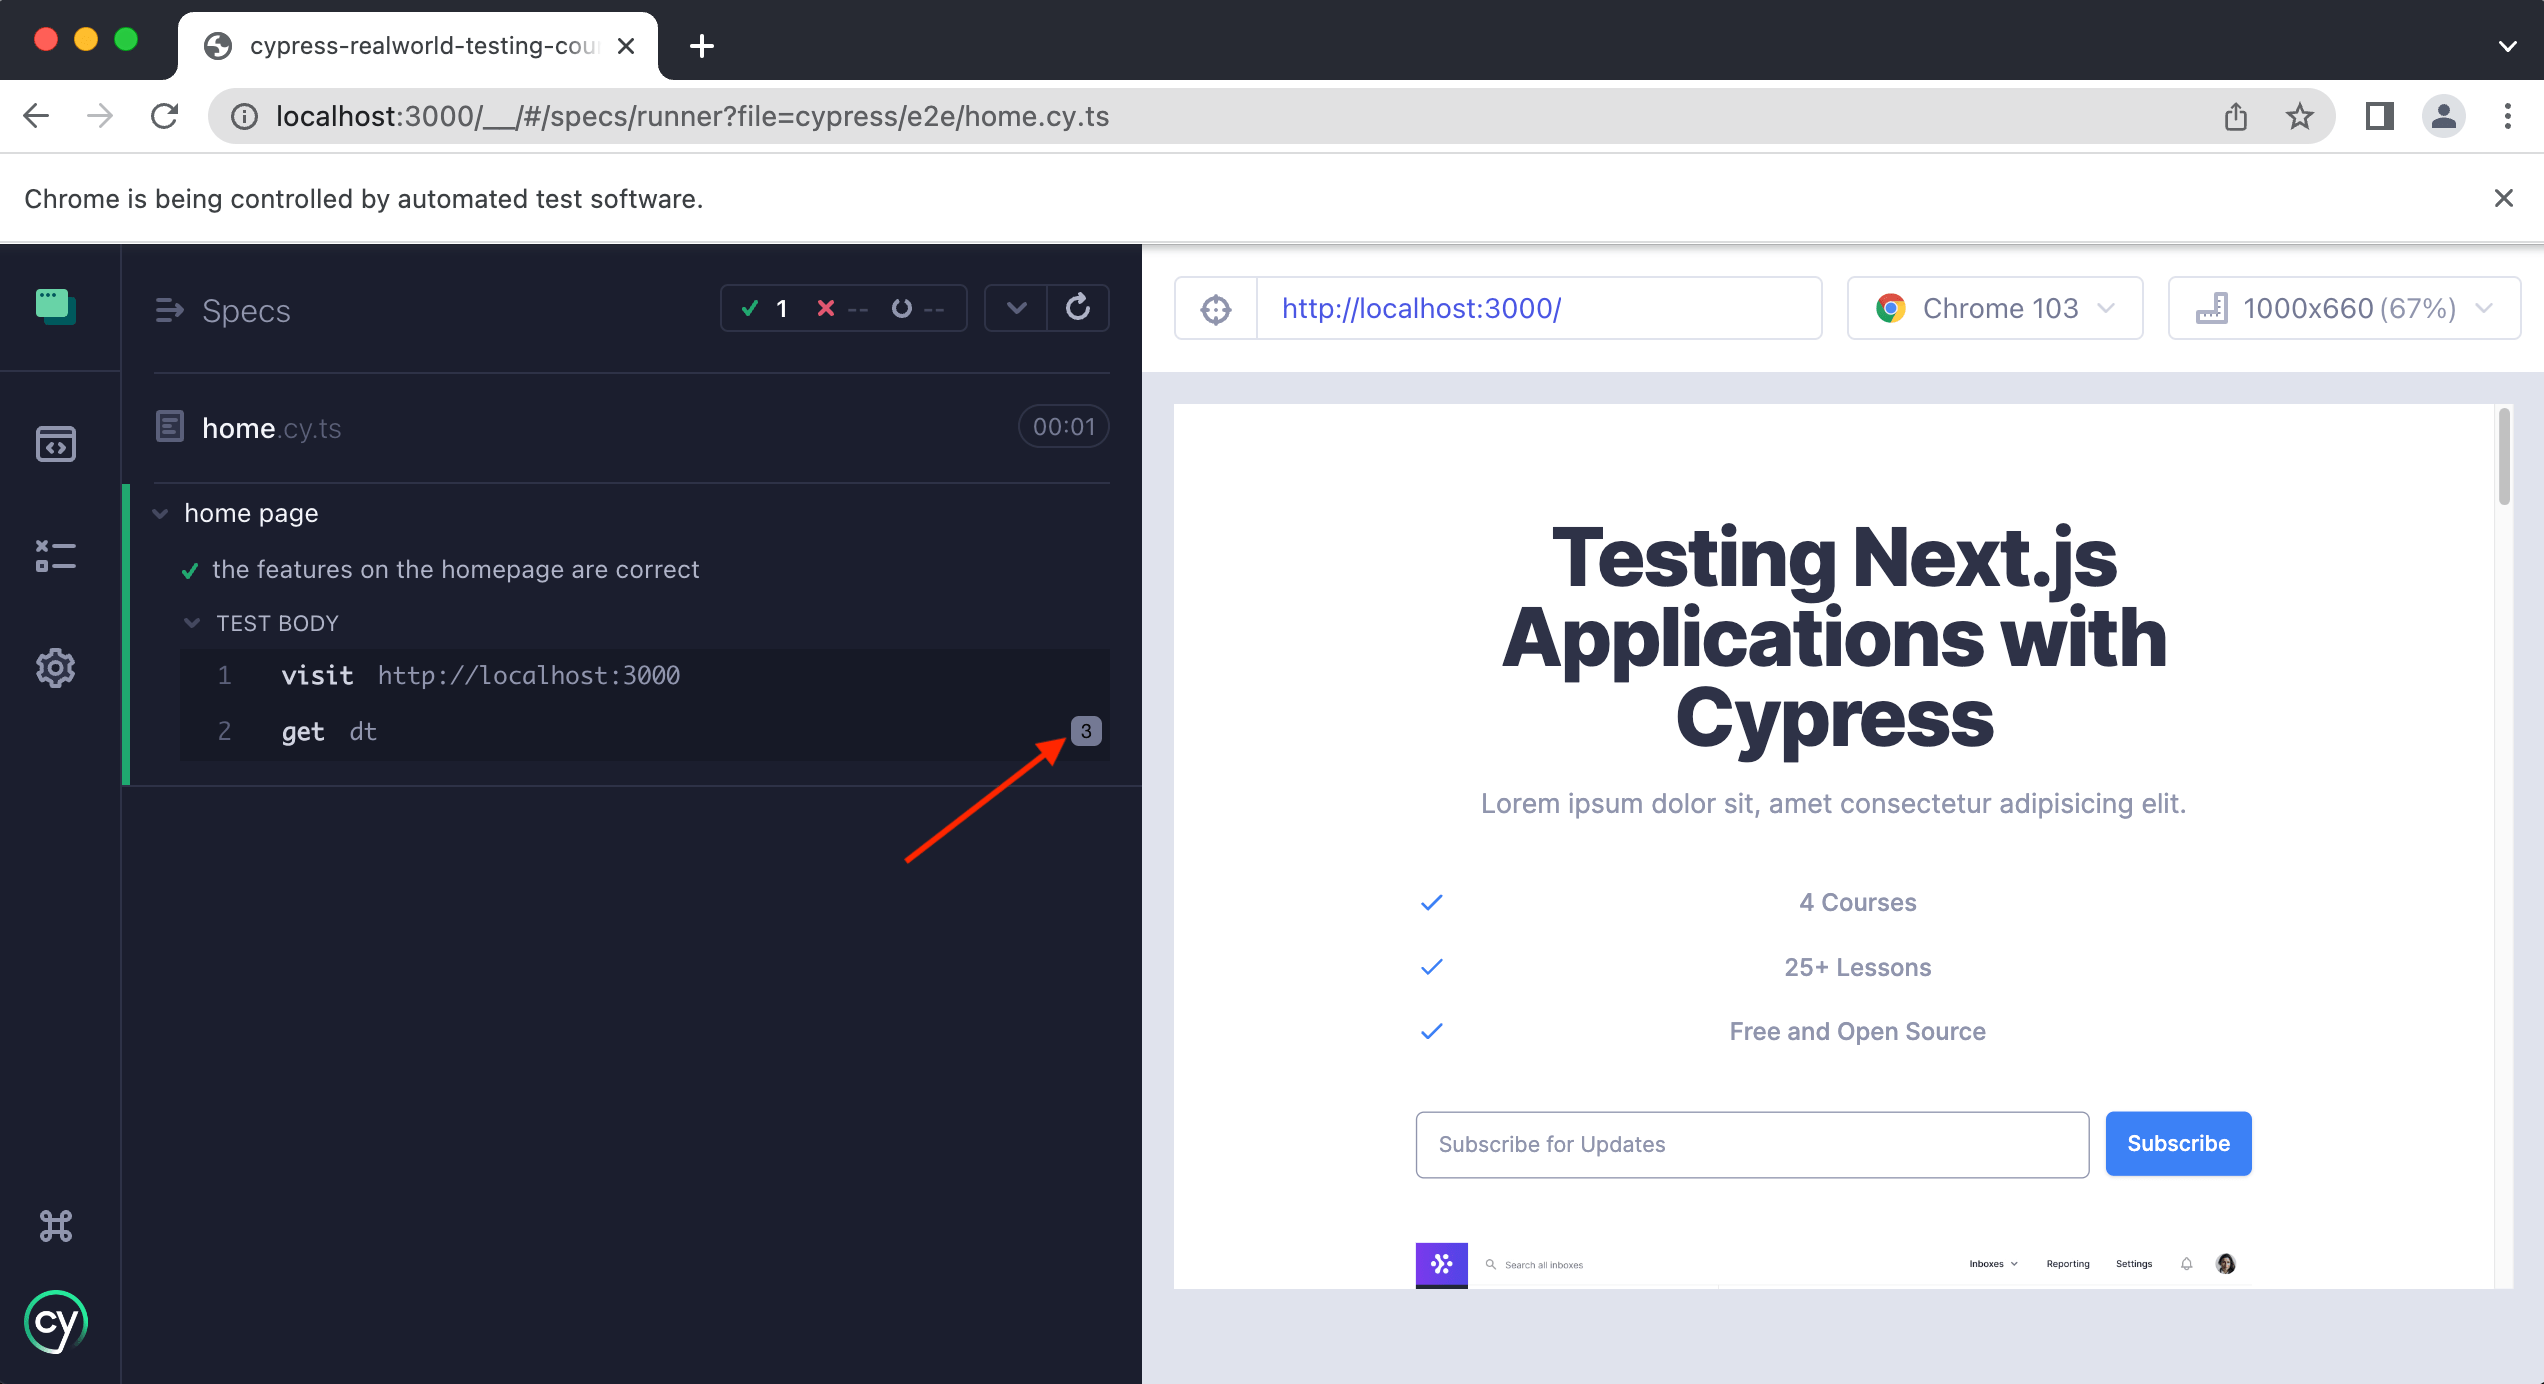
If you look closely at the get in the Cypress command log you will see a small “3” next to it. This means that Cypress has gotten a total of three elements, since there are three <dt> elements on this page.
You can see this in even greater detail by clicking on the step and then opening the dev tools like so:
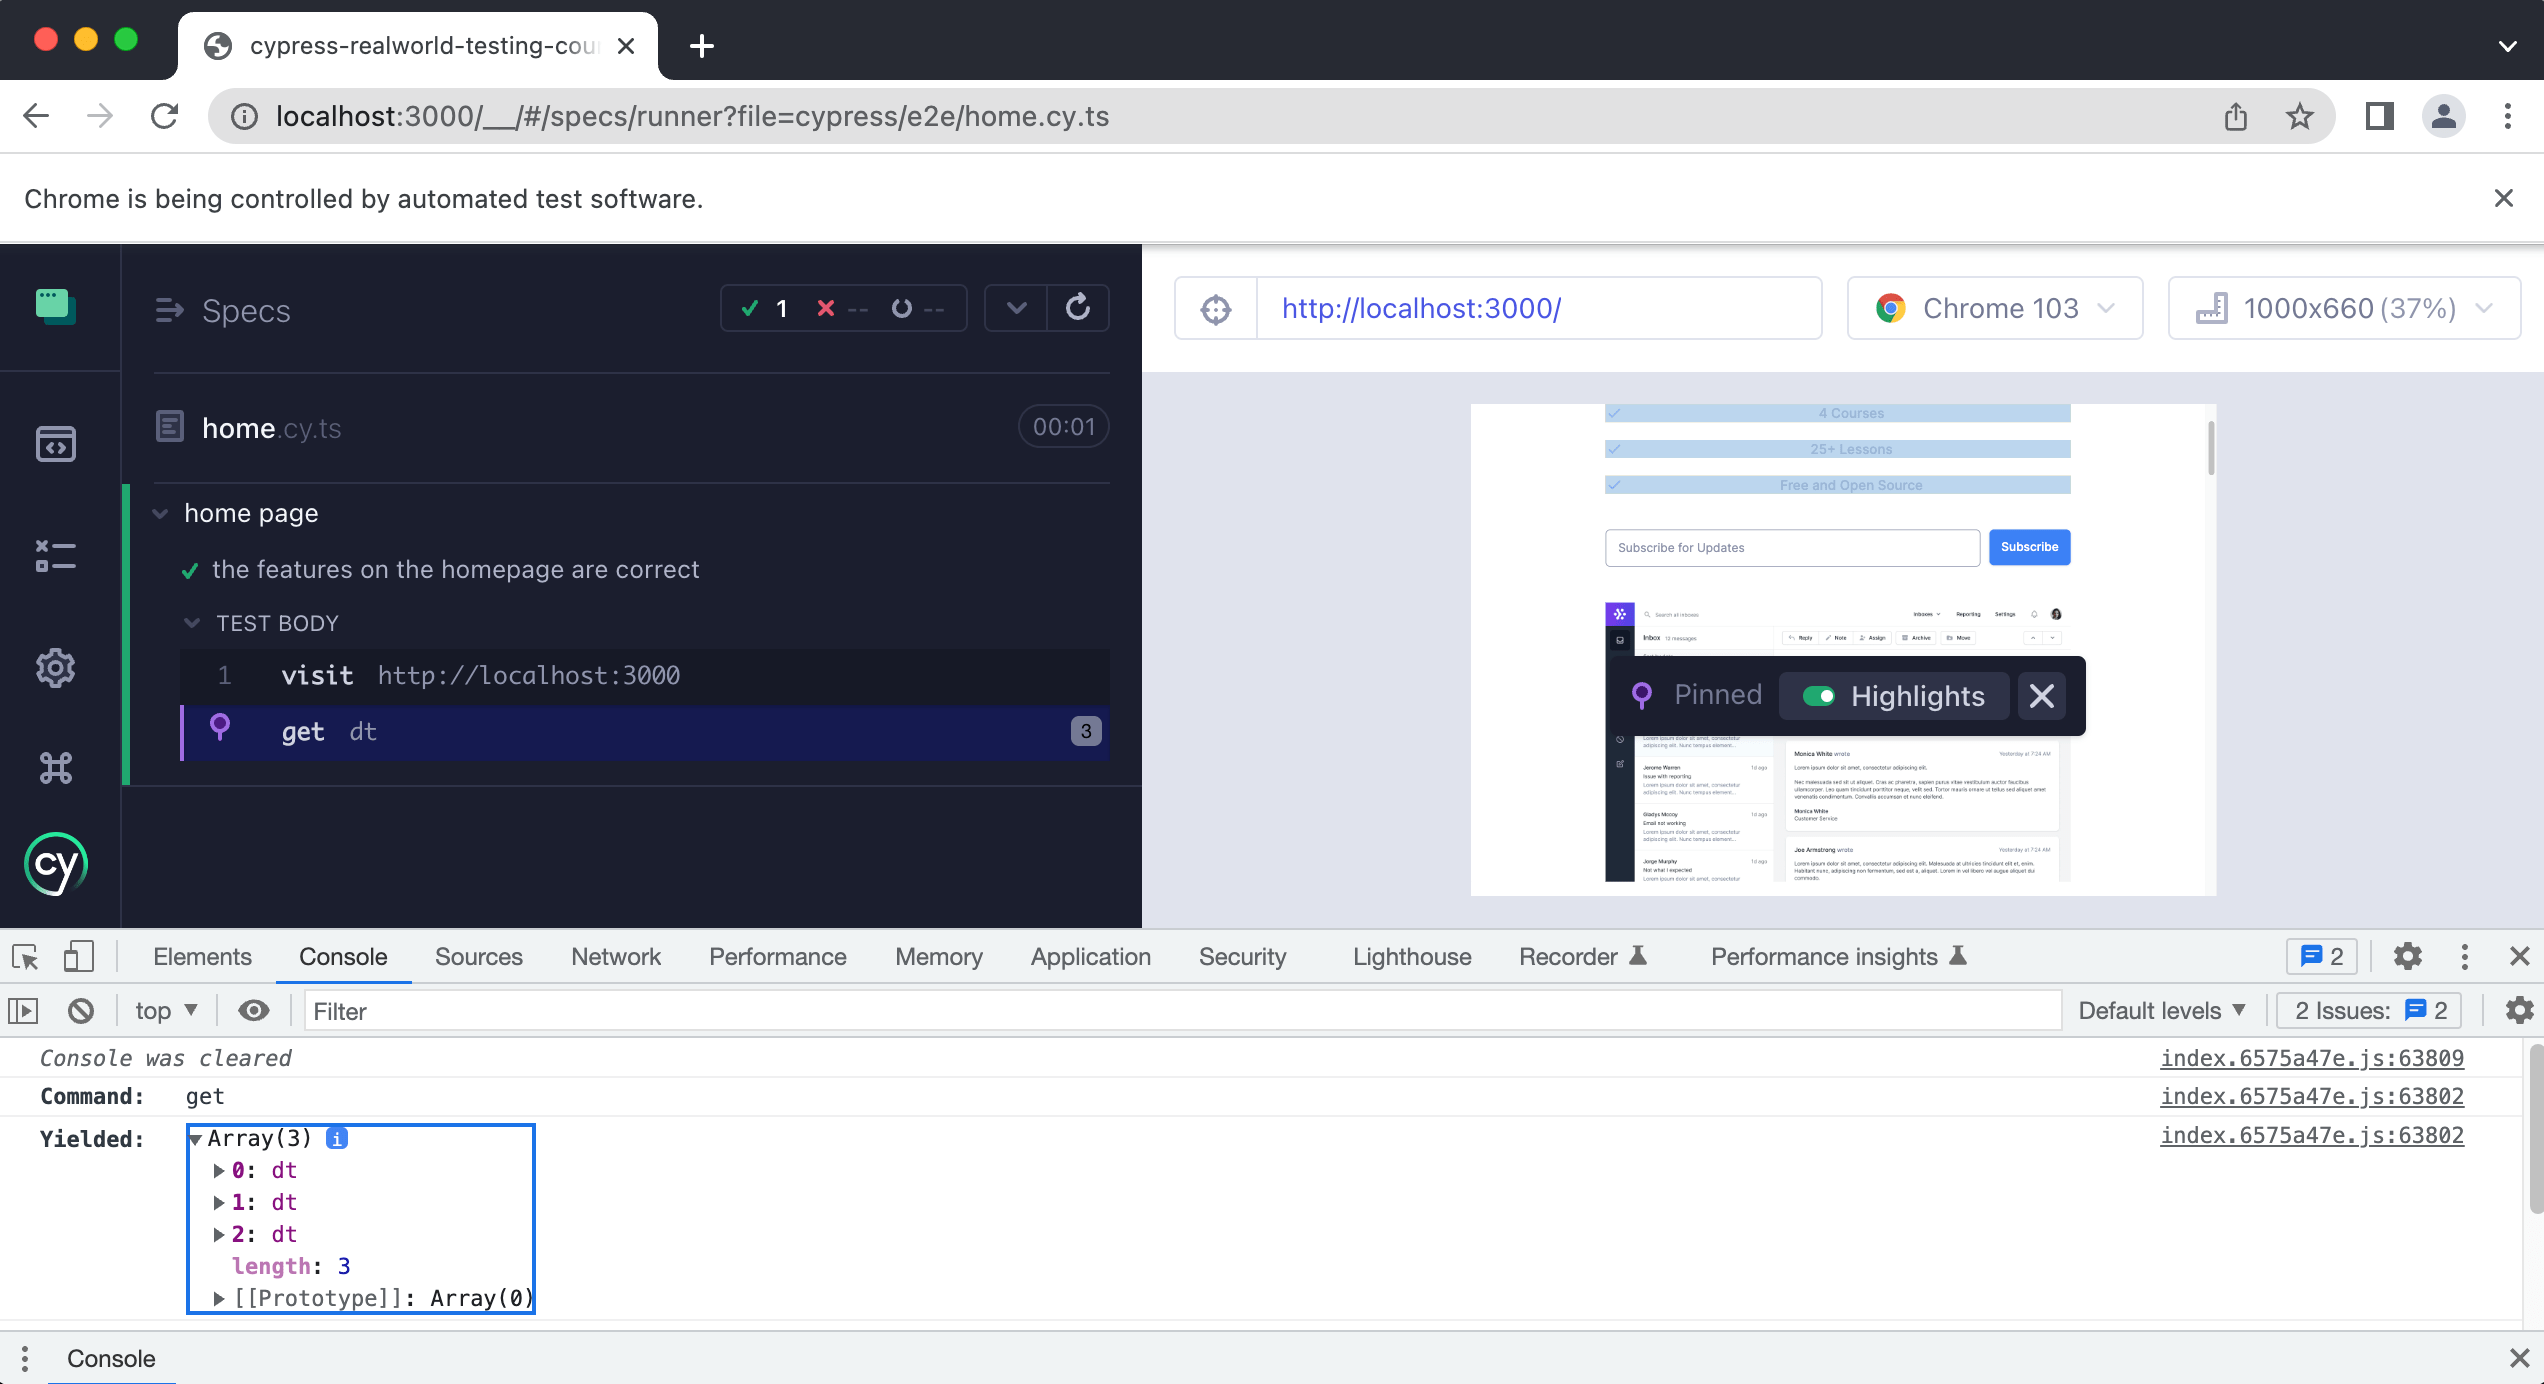
We see that an array was returned with three elements in it, all of which are <dt> HTML elements.
So how then do we get just one of these <dt> elements? Specifically, we want to get the first one and make sure that the text says “4 Courses”.
Since we are getting back an array, we can use a Cypress command called eq. This command will allow us to access a specific index within an array of elements, which is exactly what we want.
info
Remember that arrays start their indexes at 0, so the first element we want is 0 not 1.
Update your test to the following:
it.only("the features on the homepage are correct", () => {
  cy.visit("http://localhost:3000")
  cy.get("dt").eq(0)
})
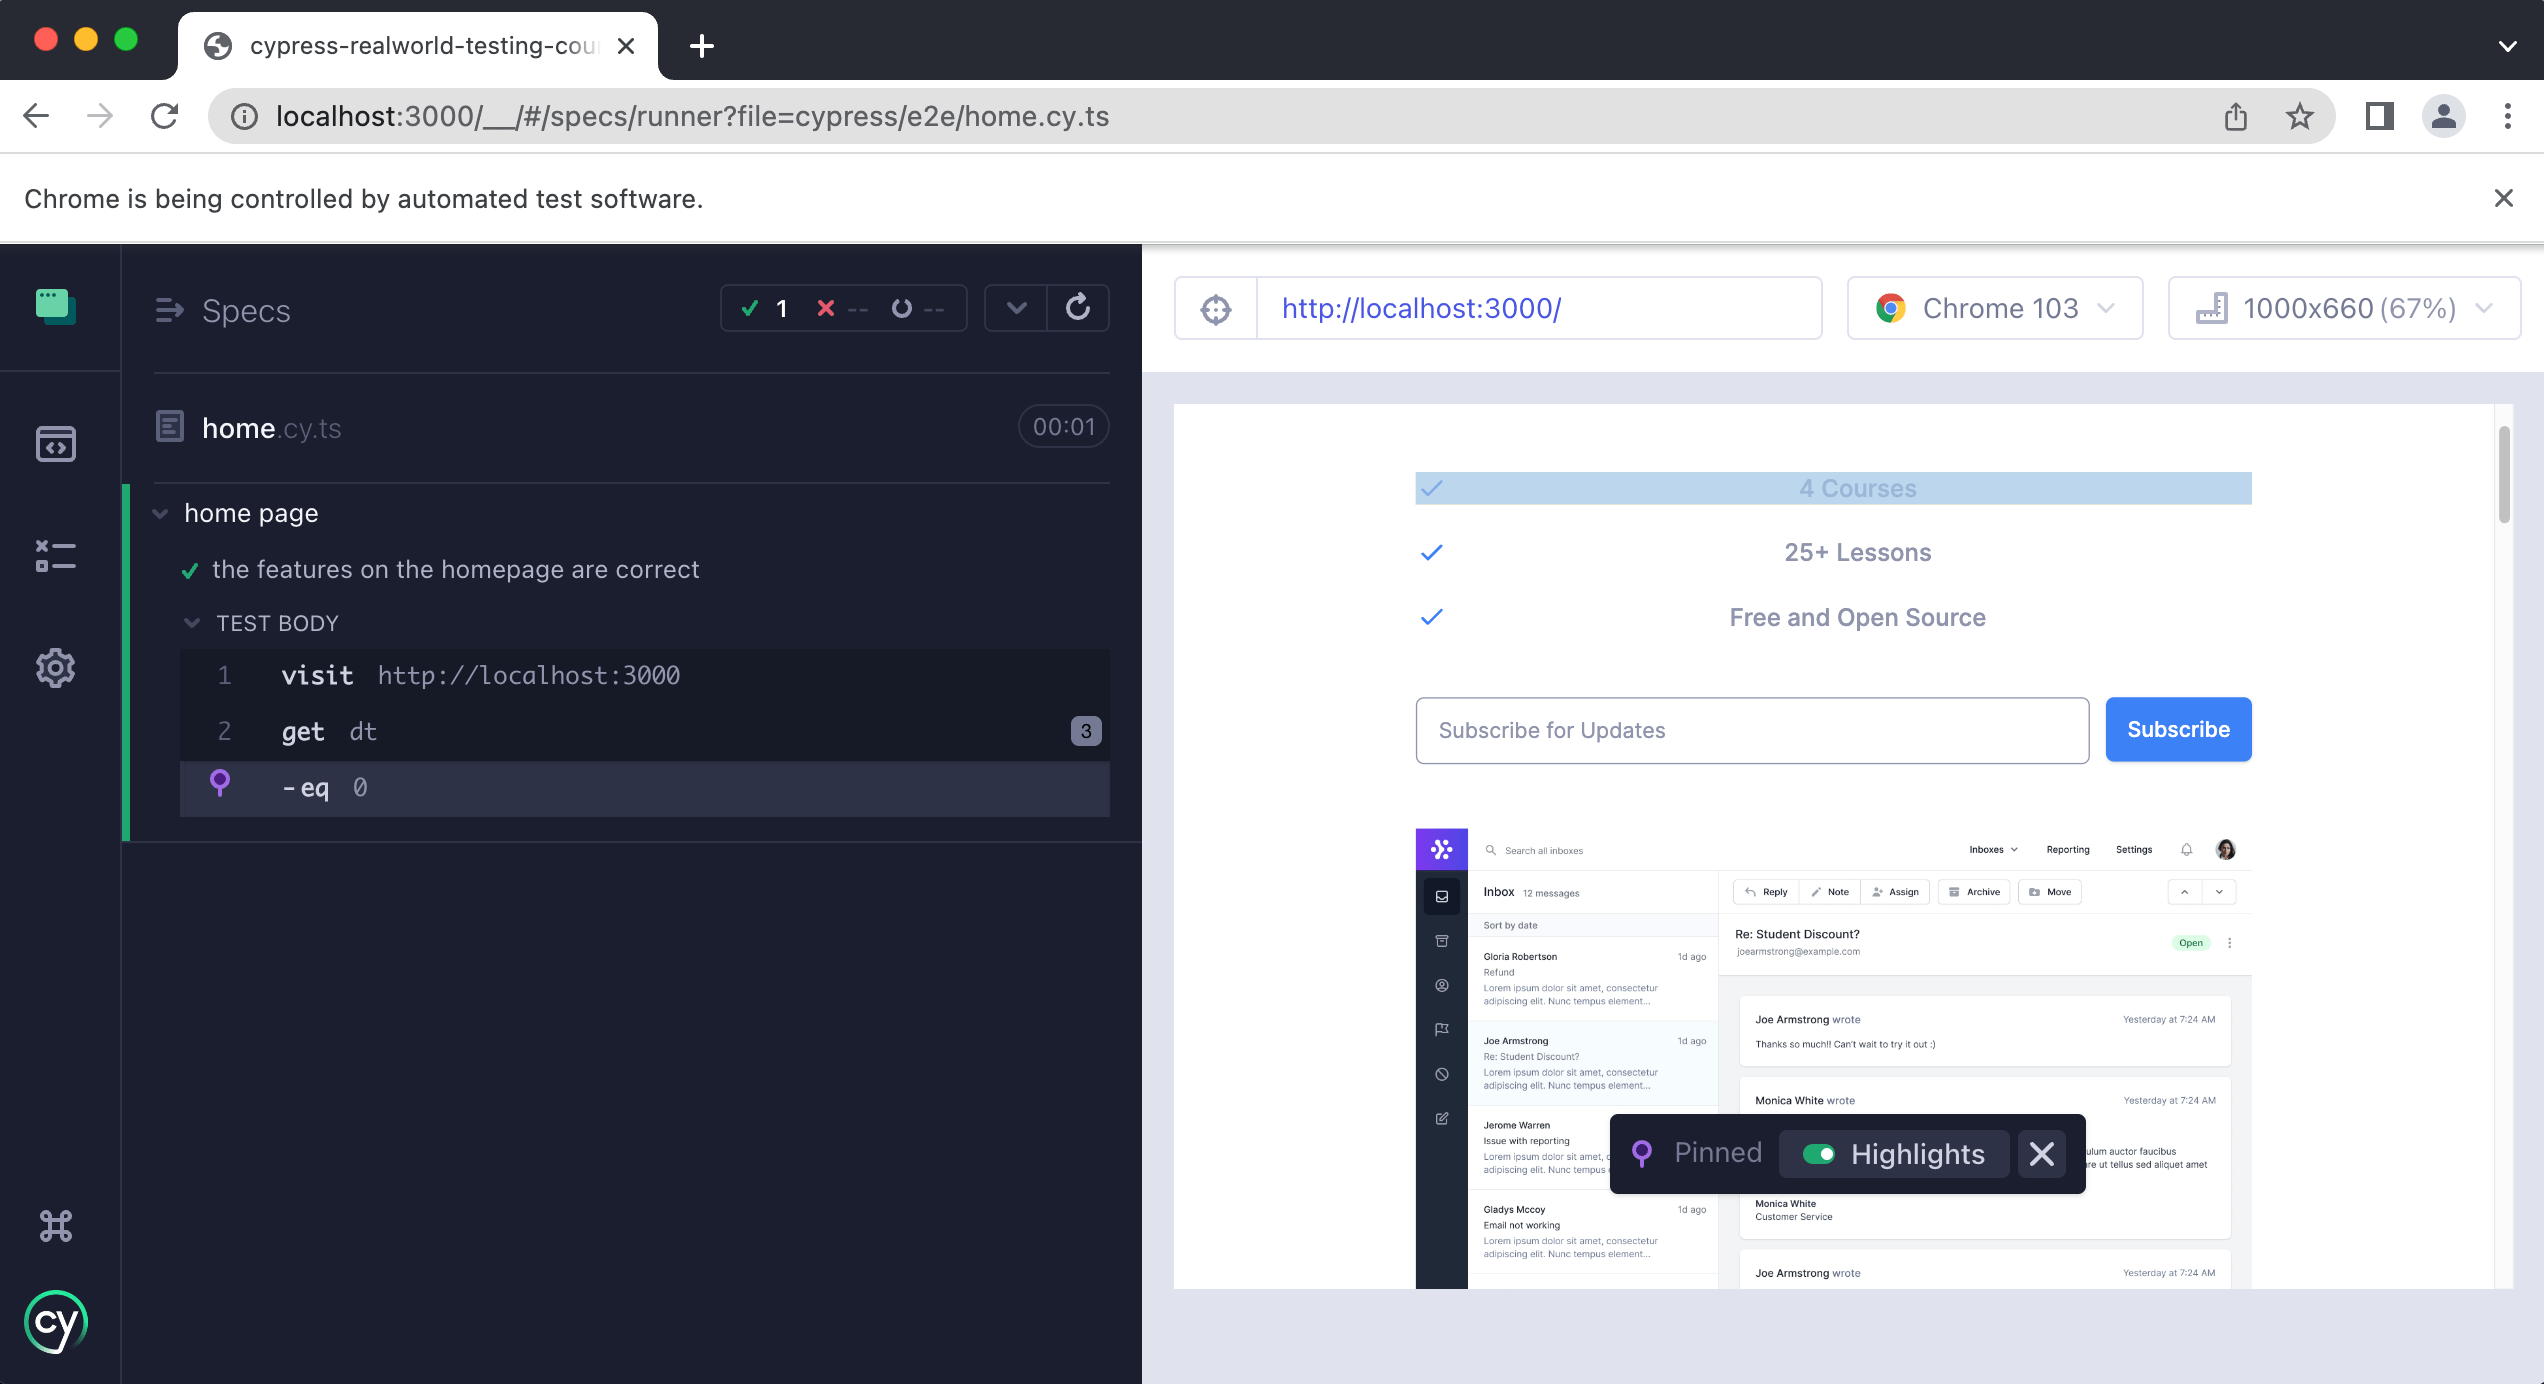
As you can see we are now getting the first <dt> element, which is exactly what we want. Now we just need to write our assertion that makes sure it contains the correct text.
it.only("the features on the homepage are correct", () => {
  cy.visit("http://localhost:3000")
  cy.get("dt").eq(0).contains("4 courses")
})
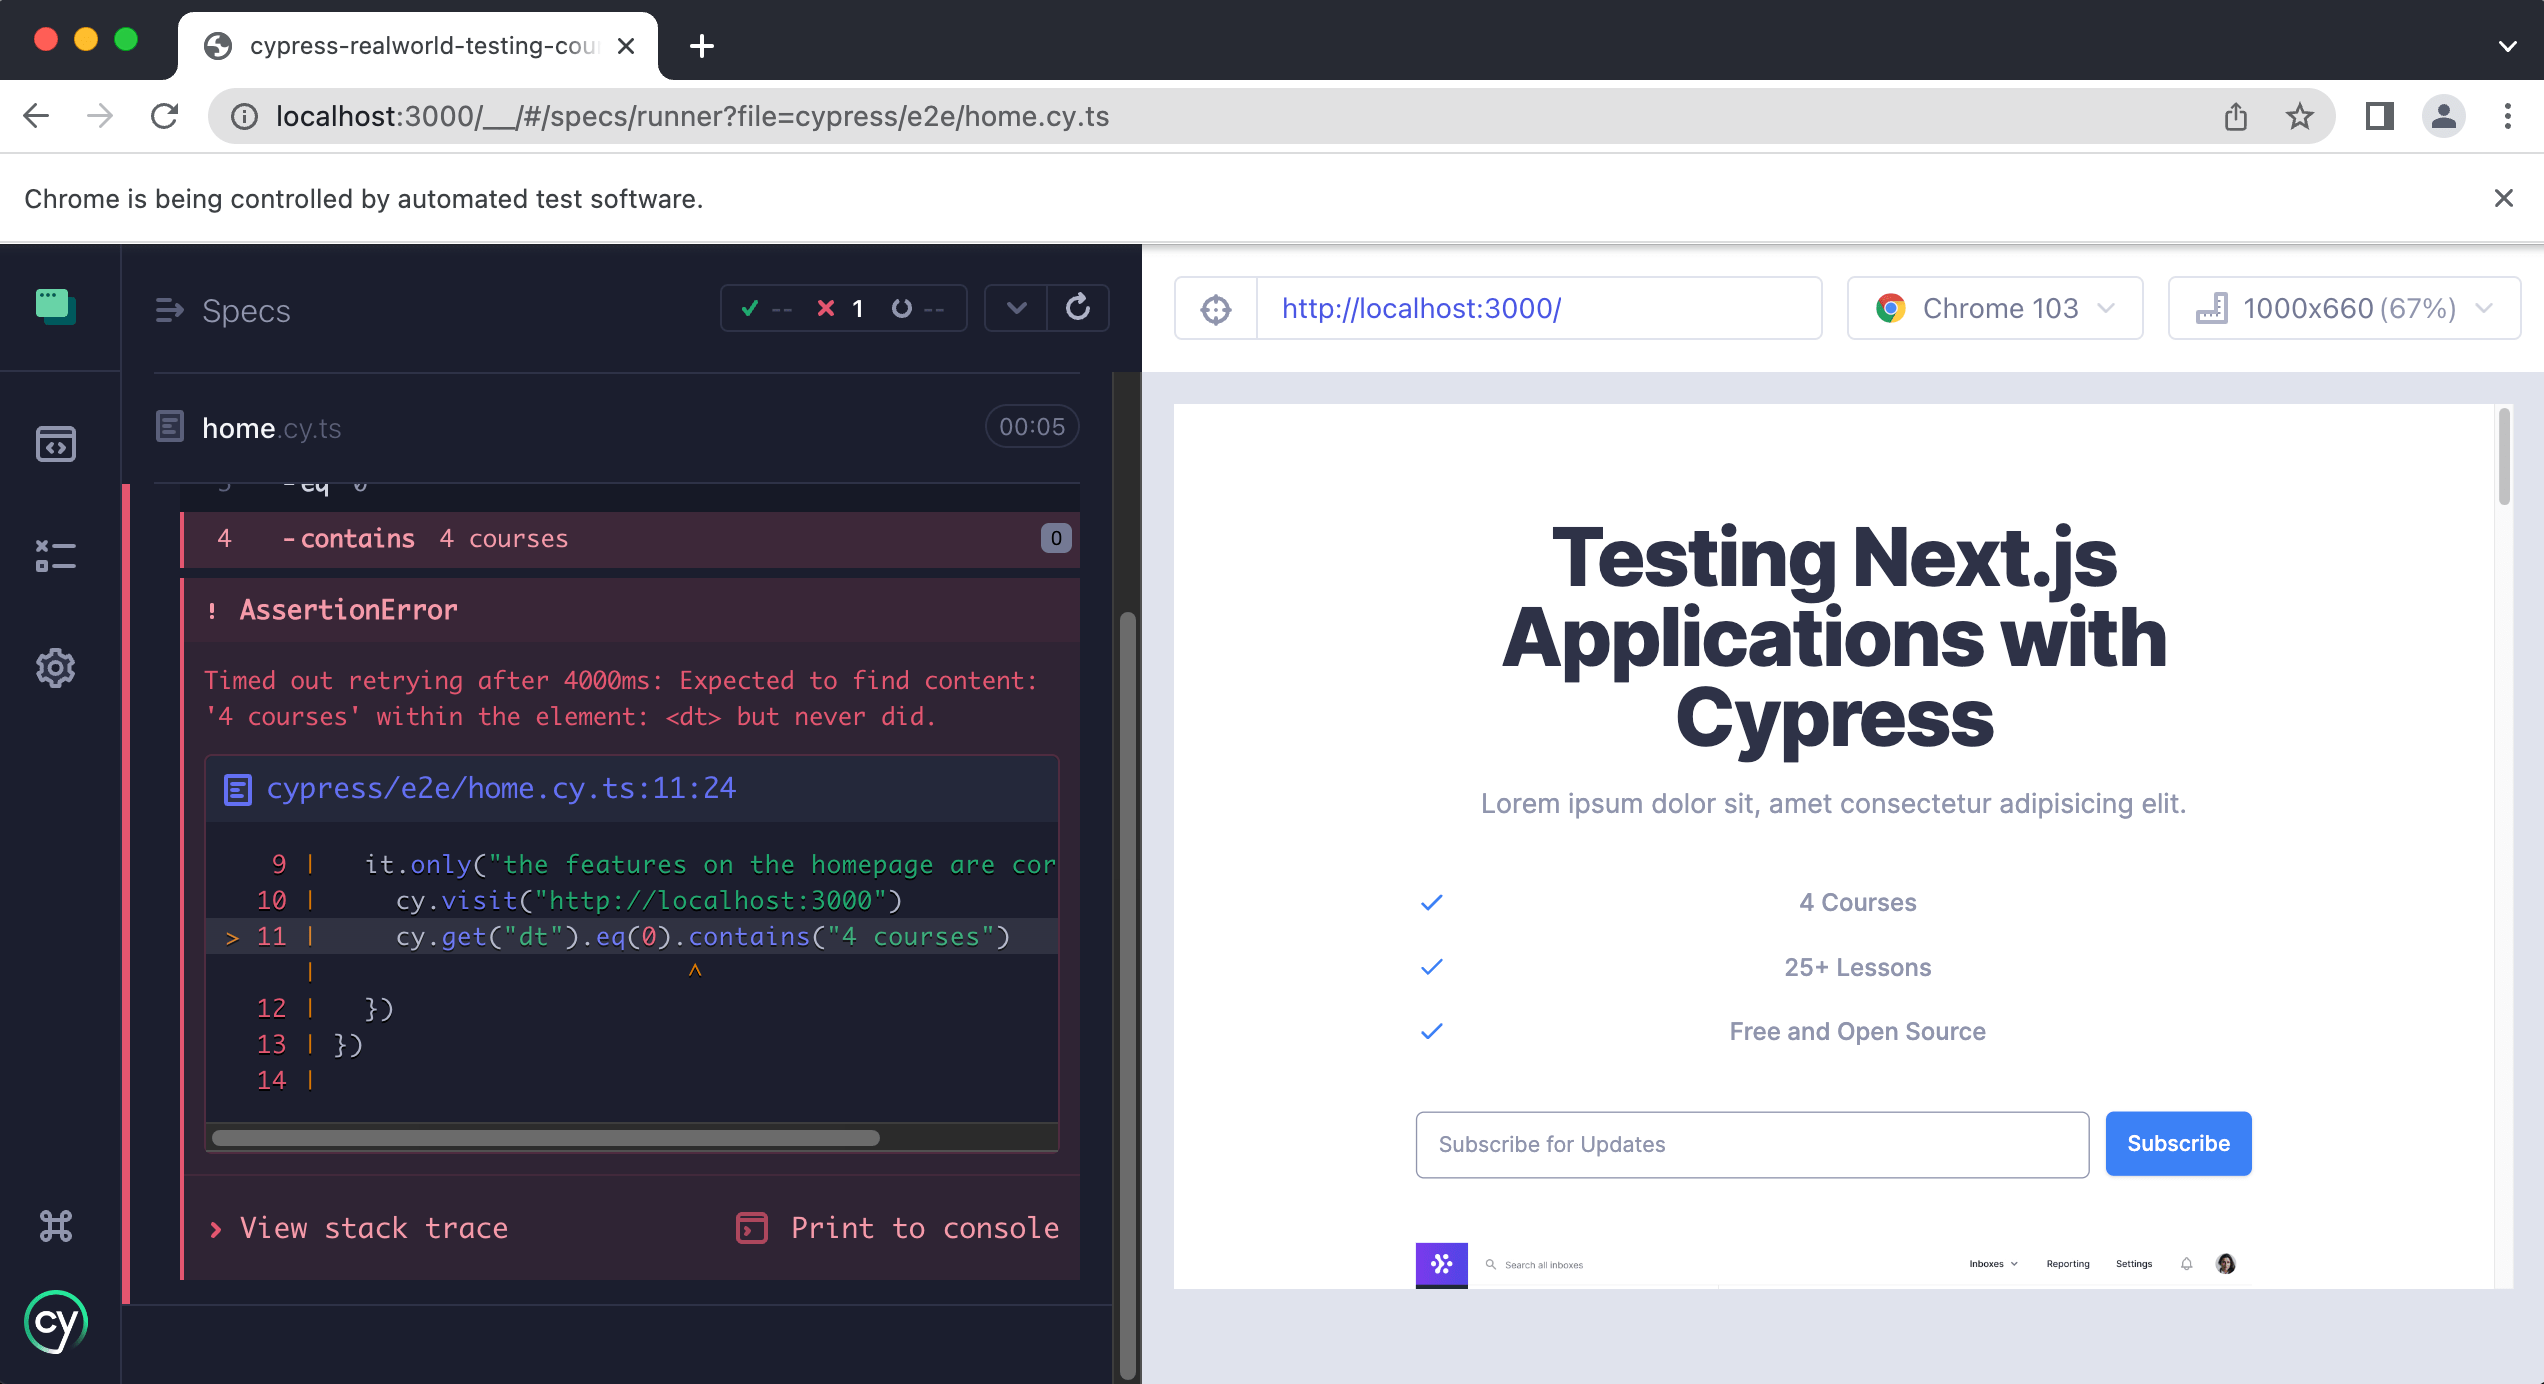
It looks like we are getting an error. Why?
We did this on purpose to draw your attention to the fact that contains() is case-sensitive. If you look closely at our test we have:
.contains("4 courses")
But our site says “4 Courses” where courses is spelled with a capital C.
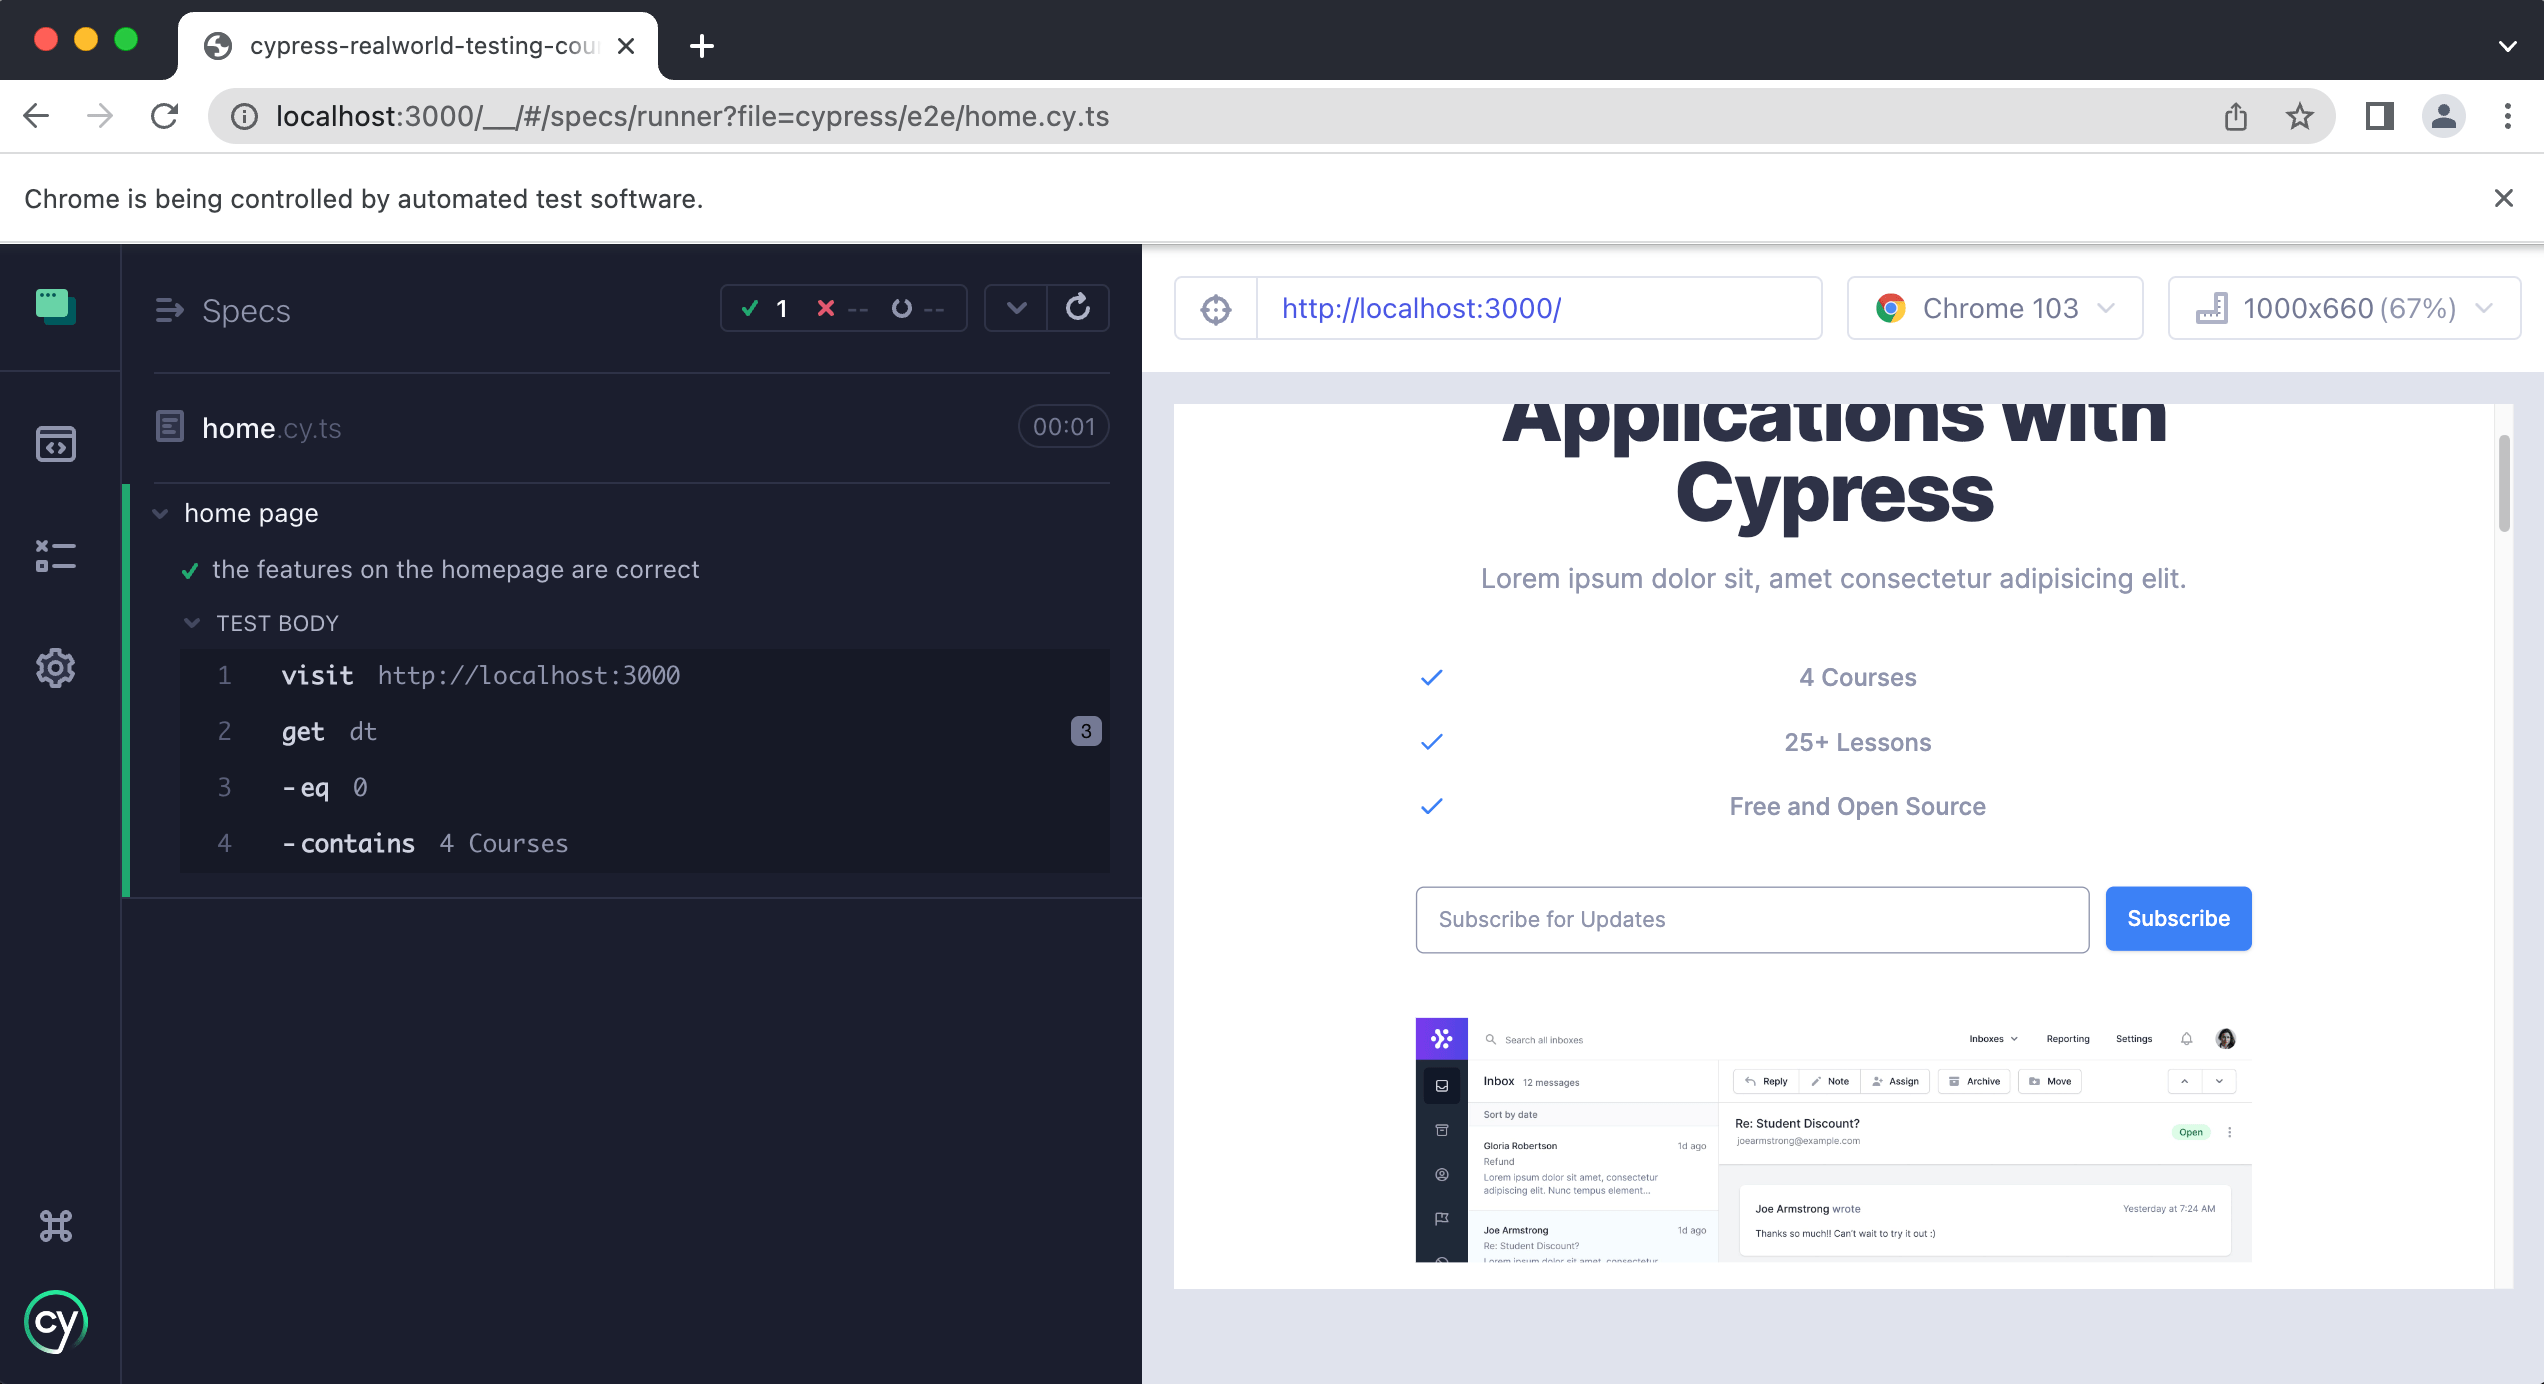
Update your test to the following to get things passing again:
it.only("the features on the homepage are correct", () => {
  cy.visit("http://localhost:3000")
  cy.get("dt").eq(0).contains("4 Courses")
})
tip
You can also pass regular expressions into the contains method. So if you wanted to make a case insensitive comparison using regex, you could use:
cy.get("dt").eq(0).contains(/4 courses/i)
Here is our entire spec file so far:
describe("home page", () => {
  it("the h1 contains the correct text", () => {
    cy.visit("http://localhost:3000")
    cy.get("[data-test='hero-heading']").contains(
      "Testing Next.js Applications with Cypress"
    )
  })

  it.only("the features on the homepage are correct", () => {
    cy.visit("http://localhost:3000")
    cy.get("dt").eq(0).contains("4 Courses")
  })
})
Practice
We still need to write two additional assertions for the remaining two features, which we are going to ask you to write for practice.
Pay close attention to this line
cy.get("dt").eq(0).contains("4 Courses")
You can copy and paste this line with minor tweaks to test for the other features. You will need to reference the correct index in the array and update the text the feature contains.
If you get stuck, the answer is below.
Practice Answers
beforeEach hook and refactoring our tests
Whew! We have covered a lot of material in this lesson and we are almost done. Before we finish we wanted to introduce to you the concept of hooks. If you take a look at the two tests within our spec file, we are using
cy.visit("http://localhost:3000")
in both of our tests. This is not a big deal since we only have two tests, but again what happens when you have dozens of tests in this file?
We can simplify this and put the cy.visit() in a single spot called a beforeEach() hook. This is a function that will get called “before each” test is run, which is exactly what we want.
Update your test to look like the following:
describe("home page", () => {
  beforeEach(() => {
    cy.visit("http://localhost:3000")
  })

  it("the h1 contains the correct text", () => {
    cy.get("[data-test='hero-heading']").contains(
      "Testing Next.js Applications with Cypress"
    )
  })

  it("the features on the homepage are correct", () => {
    cy.get("dt").eq(0).contains("4 Courses")
    cy.get("dt").eq(1).contains("25+ Lessons")
    cy.get("dt").eq(2).contains("Free and Open Source")
  })
})
Notice how we have removed the cy.visit() from within each test and instead added it inside of the beforeEach(). Now if we save this file and run our tests, they should still be passing.

Wrap up
In this lesson, you learned how to install Cypress and configure it for E2E testing. You also learned how to create spec files and write Cypress tests. Along the way, you learned some Cypress best practices for getting elements. Finally, you learned how to refactor and clean up your tests using a beforeEach hook.
In the next lesson, you will learn how to test forms and how to create and use custom Cypress commands.